CRAMPONS vs. MICROSPIKES
Microspikes are not mountain saftey devices.
They are hiking convenience devices. Do not rely on them to save your life in the mountains.
___________________________________________________________________________________
(This was originally written for the Mount Whitney Facebook Group audience...)
“Are microspikes good enough for <insert objective>?”
The oft-repeated question…Discussion on this topic is usually incomplete and sometimes leaves people understandably confused. Logic may suggest that what’s below is widely-known, but is it? Avoidable incidents continue to occur. Why? This post is for people who don’t know why, but want to. It’s for people who search for “crampons” on Amazon and don’t realize the algorithm is showing them microspikes. It's for people who don't know why the two things are different. It’s an attempt to answer that “why” with both text and photos. If you don’t know the why, you only have the “what”, and the what (“Don’t wear microspikes”) just isn’t the full story.
Climbing companies (Petzl, Black Diamond, Grivel, Cassin) make crampons. Microspikes of many kinds are made by many companies not in the climbing ecosystem and are often marketed as “crampons”, thus the total mess on Amazon and other places. The confusion it causes is dangerous. It’s a public safety hazard. Eventually, there will be a lawsuit…
Why do people say that microspikes don’t work?
“Work” in this case means “Perform as intended for the use case designed for.” Microspikes were designed for flat, icy surfaces, and they work great in those conditions. At some point, hikers came to assume that microspikes are the correct choice of gear to use while ascending, descending or traversing steep snow slopes in alpine terrain.
That assumption is incorrect.
Hikers use microspikes on icy trails, but they oftentimes fail to connect the dots when the trail disappears and the line of demarcation between hiking and mountaineering is crossed. Many people can’t identify that line (it’s not always obvious), or know it exists (it’s unintuitive), or have a practical understanding of what “mountaineering” means (it means a range of things).
I’m not referring to a trail’s degree of incline over distance when I say “flat”, though that grade is always engineered to be less than the sloping terrain through which the trail is set (that’s what traverses and switchbacks are). I’m referring to the dirt you’re standing on. It’s an engineered attempt at a meter-wide zone of “flat” in terrain that sometimes isn’t, stretching out both in front of and behind you (super convenient…)
Why does this matter as it pertains to microspikes? Because if all you’re doing is walking (or running) on a well-maintained trail that has some spotty sections of left-over “rotten” snow (or new verglas), when the rest of the environment is virtually snow-free, then microspikes can be a valid tool in the mountains. In zero-consequence terrain, microspikes "work".
But…
What about high-consequence terrain?
Mount Whitney by any route when significant snow is present isn’t just (only) hiking, it’s a mix of hiking and what lies on the other side of that line of demarcation. For Main Trail attempts during those times, this often means classic mountaineering; a simplistic form of mountaineering where ropes (and other tools) are not used, but mountaineering nonetheless.
In very general terms, during the Spring shoulder season (sometimes this includes July) the Whitney Main Trail is hiking below the treeline and sections of classic mountaineering above it. Trail Camp, at 12k feet on the Main Trail, is usually where this line of demarcation begins to matter. A successful Whitney attempt under these conditions (by either route) means you need to address the requirements of both hiking and classic mountaineering.
In more specific terms for the Main Trail?
Usually, in May-July, when the snowpack is melting out, the trail is dirt, or a mix of dirt and sections of muddy slush and snow from the trailhead to around 10,500 feet (Mirror Lake), in reasonably low-consequence topology. You don’t need anything but trek/running shoes or hiking boots in conditions like that.
However, above about 11k feet, you’re in alpine terrain, well above the tree-line, where techniques and decisions become much more consequential. This is always a self-evident moment; you finally break out of the trees and see the enormity of the mountains laid bare; rock, ice and sky. The trail is often buried in snow, the Summer routes are sometimes inaccessible or non-advisable. The routes you need to negotiate present a variety of hazards unique to (but common in) big mountain terrain.
You’re beyond that line of demarcation.
In such conditions (see photos and descriptions), the viable route (on the Main Trail) is then up a 20°-35º snow slope that ascends 1500 vertical feet from Trail Camp to Trail Crest, with standard alpine hazards that need to be properly mitigated.
Sometimes it may not look like it, especially in perfect sunny conditions, but it only takes a small amount of high-consequence alpine terrain and bad decisions to ruin your day. Or life. You need to adapt your technique. This is known as a “transition zone”. Learning to properly identify transition zones is critical in mountain safety. Many people struggle with it. Sometimes all it involves is putting on a helmet, or taking your ax off your pack (and using it correctly), or both. Sometimes it means more laborious gear swaps to increase safety, speed, and efficiency.
If you use microspikes in terrain like this anyway, you might get away with it some number of times, depending on many factors, but you also might be injured or killed when they fail or lead to failure. (Microspike use in this kind of terrain is often poorly-paired with trek poles, lack of ax and no helmet, which compounds the problem and serves as a consequence multiplier.)
If that failure happens, it won’t be surprising to people who understood what techniques and equipment were advisable for the conditions and terrain at the time, and the potential results of failure if they’re not used and applied. It’ll just be tragic (again) that the person who suffered the consequences didn’t get the memo.
Put another way, sometimes microspikes are kinda sorta convenient in zero-consequence scenarios, even in the mountains, and I’m guilty of using them there (“Hello. My name is Brandon, and I have used microspikes in the mountains…”), but if you’ve left the world of hiking in the treeline below you and are actually climbing a mountain (meaning, not on a trail; ascending/descending/traversing steep snow slopes in alpine conditions), they are not the correct choice; crampons are (on mountaineering boots, with an ax and a helmet).
Microspikes are convenience devices, not mountain safety devices; don’t rely on them to save your life.
They sometimes make walking on sections of zero-consequence trail in certain conditions a little easier. That’s it. That’s all they’re for and all they can be relied on to do effectively.
If you plan to ascend 1500 vertical feet up a 35° slope of firm snow at 05:00 in alpine conditions (and down it later) and think it’s microspike terrain, then you’re simply not recognizing the line of demarcation, and your safety and sometimes your life hangs on the next couple of decisions you make. What you need there isn’t a convenience item. You need gear specifically designed for those conditions and for that terrain.
A large portion of the injuries and deaths we see on Mount Whitney (and elsewhere) are frequently the result of people who don’t make the transition between low-consequence hiking and higher-consequence classic mountaineering, either because they didn’t recognize the line of demarcation, they underestimated the various threats that existed, or they just didn’t realize that any of it applied to them, until it did...
Nobody is suggesting you never, ever use microspikes anywhere in the mountains ever. But if you go into alpine terrain, you need to understand when, where and why they are not the correct tool. (Spoiler alert: they seldom are).
This isn’t an attempt to police the mountains; do whatever you want. Just be aware that there is an entire classification of mistakes and bad decisions that lead to negative outcomes in alpine terrain that are absurdly easy to avoid. (The cost-benefit analysis indicates “Asymmetric Upside. Leveraged gain-minimal input.”). Microspike use in alpine terrain when crampons are necessary is one of those mistakes; the only explanation for which is ignorance of risk identification and mitigation of those risks. There are many such mistakes, but you can learn to avoid them.
All.
Easily…
Be safe and make credibly-informed decisions.
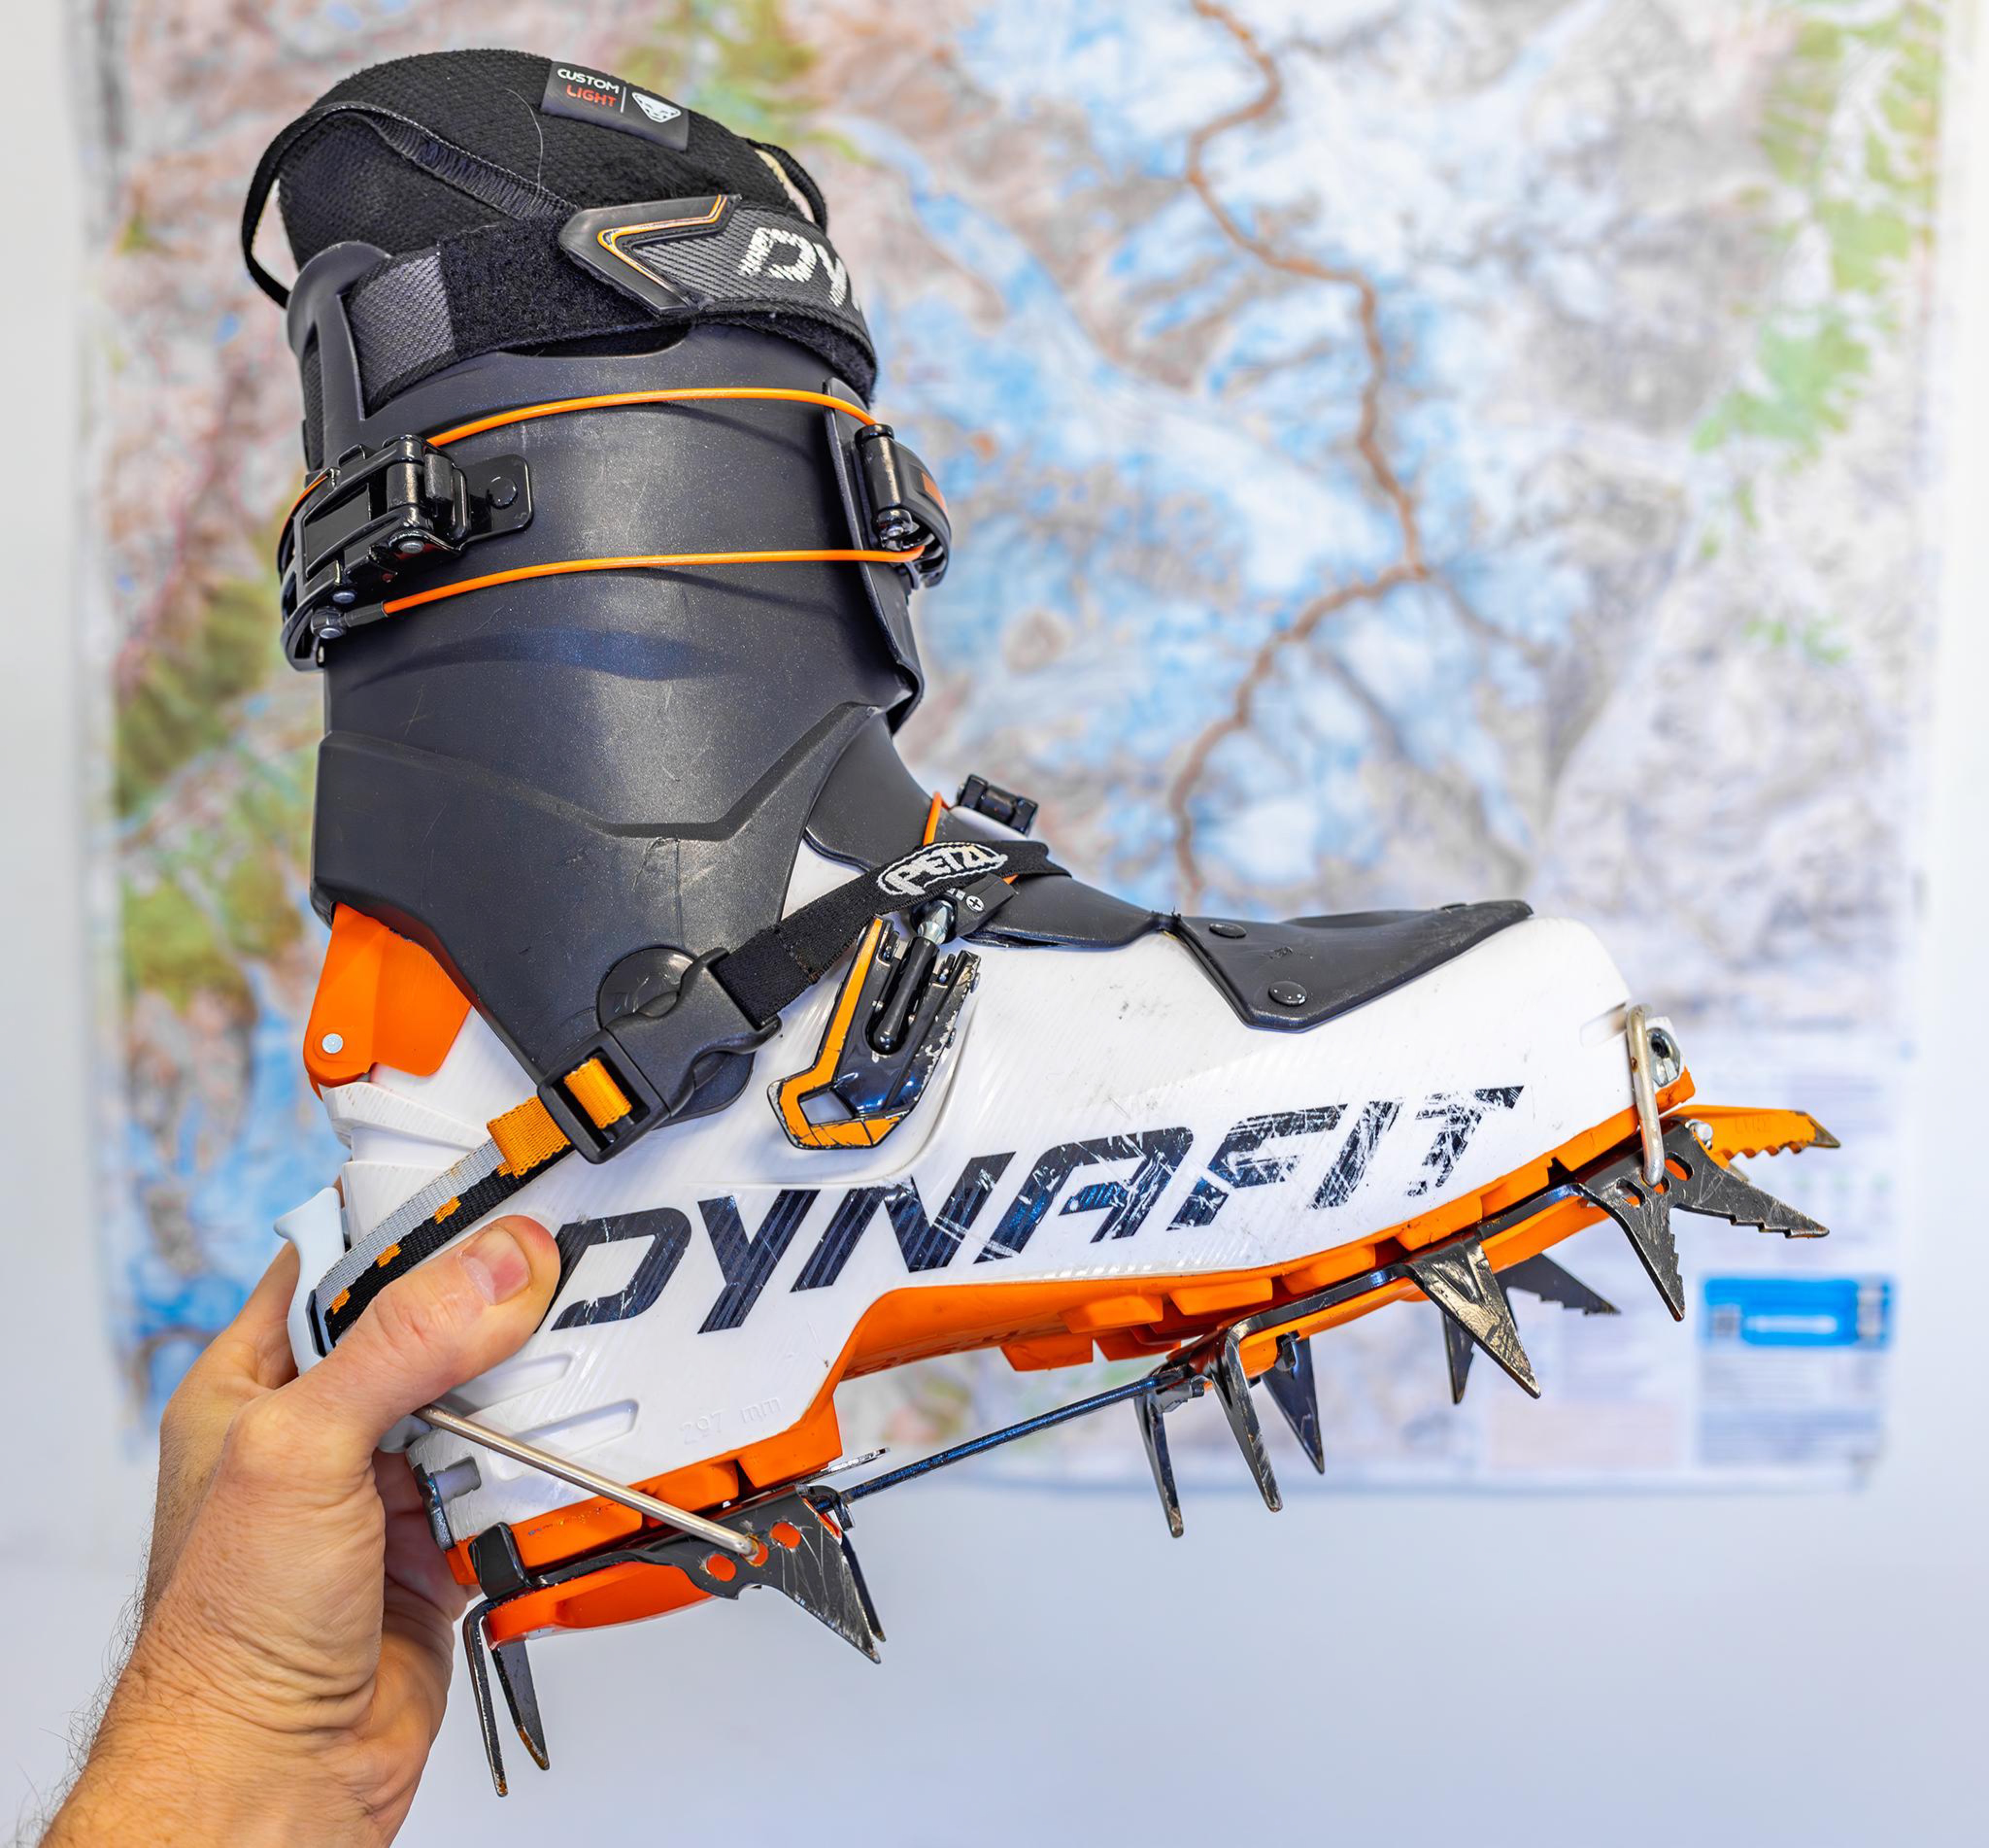
This is the ski mountaineering setup I use when the route I’m doing involves the kind of climbing that might benefit from the use of two technical ice axes. When the “mountaineering” part is mellow, I use my Petzl Irvis crampons, or my Petzl Leopard crampons if it’s even more mellow (such as the slope to climber’s right of the switchbacks on the Main Trail in April, for example).
These crampons are designed for ice-climbing, technical mountaineering and mixed alpine routes. They are overkill for anything else, and they’re overkill for glacier-only routes. I bought them to replace my Petzl Sarkens. (See next photo…)
This setup is extremely rigid. The boot obviously has no sole flex. (It’s a specialized ski boot you can climb in). A rigid sole is what you want and need for technical climbing. These crampons are configured in a way to make them compatible with boots with both a heel and a toe welt. (Indentions that accept the metal toe piece and a lever-lock heel; you can clearly see both in the photo). This makes these crampons (and all technical mountaineering crampons configured like these are) niche items for a specific task, but preferable for that task. Note the interchangeable, vertically-oriented front points. (The orange ones. You can only see one in this photo, but there are two). I’ll refer back to them in another photo.
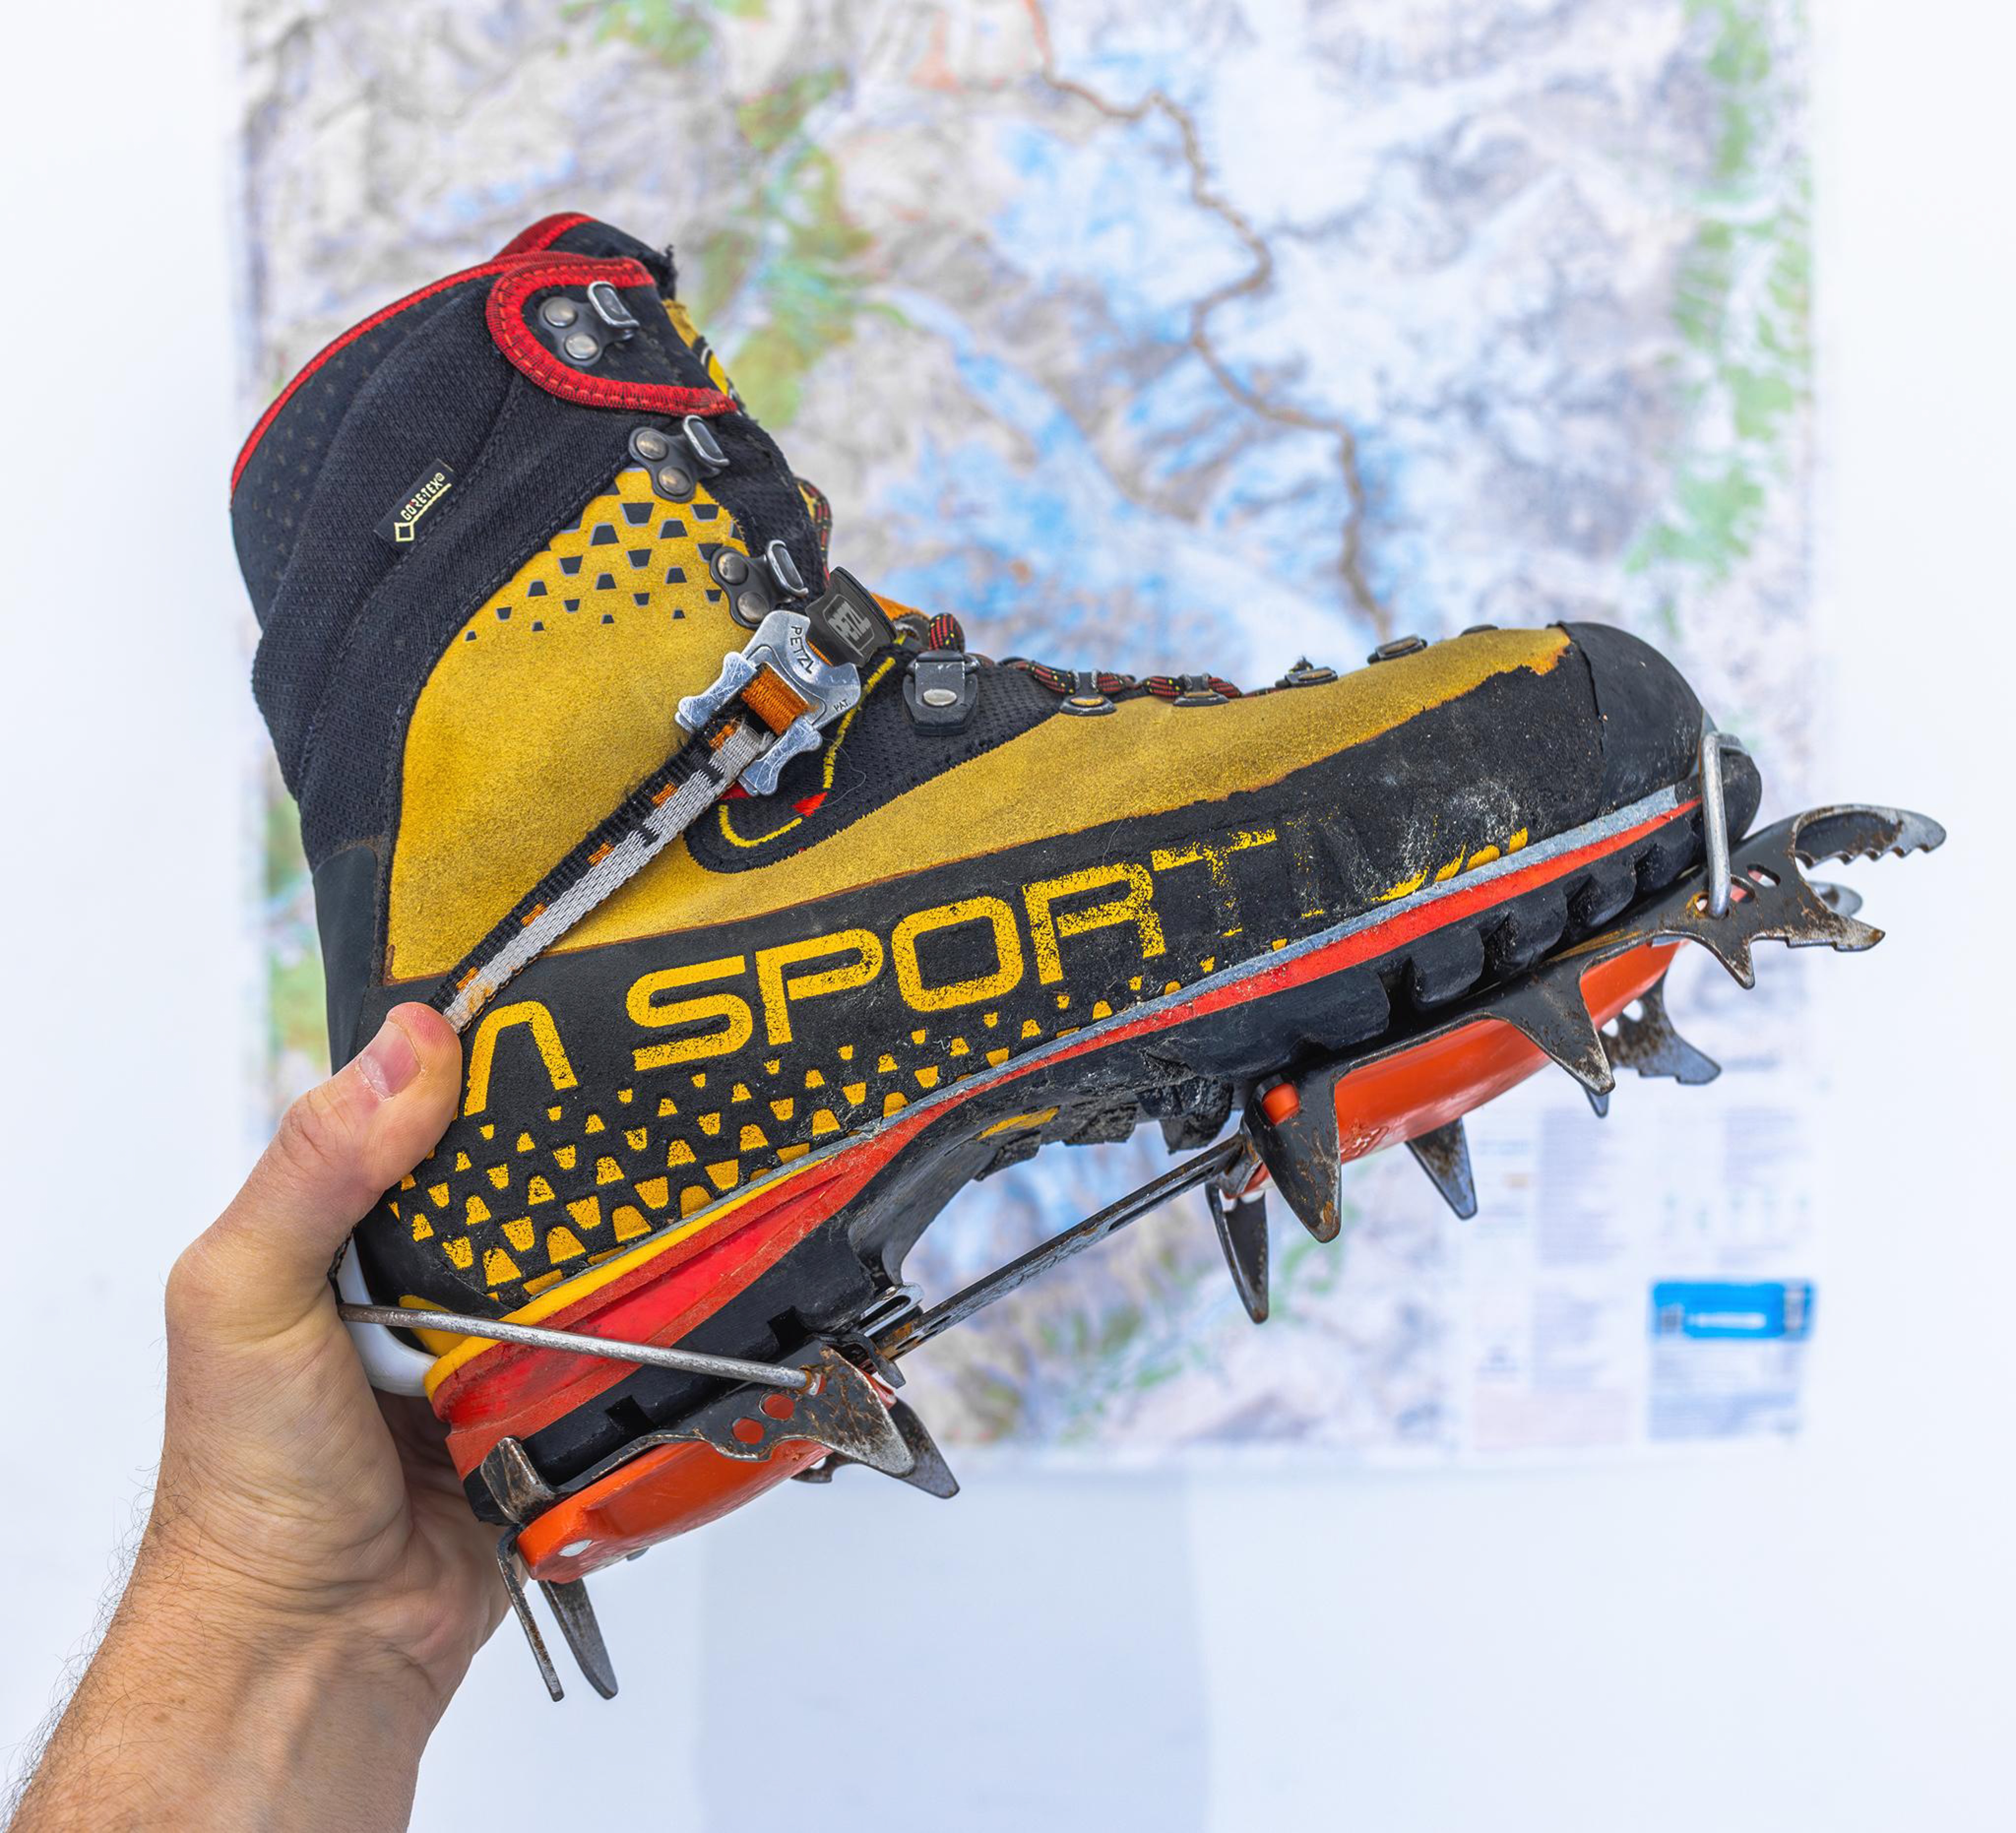
These crampons have been retired. I’ve worn them down and sharpened them too many times (the exactly-appropriate number of times?…) This is (was) my technical mountaineering setup (replaced them with the Lynx crampons in the previous photo).
I use this kind of setup on cold and/or glaciated routes and where the climbing is the sort that I might be using two technical ice axes. (Swiss/French Alps, anywhere in the Cascades, anywhere in the Sierra in Winter). For bigger routes, I use a more robust, warmer boot, but this is a very capable setup with a wide range of use cases. This is a workhorse combo; you can get a lot done in a lot of places with it.
Zero-flex sole, which is, again, advantageous on technical climbing routes, but sort of a buzzkill on all other routes. Hiking in these boots is an acquired taste. Sometimes you just have to do it. Nepals have both a toe welt and a heel welt, which means they will accept technical crampons.
Note the integrated, vertically-oriented front points. I’ll refer back to them in another photo.
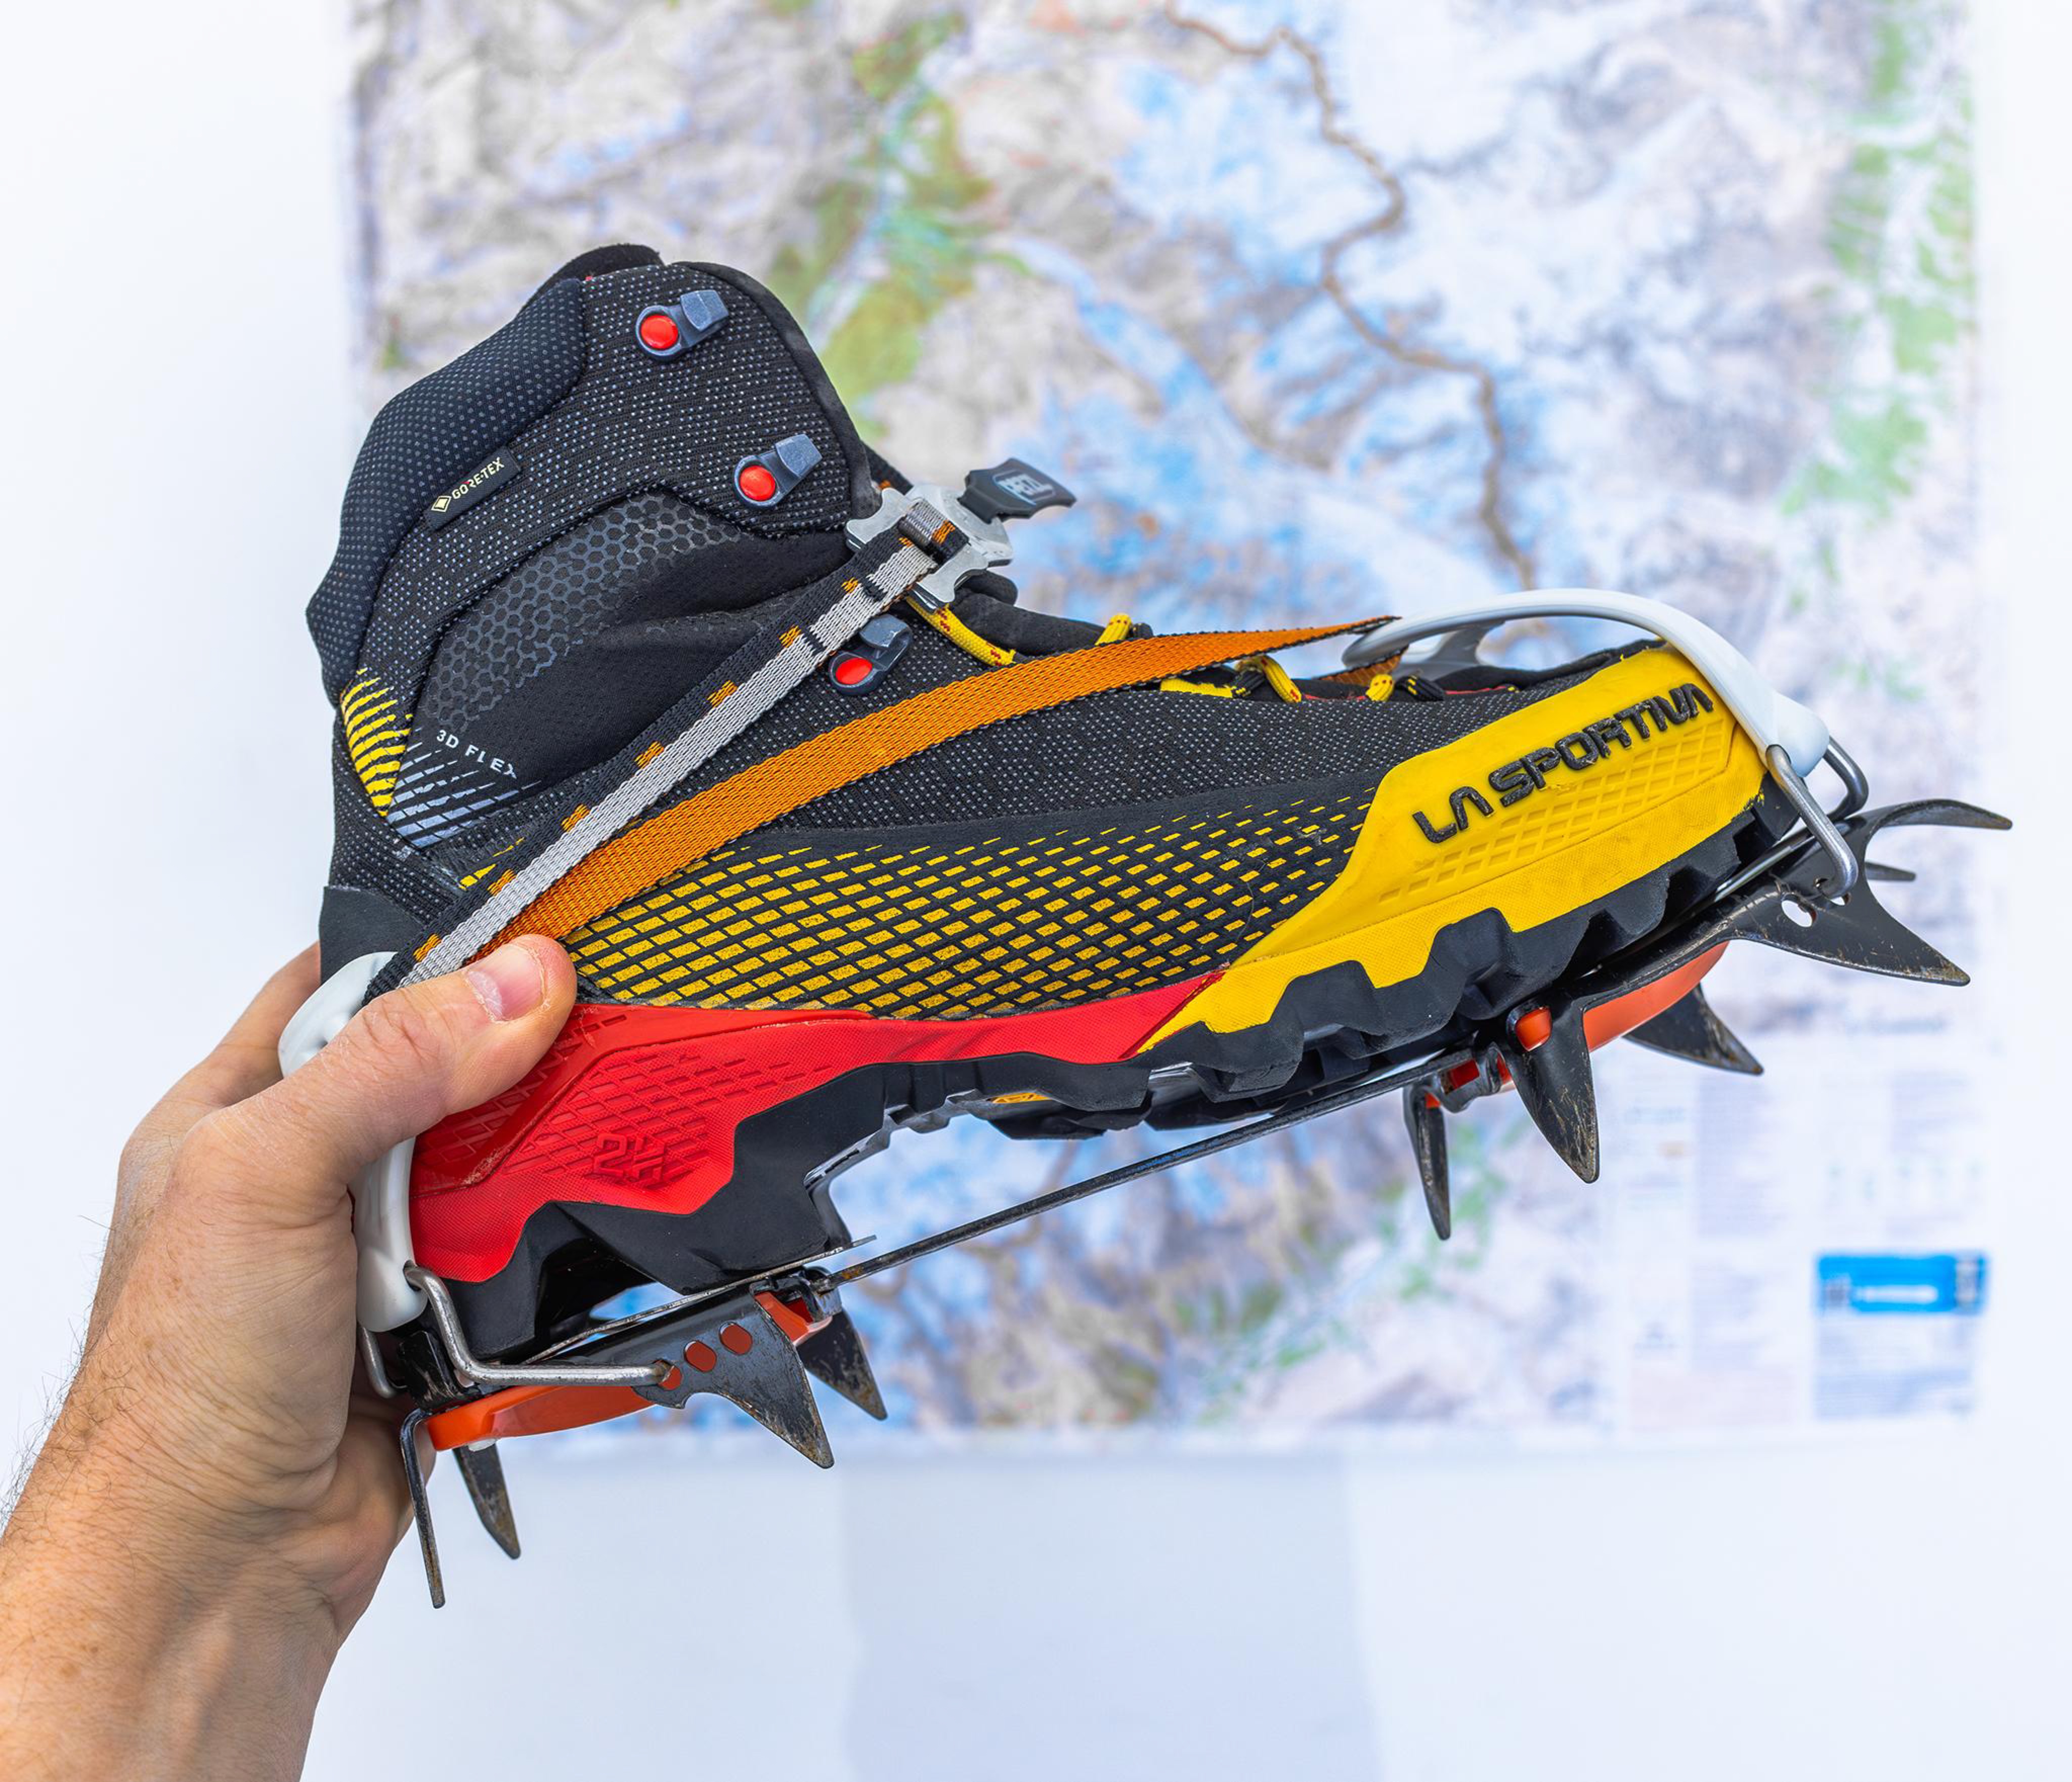
You may read that you need a 12 point crampon. 10-pointers are suitable for classic mountaineering, and 12-pointers are overkill.
It’s not the number of points that classify a crampon, it’s the type of points; look at these front points and compare them to the Lynx in the other photo. Huge difference. These are horizontal as opposed to vertical. They are designed to dig into firm snow and hold on the small platforms they create, adding stability and ease to low/moderate angle ascents. The horizontal front points serve as sort of a snow “paddle”, almost like a mini floatation device for front-pointing. Vertically-oriented front points are much better at penetrating ICE and very firm alpine névé (and getting into small cracks in granite on mixt routes). 10-point crampons are usually lighter, and that’s true for these. Configured here with universal straps. These crampons will go on anything.
These boots flex a little. Much less than a typical hiking boot, but more than Nepals. (Previous photo). Due to this flex, they’re great to hike in. They are super comfortable. When it comes time to climb a 35º snow slope, they suffice. Any steeper than that though, and they start to show their weakness. For terrain in the 35º+ range, you really want rigid-sole boots. In steep terrain, you front-point a lot, and front-pointing in boots that flex is not fun, because while a rigid-sole boot creates a solid, stable platform that takes very little effort to stand on while perched on just two crampon points, flexible-sole boots do not; they have a tendency to torque out of that front-point placement due to sole-flex and heel-drop, leading to instability and a vanishing degree of confidence.
You sort of need to try both rigid soles and soles with flex to understand how significant this difference is. If all you’re ever going to do is some light, classic mountaineering in relatively warm conditions, which by a very wide margin is the most common type, these boots and crampons are fantastic.
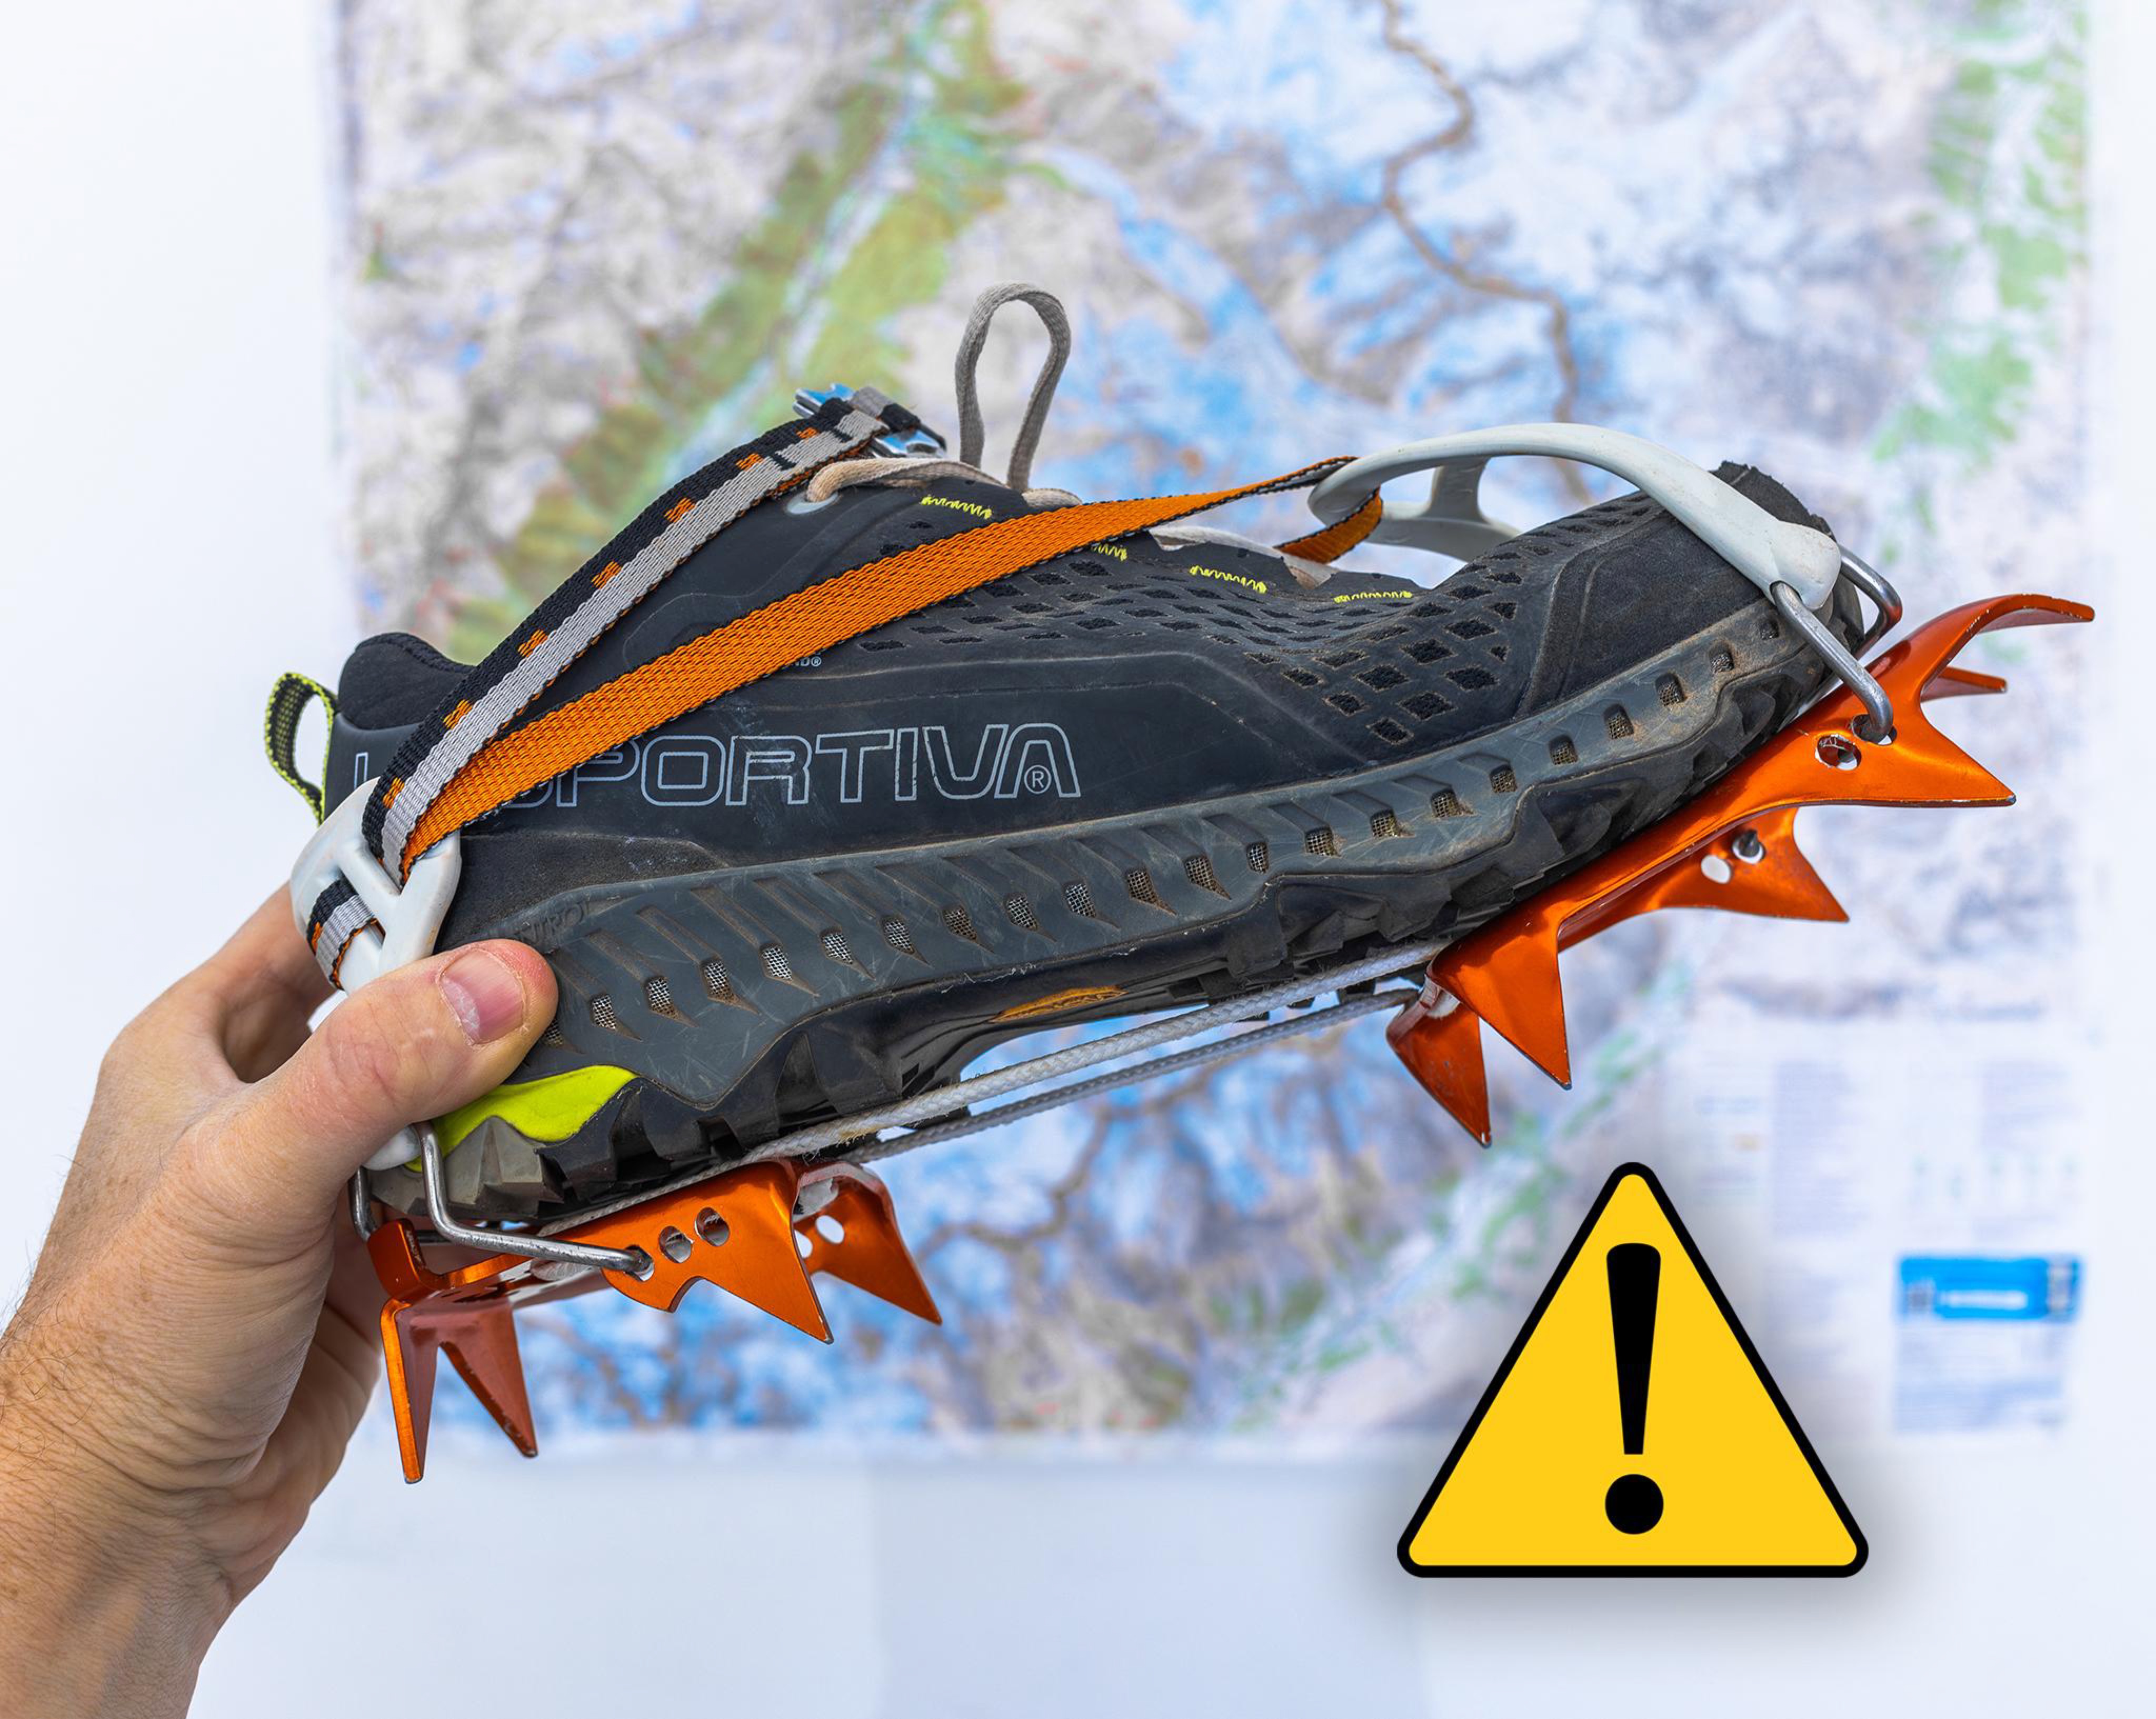
This is one of my La Sportiva Spire GTX trek shoes mounted with a Petzl Leopard crampon. Leopard crampons are aluminum, so you can’t walk over rocks with them. They’re for the same general type of terrain that Petzl Irvis crampons are for (previous photo), but when there is no rock or ice involved (just hard-packed snow).
They are also…floppy. The only thing holding the front and back pieces together is dyneema cord (see other photo), so they really only work on rigid-sole boots. If a crampon has a rigid spine (the metal bar connecting the front and toe piece), then you can get away with wearing them on softer-soled boots (hiking boots, for example) and still enjoy the benefits of a semi-rigid crampon/boot combo.
These are very niche crampons in general, shown here on non-adequate footwear. They are extremely light, however. (350g…a little more than a phone).
The shoes are…just shoes. So they flex. A lot. But they flex less than any shoe that is not specifically a trek shoe or approach shoe. Compared to my Hoka trail running shoes, these feel “rigid”. But they’re not. If you read the previous photo captions, you know that this is not a good thing for climbing steep snow. Because they are shoes, the crampon strap can, and always will, dig into your ankle. Ouch. If you’re thinking “yeah but I have mid-shank “trek boots” like the Salomon Ultra 4 Mid GTX!”; cool, I had a pair of those once. They solve none of the issues with using super flexible boots/shoes with a non-rigid crampon in a mountaineering context…
So, with all those caveats, why even mention it? Sometimes the situation is such that there is enough snow on a route to merit the use of crampons, but only in very short sections and with only moderate fall-lines on a route you will only need a sturdy trek or approach shoe for 99.99% of the time. While there may not be any no-fall zones (meaning; if you fall, you’ll probably die), there may definitely be “don’t-WANT-to-fall-zones”.
These crampons fall into the “crampons you take when you don’t want to take crampons” category. A “would be dumb to not take the extra 350 grams…” type of situation.
These crampons get the job done somewhat satisfactorily in certain niche scenarios. Since they have no rigid structure, they need to be attached to a rigid-soled boot to be remotely effective. I’ve used them on both my Dynafit ski boots and my Aequilibrium ST GTX boots while ascending slopes on both the Main Trail and Mountaineers route in Winter. But mounting them on SHOES makes them less effective.
I’ve used crampons on trek shoes a handful of times over the years. It pretty much sucks and I don’t recommend trying it.
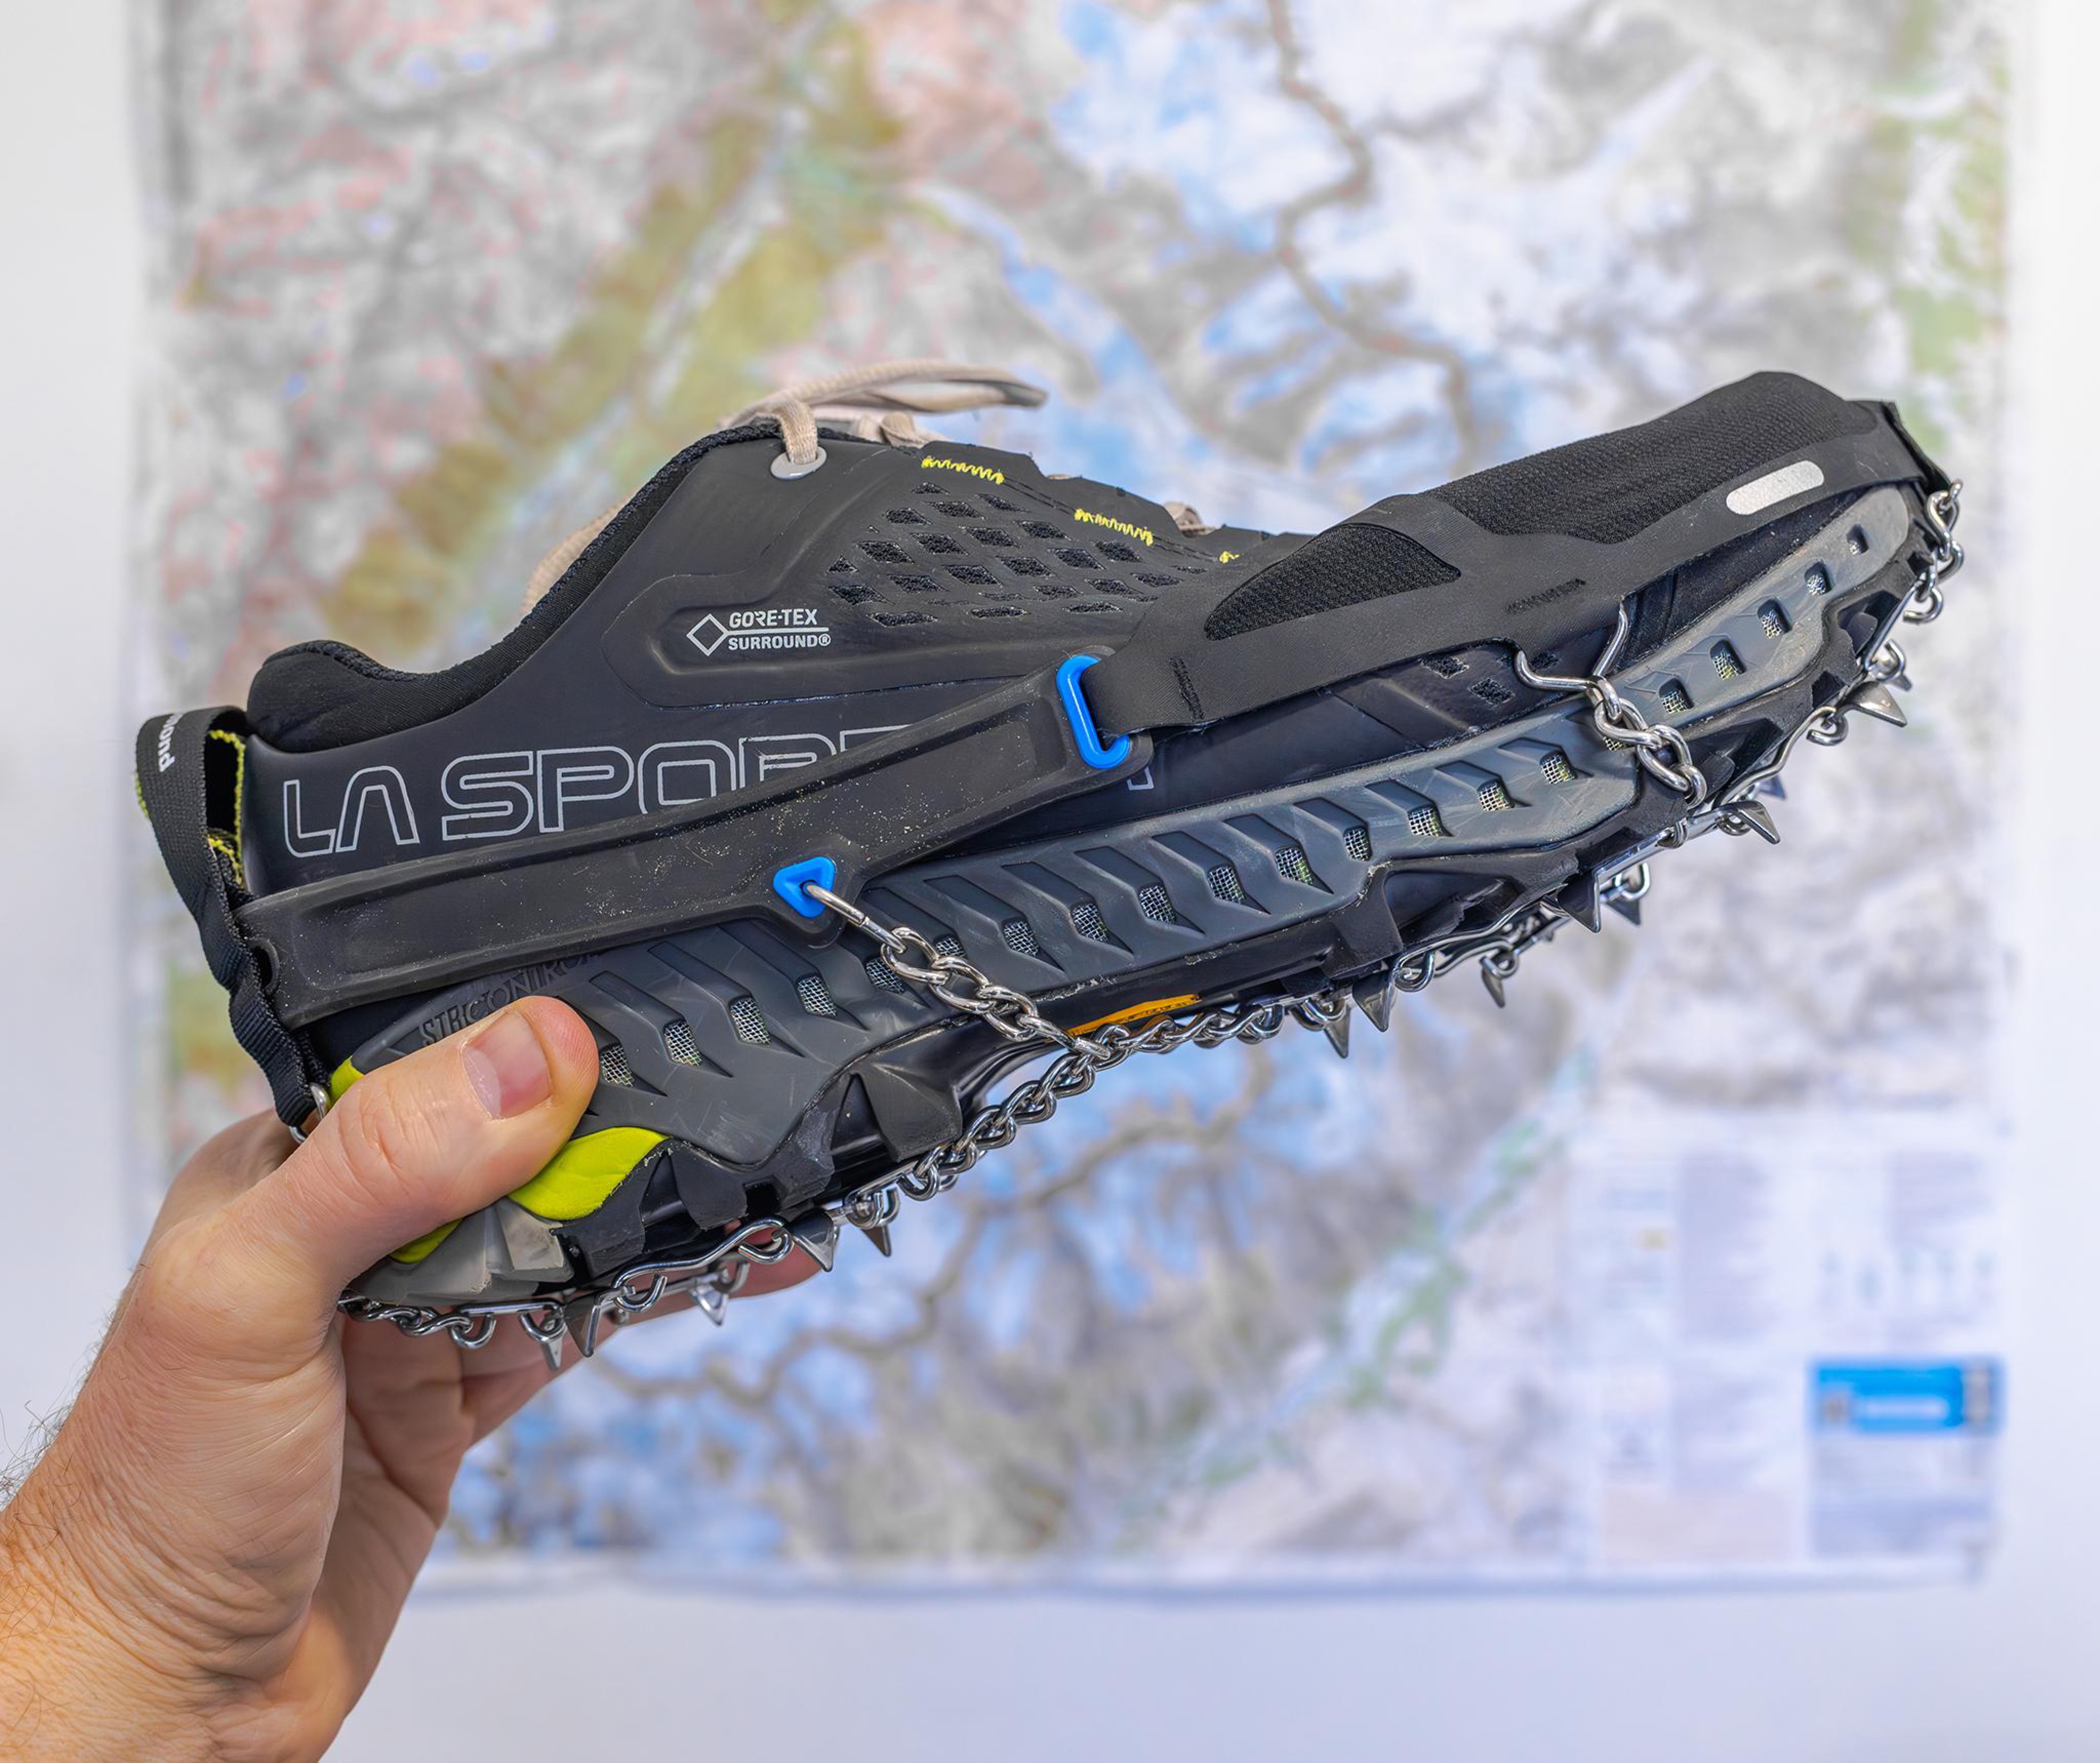
The BD Distance is a super light microspike. They weigh what my phones weighs (245g) and pack down really small. These two make a good combo for zero-consequence terrain, and when my day’s mission plan includes a lot of logistical transitions, these two pieces of gear are sometimes with me and play a role in some of those transitions. (See the skis photo with transition descriptions…)
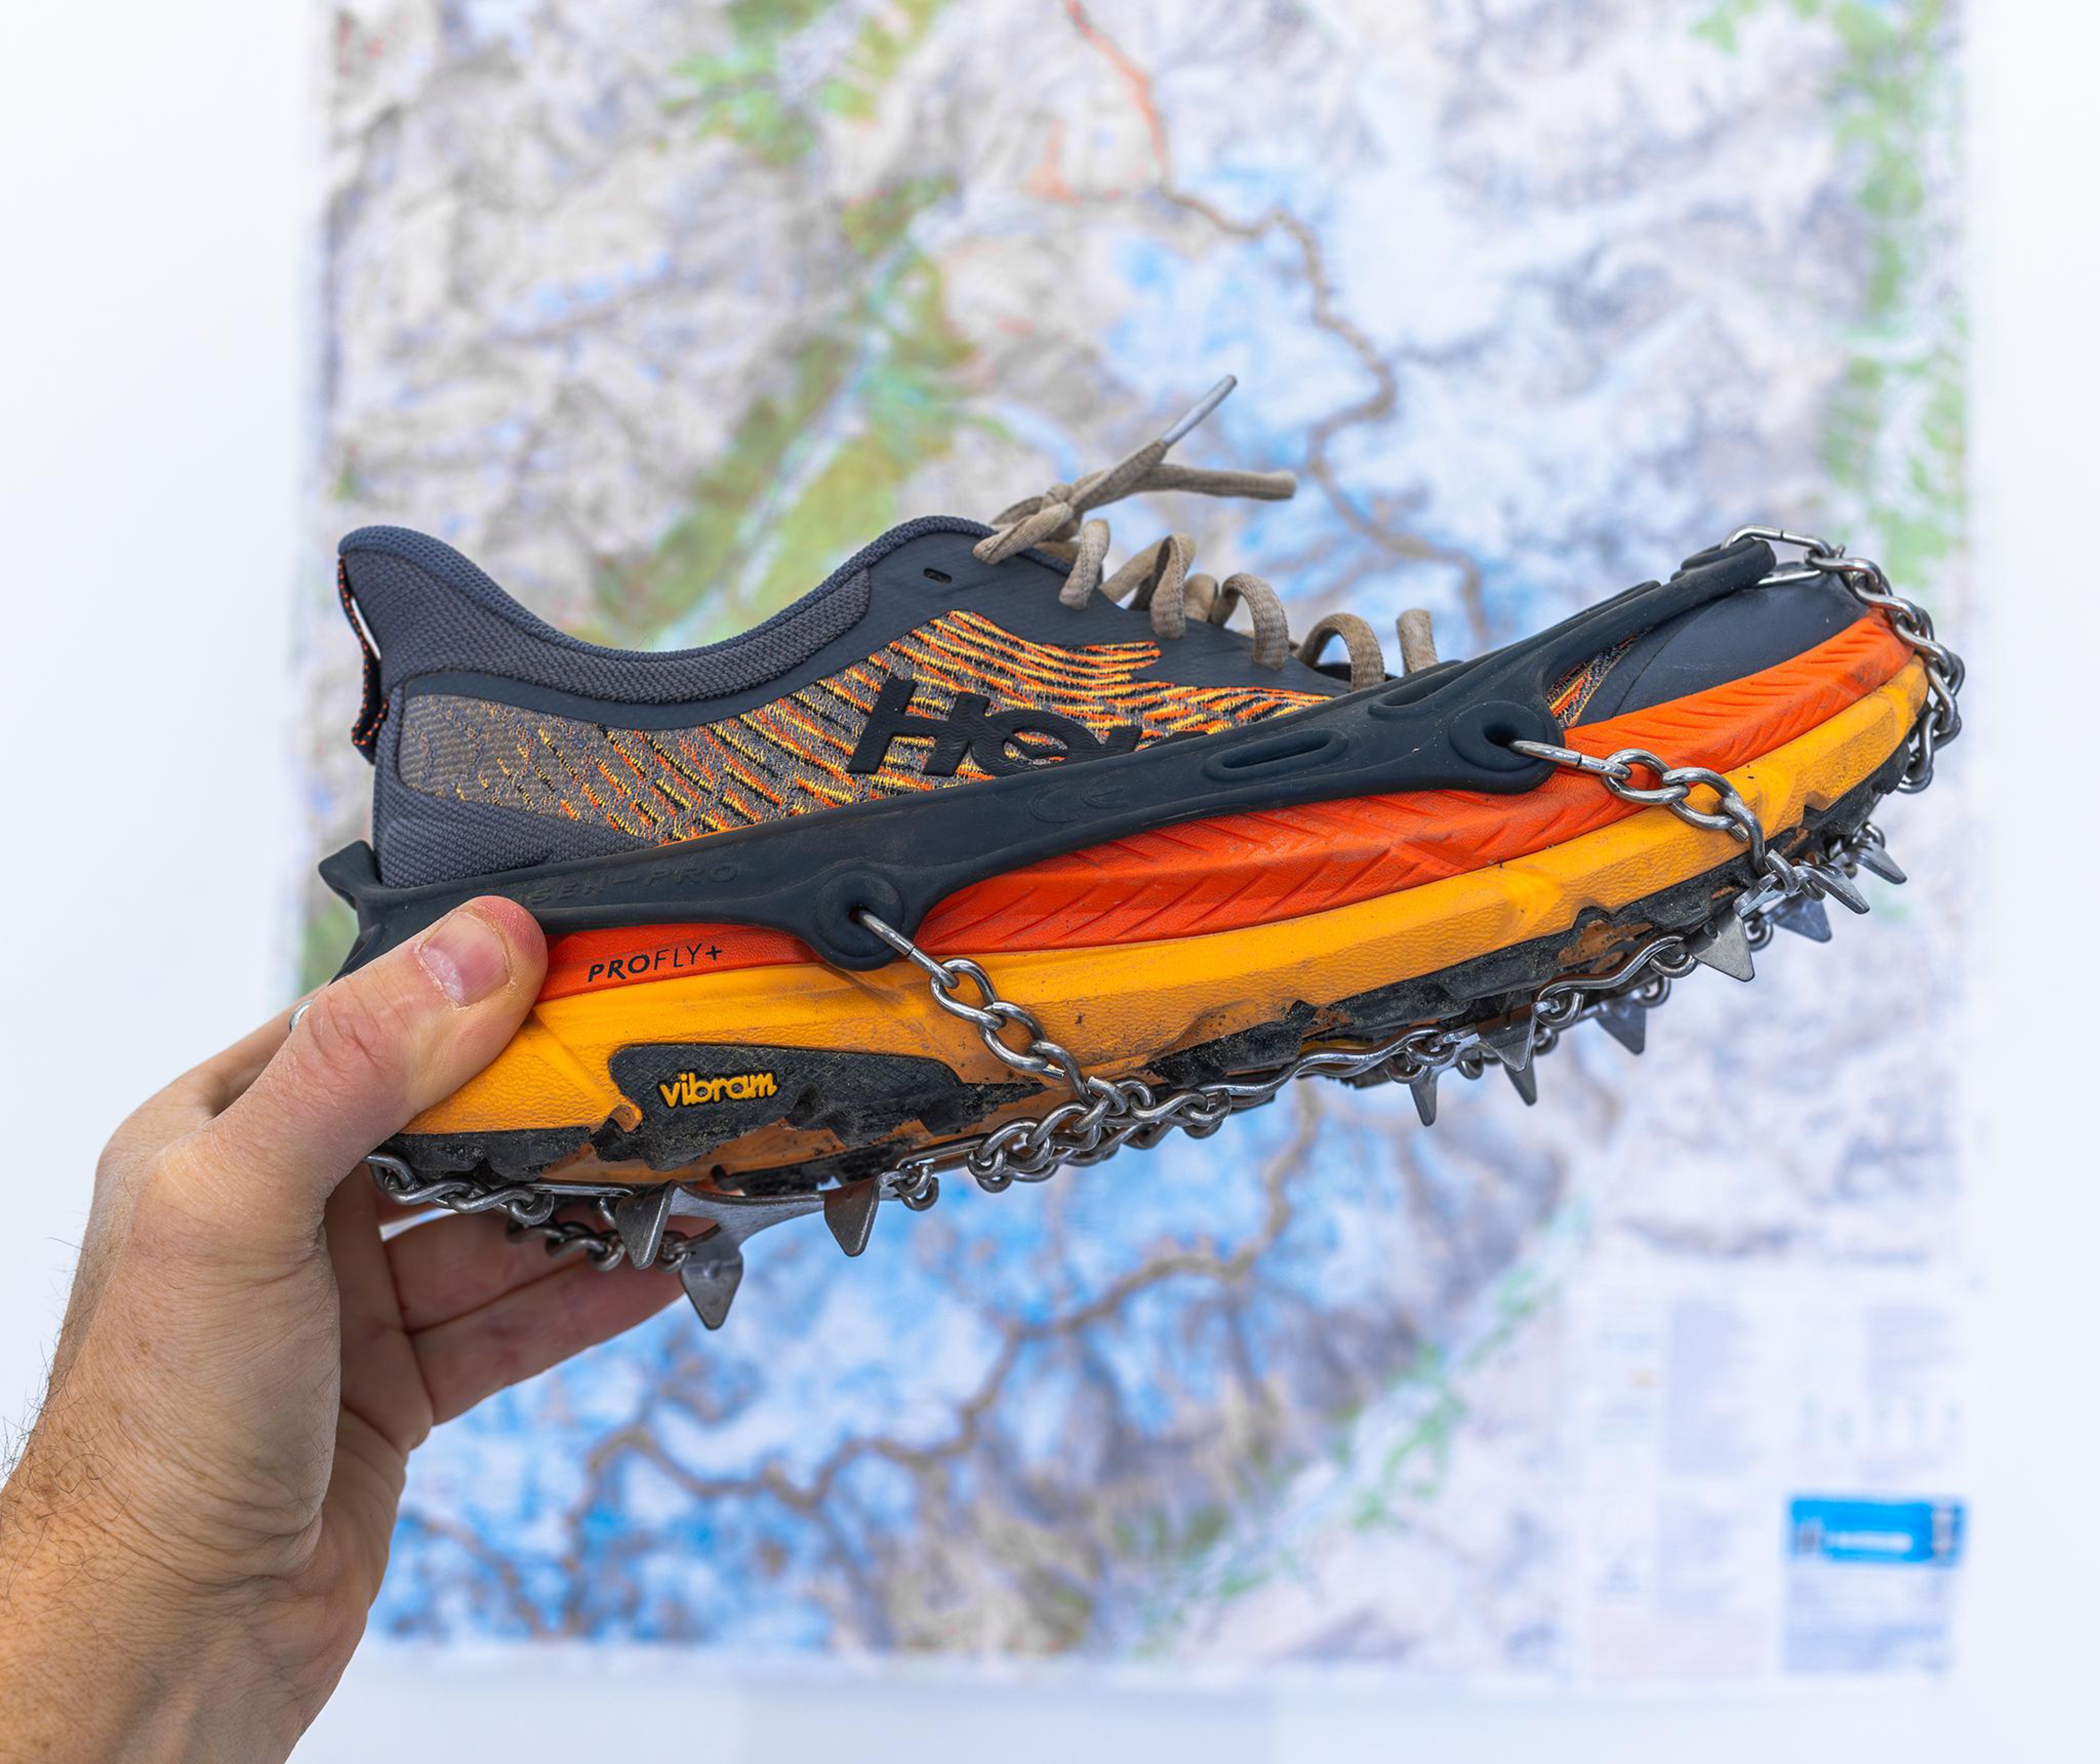
Looking at this photo (and the other microspike combo) as compared to the crampon images, the differences should be pretty obvious, and that should be a clue why this setup doesn’t work on steep snow slopes in the mountains. They’re just made for different use cases.
I use this kind of setup when I’m mountain running zero consequence terrain that’s glazed with ice/snow. And very infrequently anywhere else. Actually, basically never.
If I’m considering microspikes as part of mountaineering objective for zero-consequence terrain sections, I use the La Sportiva Spire/BD Distance setup, because those shoes are about twice as rigid as these are (and warmer/dryer).
If I’m doing a trailrun/mountaineering combo, the conditions are usually such that the trails are mostly dry below a certain elevation, and I can run up on dirt/mud/slush, then transition into rigid-soled boots, then use crampons on those boots as I get higher.
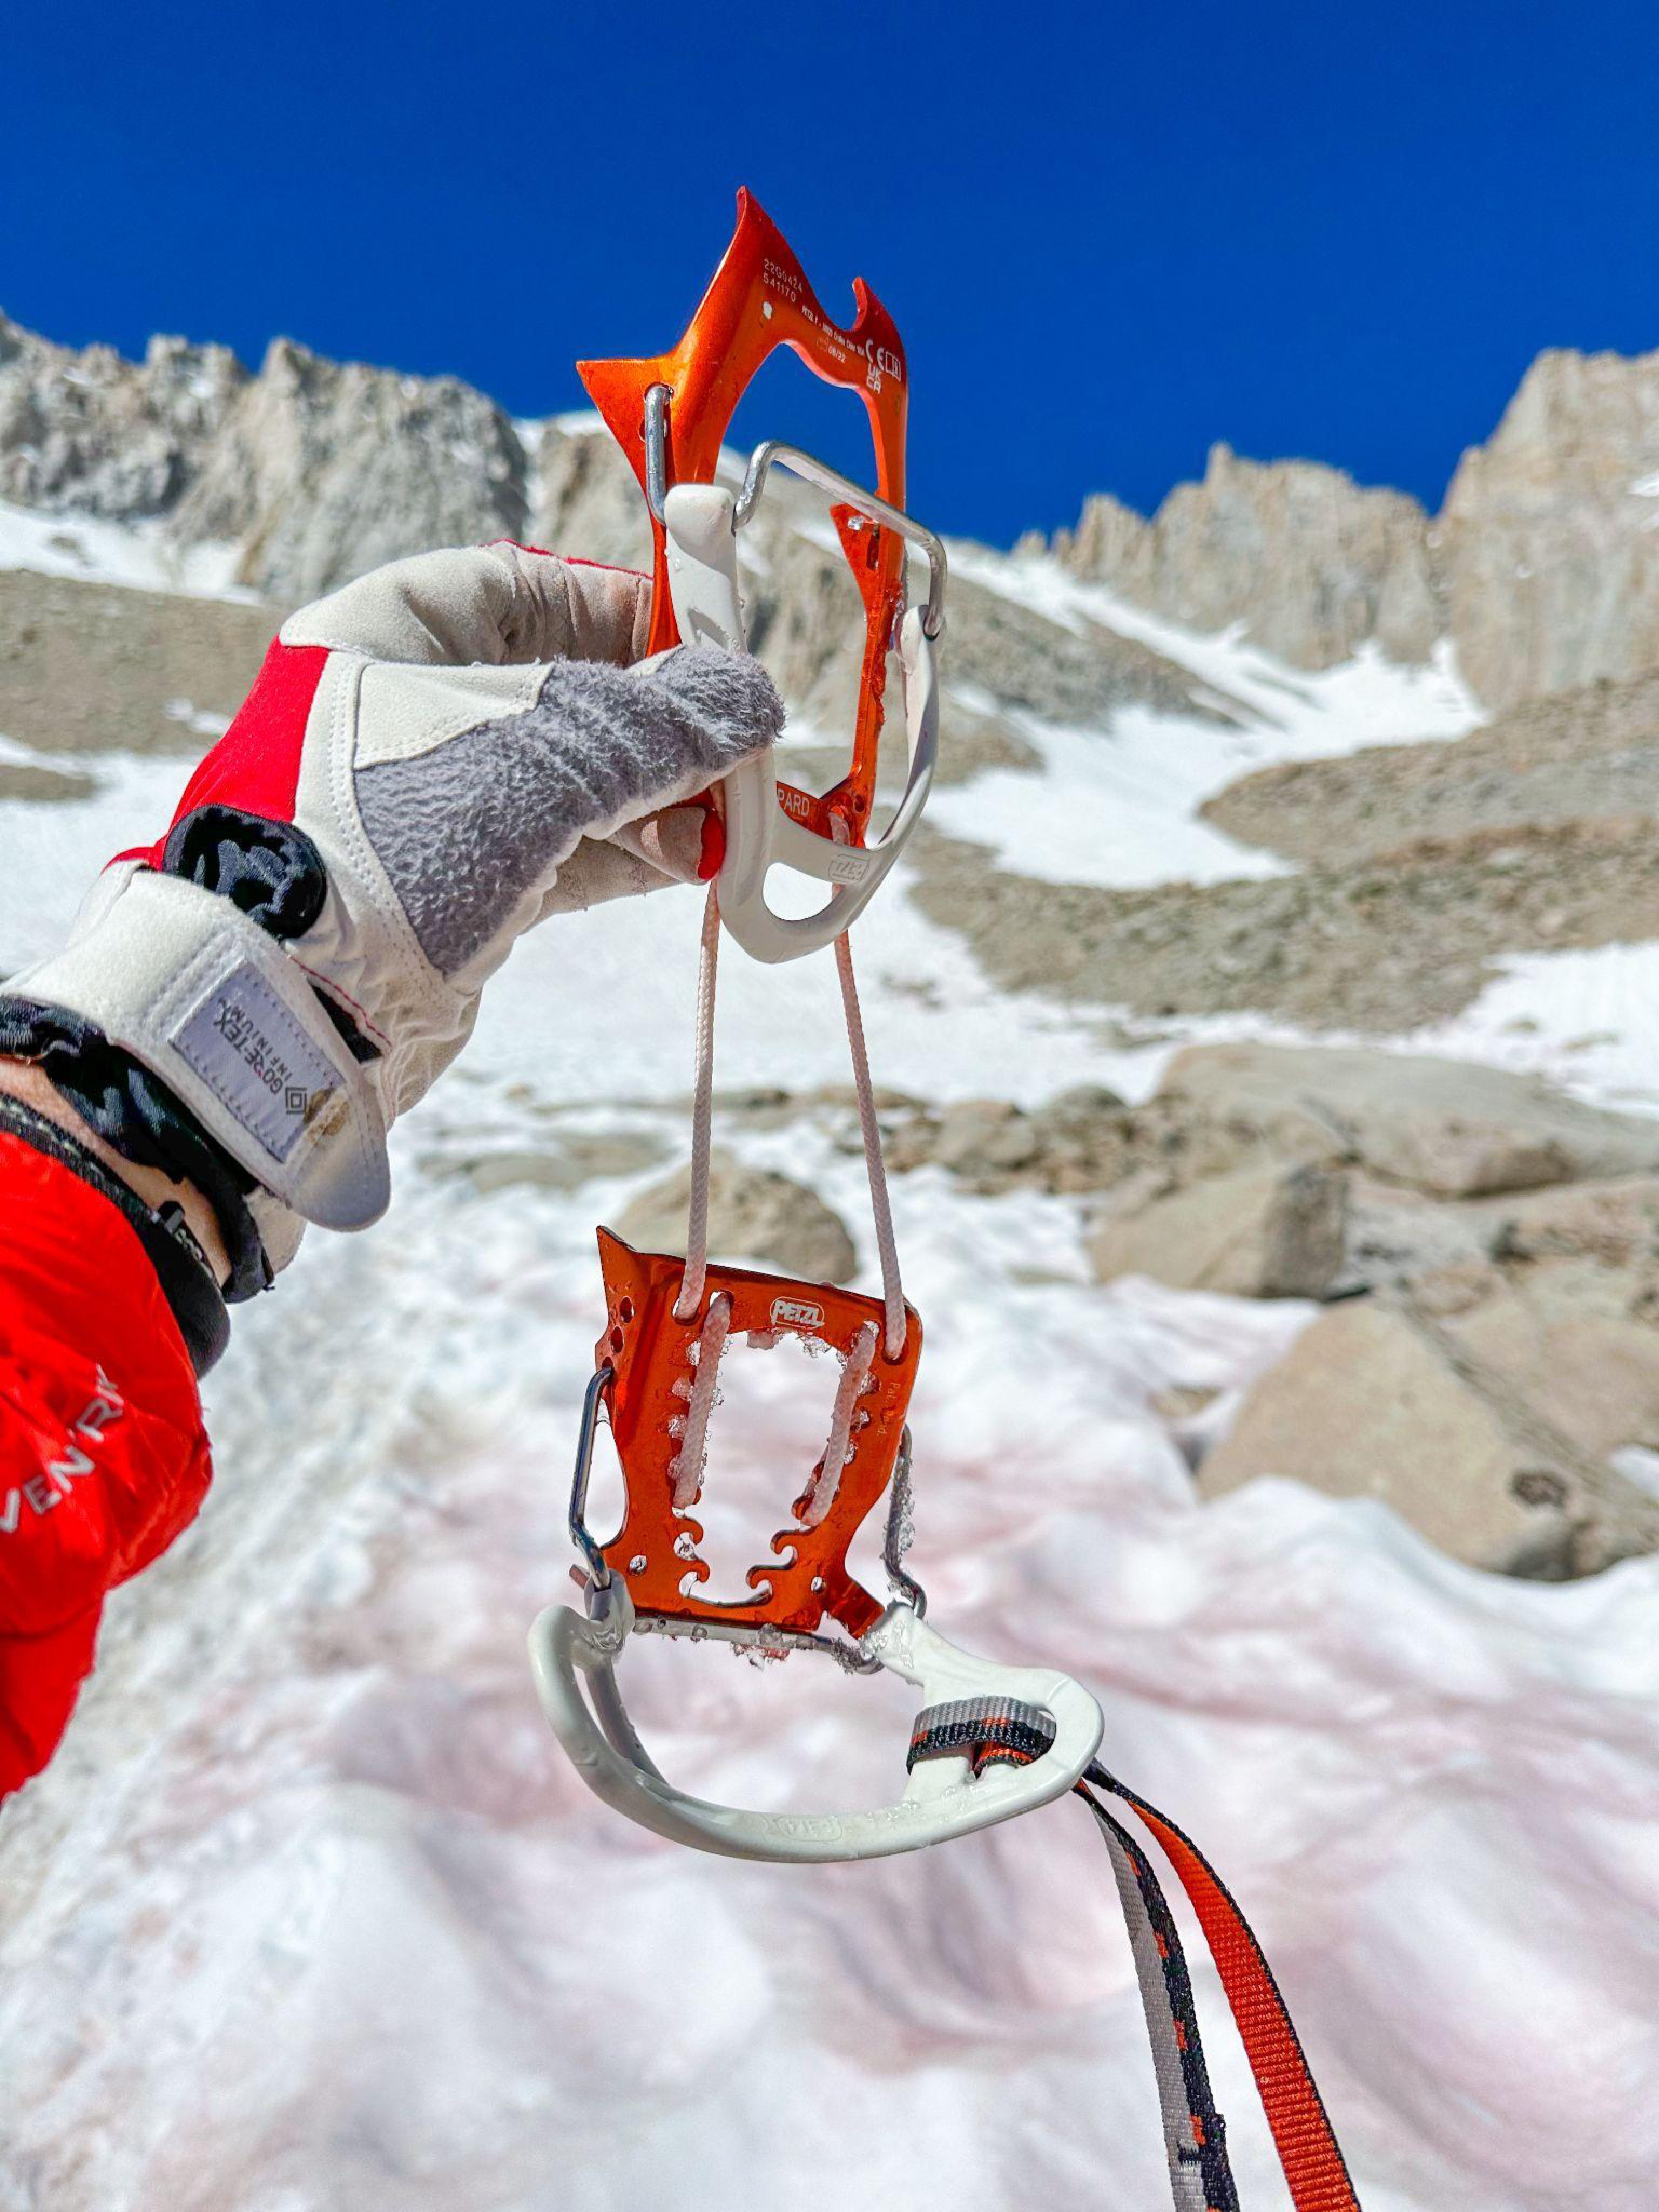
.I use strap crampons on my Aequilibrium ST GTX boots because those boots don’t have a toe-welt to accept technical crampons. (I swap the straps for techs when i plan to put these on my ski boots or my Nepals).
These crampons a very niche items. Because they’re aluminum, you can’t trudge over rocks (or climb mixt routes) in them. Because the connection between front and rear is only dyneema cord, they’re floppy, so they rely on boot rigidity alone to hold their form and legitimize their functionality. They’re super light though. 350 grams.
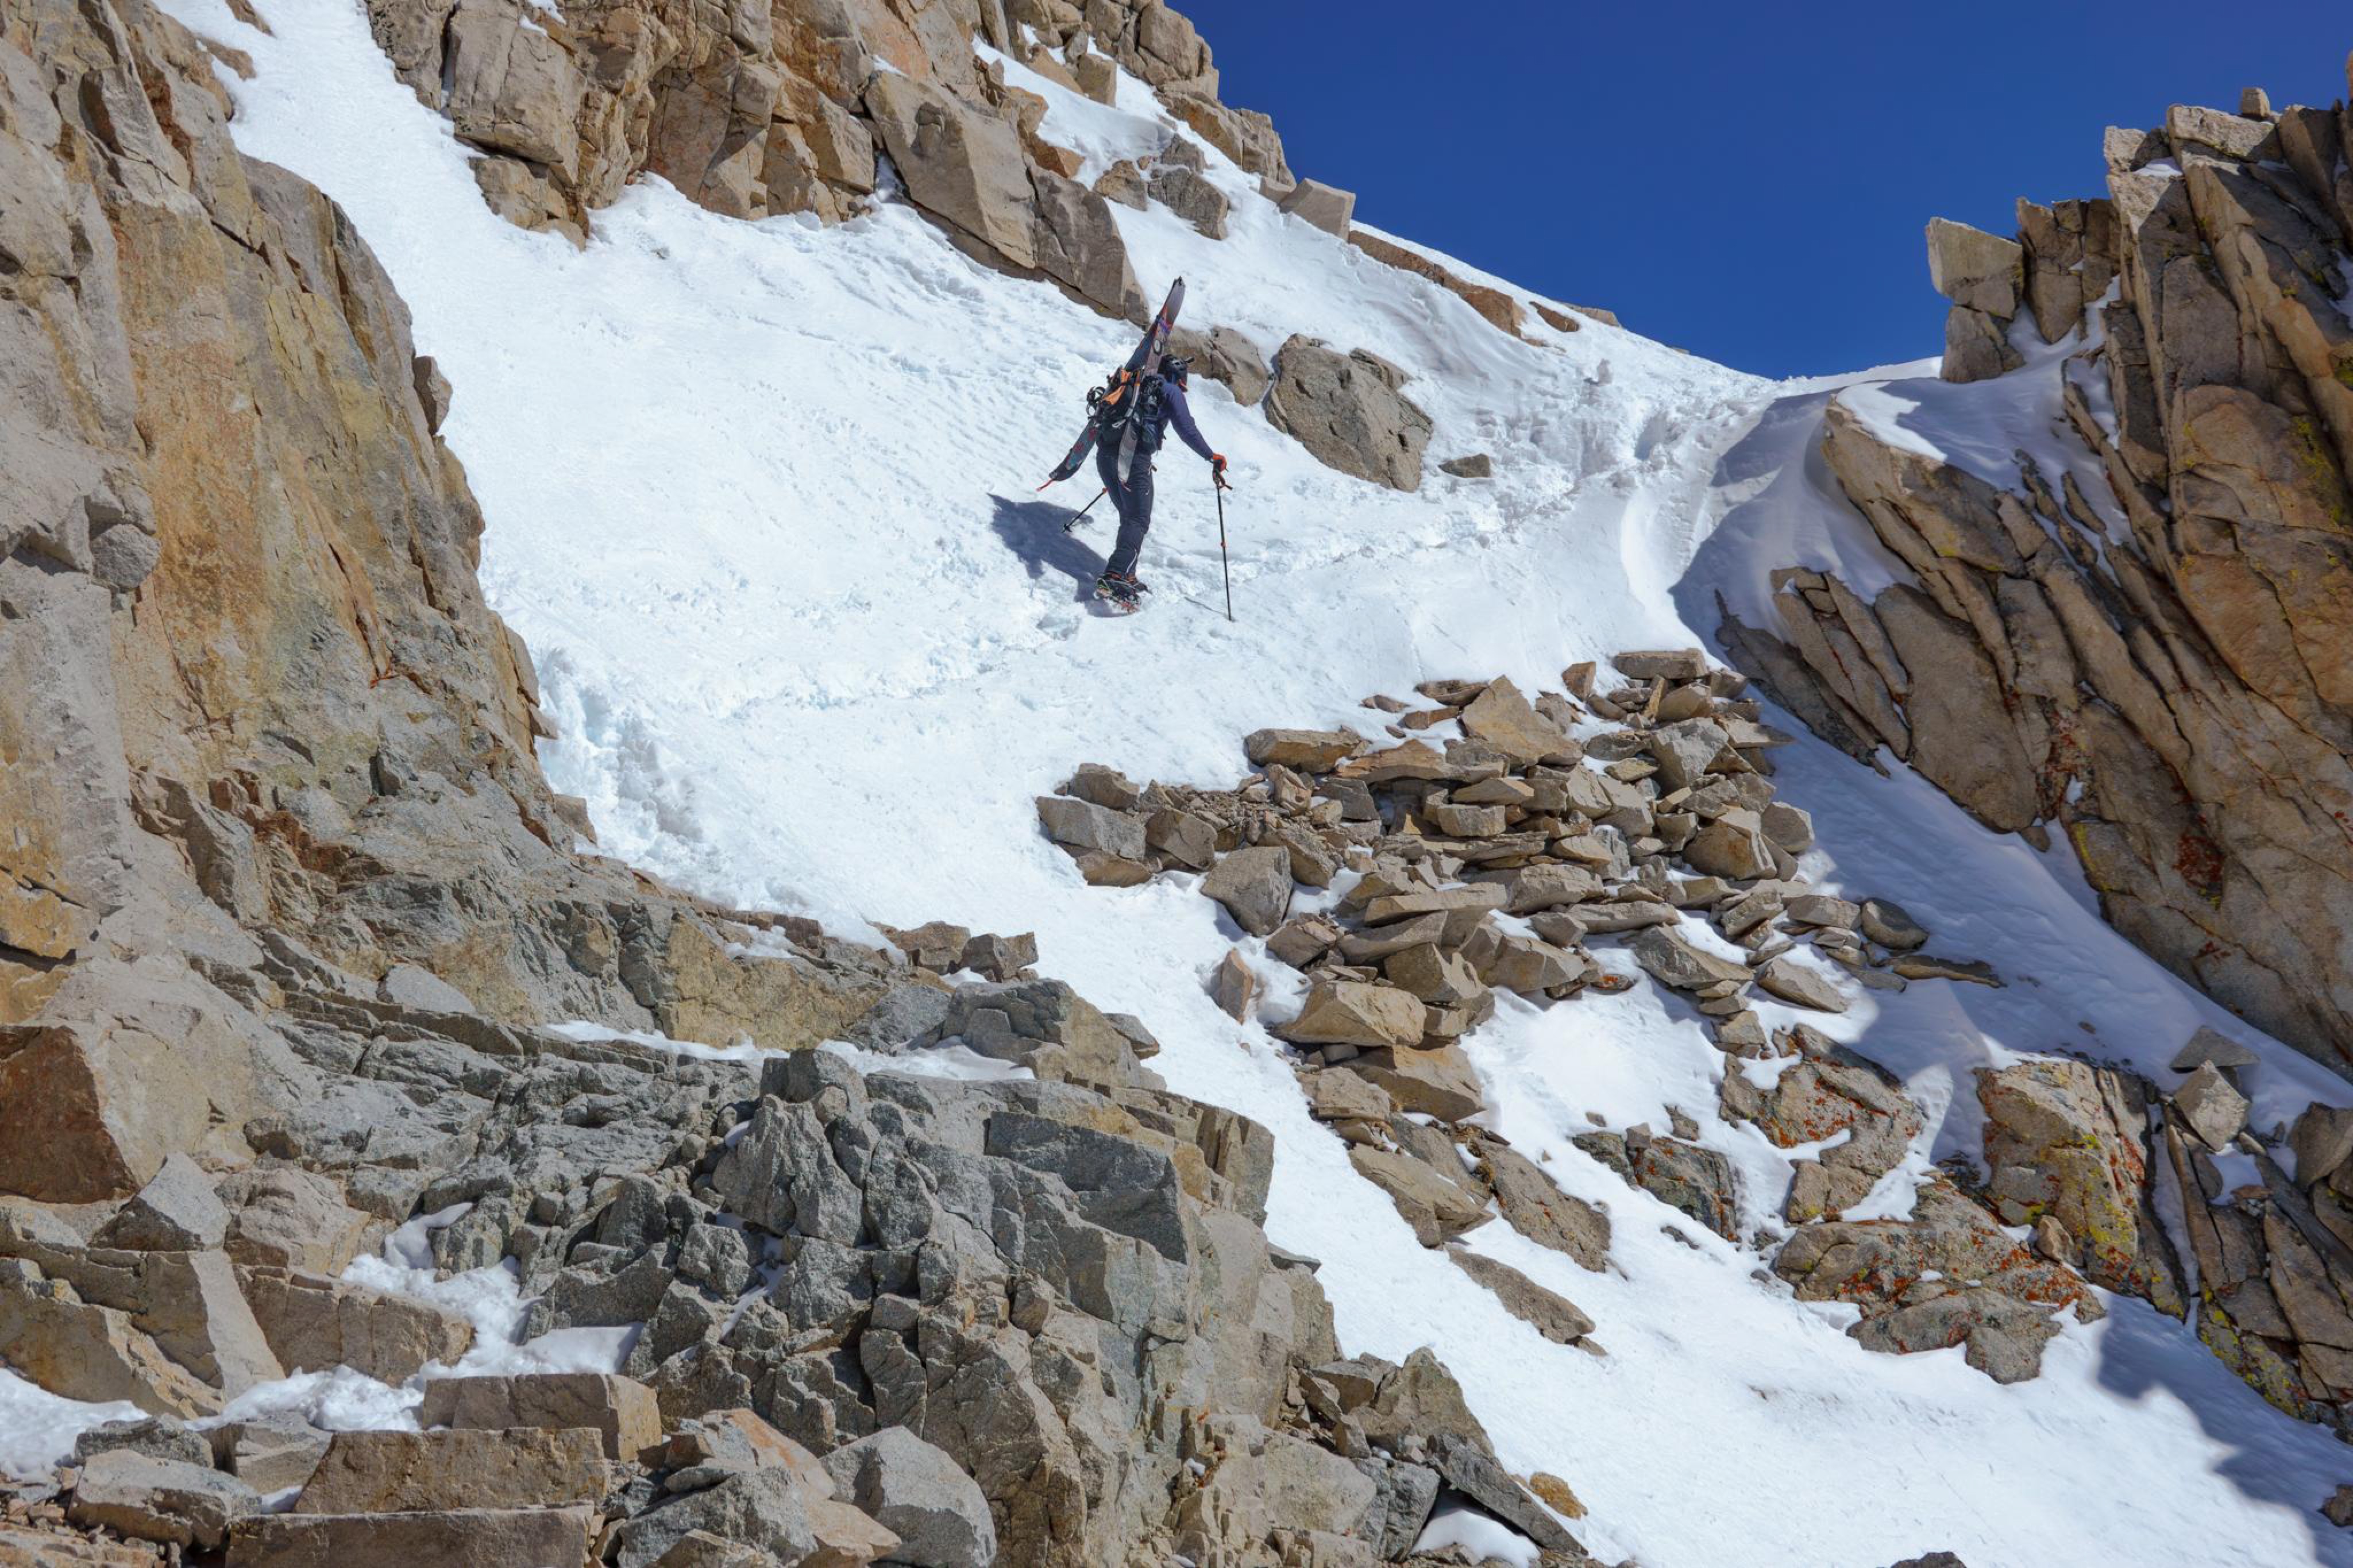
This is Pat on the West Slope (Main Trail between summit and TrailCrest) during our Mountaineers Route/Main Trail traverse on 04.27.2024. Very little time to arrest a fall here, so footing is more crucial than it usually is. Below this, there are intermittent snowfields and rock bands for about 1500 vertical feet.
While an ice ax is important in this kind of terrain, bomber footing is more important. The primary use of an ice ax is arresting a fall, and as noted earlier, there’s very little time for that here. Concentrating on proper foot placement and crampon work is always your first line of defense in terrain like this.
We were both using whippets (SA poles…in this case we both had Black Diamond WR2 poles). We also had two technical ice axes each (we both brought our Petzl Quarks) to make the ascent of the Final 400 faster/safer.
SA poles do not replace ice axes.
They’re used entirely differently, and they take practice to be effective. And that effectiveness is caveated…
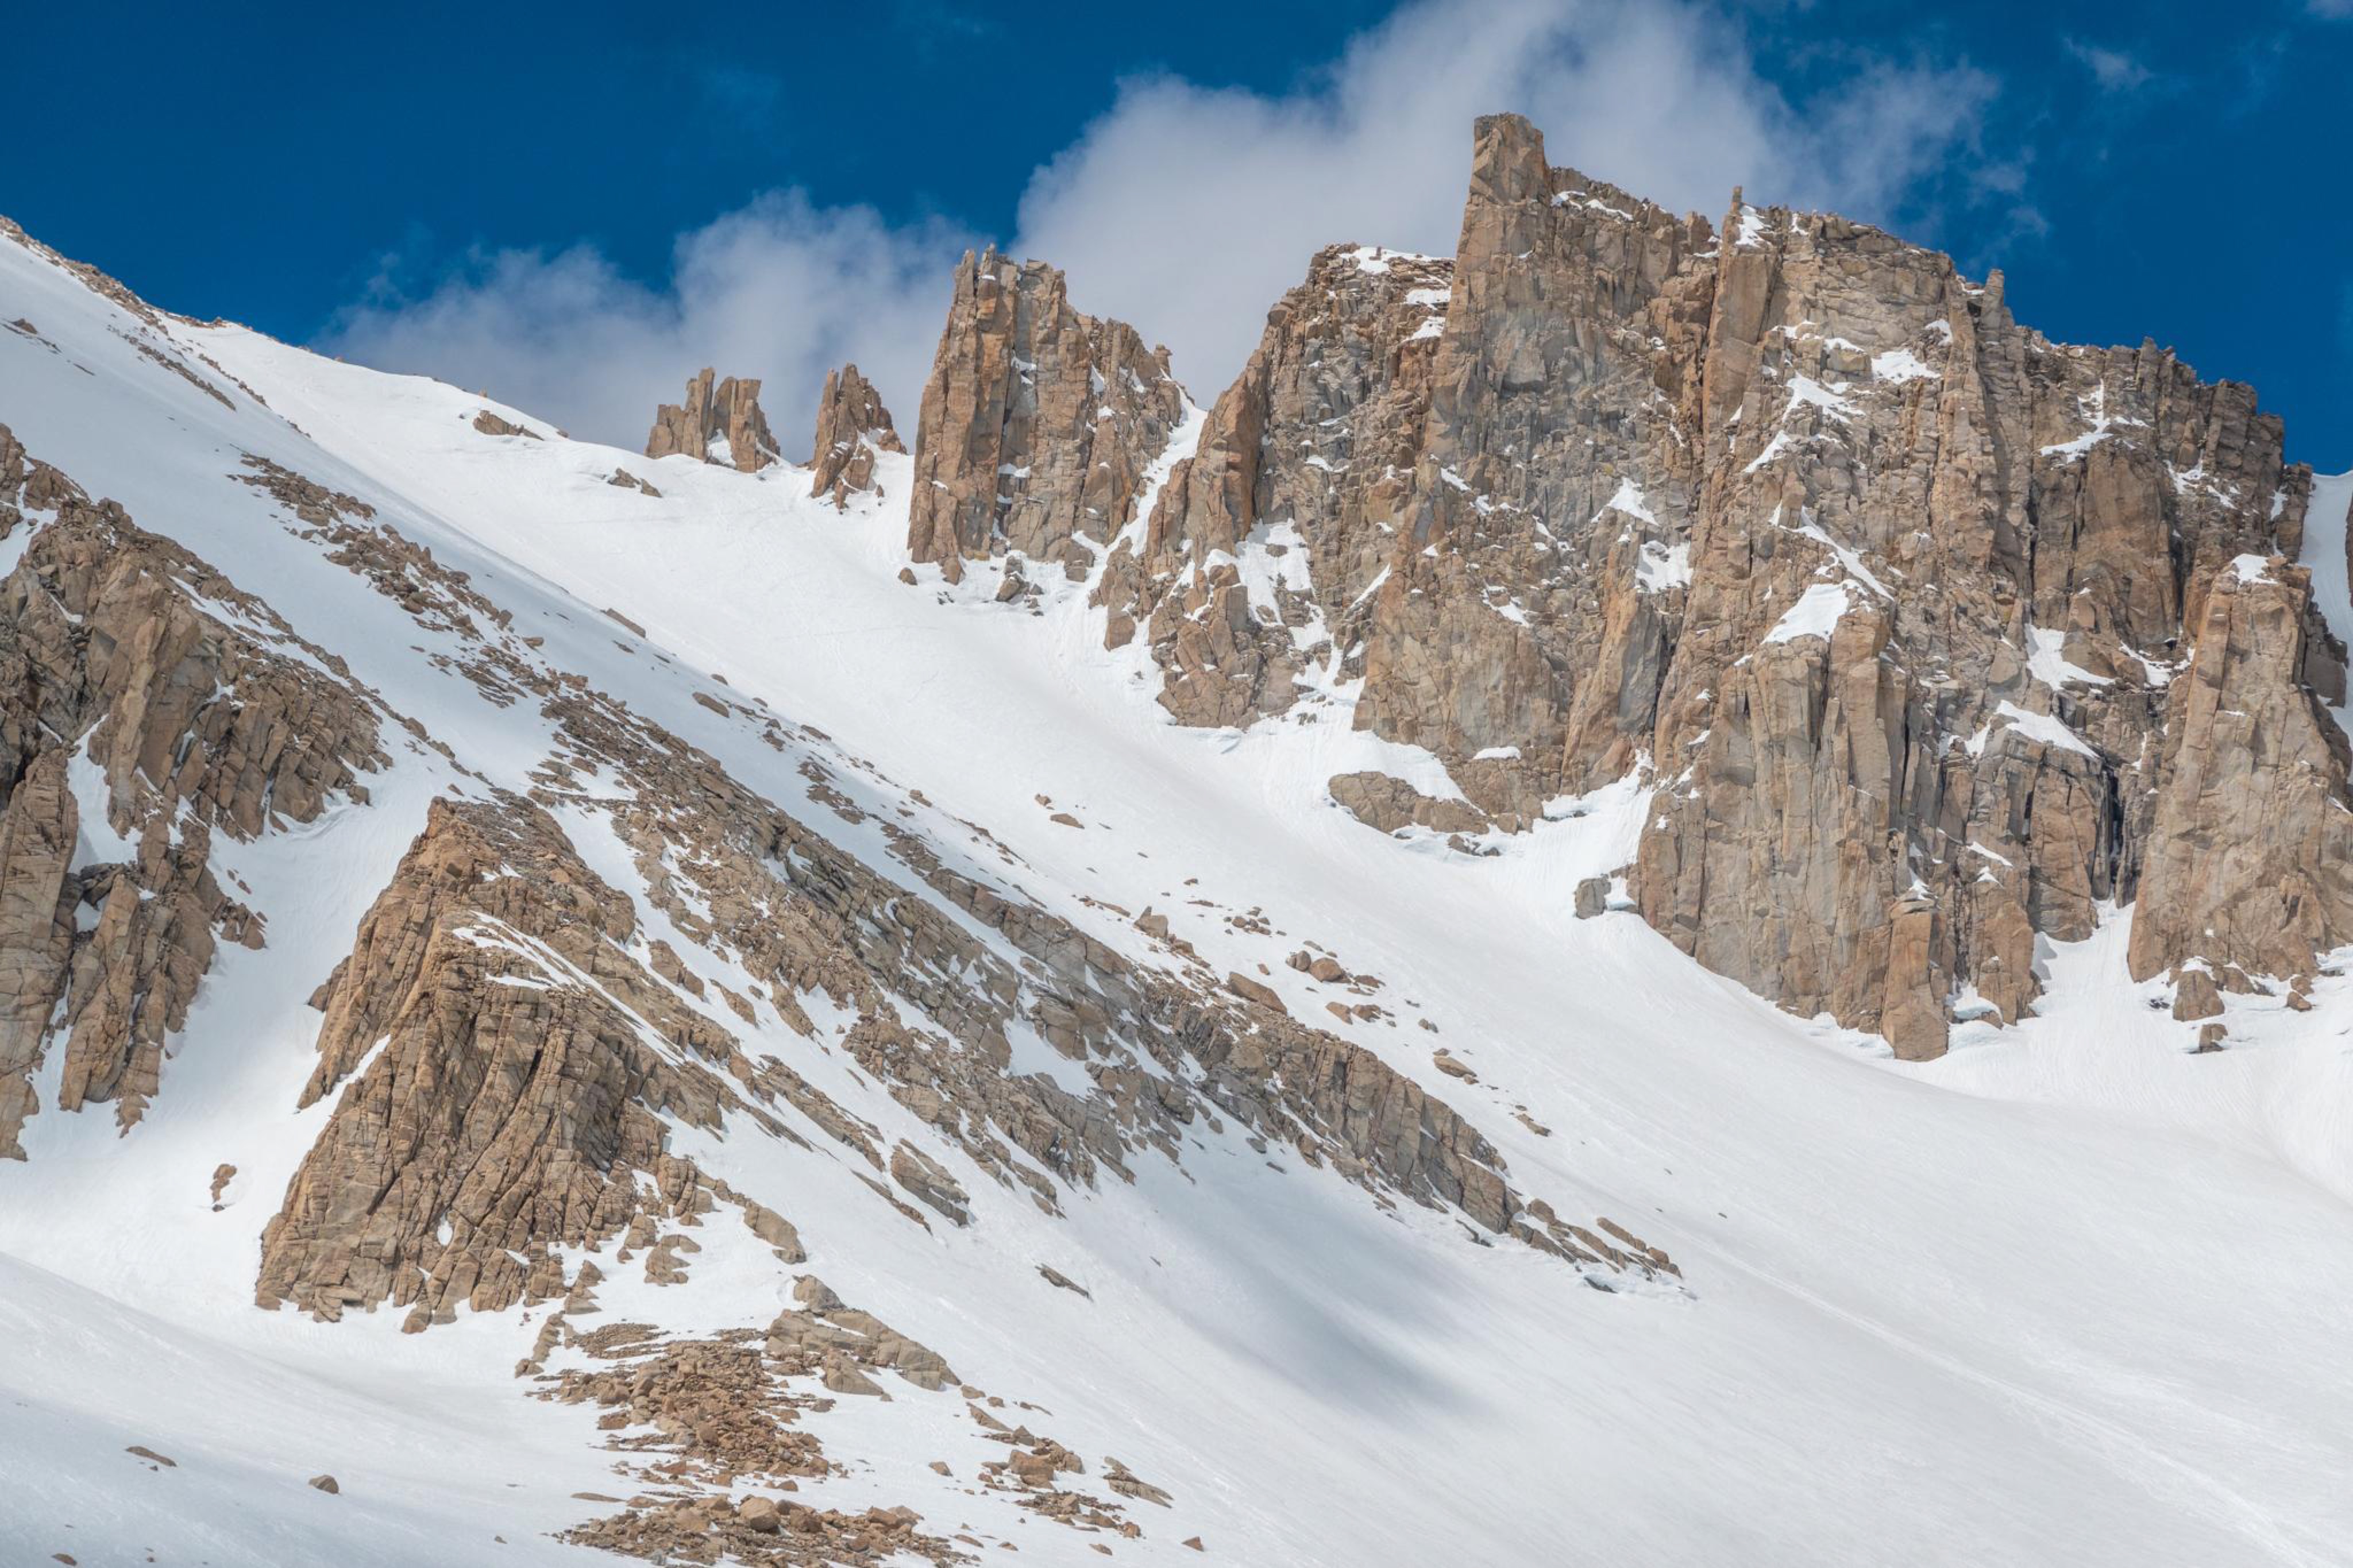
This is the slope to climber’s right of the Switchbacks on 04.17.2022. The Switchbacks themselves were snowed-in, so the safest route was up (and down) the slope. Because this slope is a NorthEast aspect, it refreezes earlier than would be expected. You can run sun-shade plots in many tools (CalTopo for example) to see when terrain throws shadow over other terrain. This slope begins to refreeze at around 15:00 in April. So if you manage to ascend it when the snow is soft (the opposite of what you should be doing, but people do this frequently), and you move too slowly once above it, it very well may be refrozen for your descent, and if all you have are microspikes, you’re going to be in some trouble.
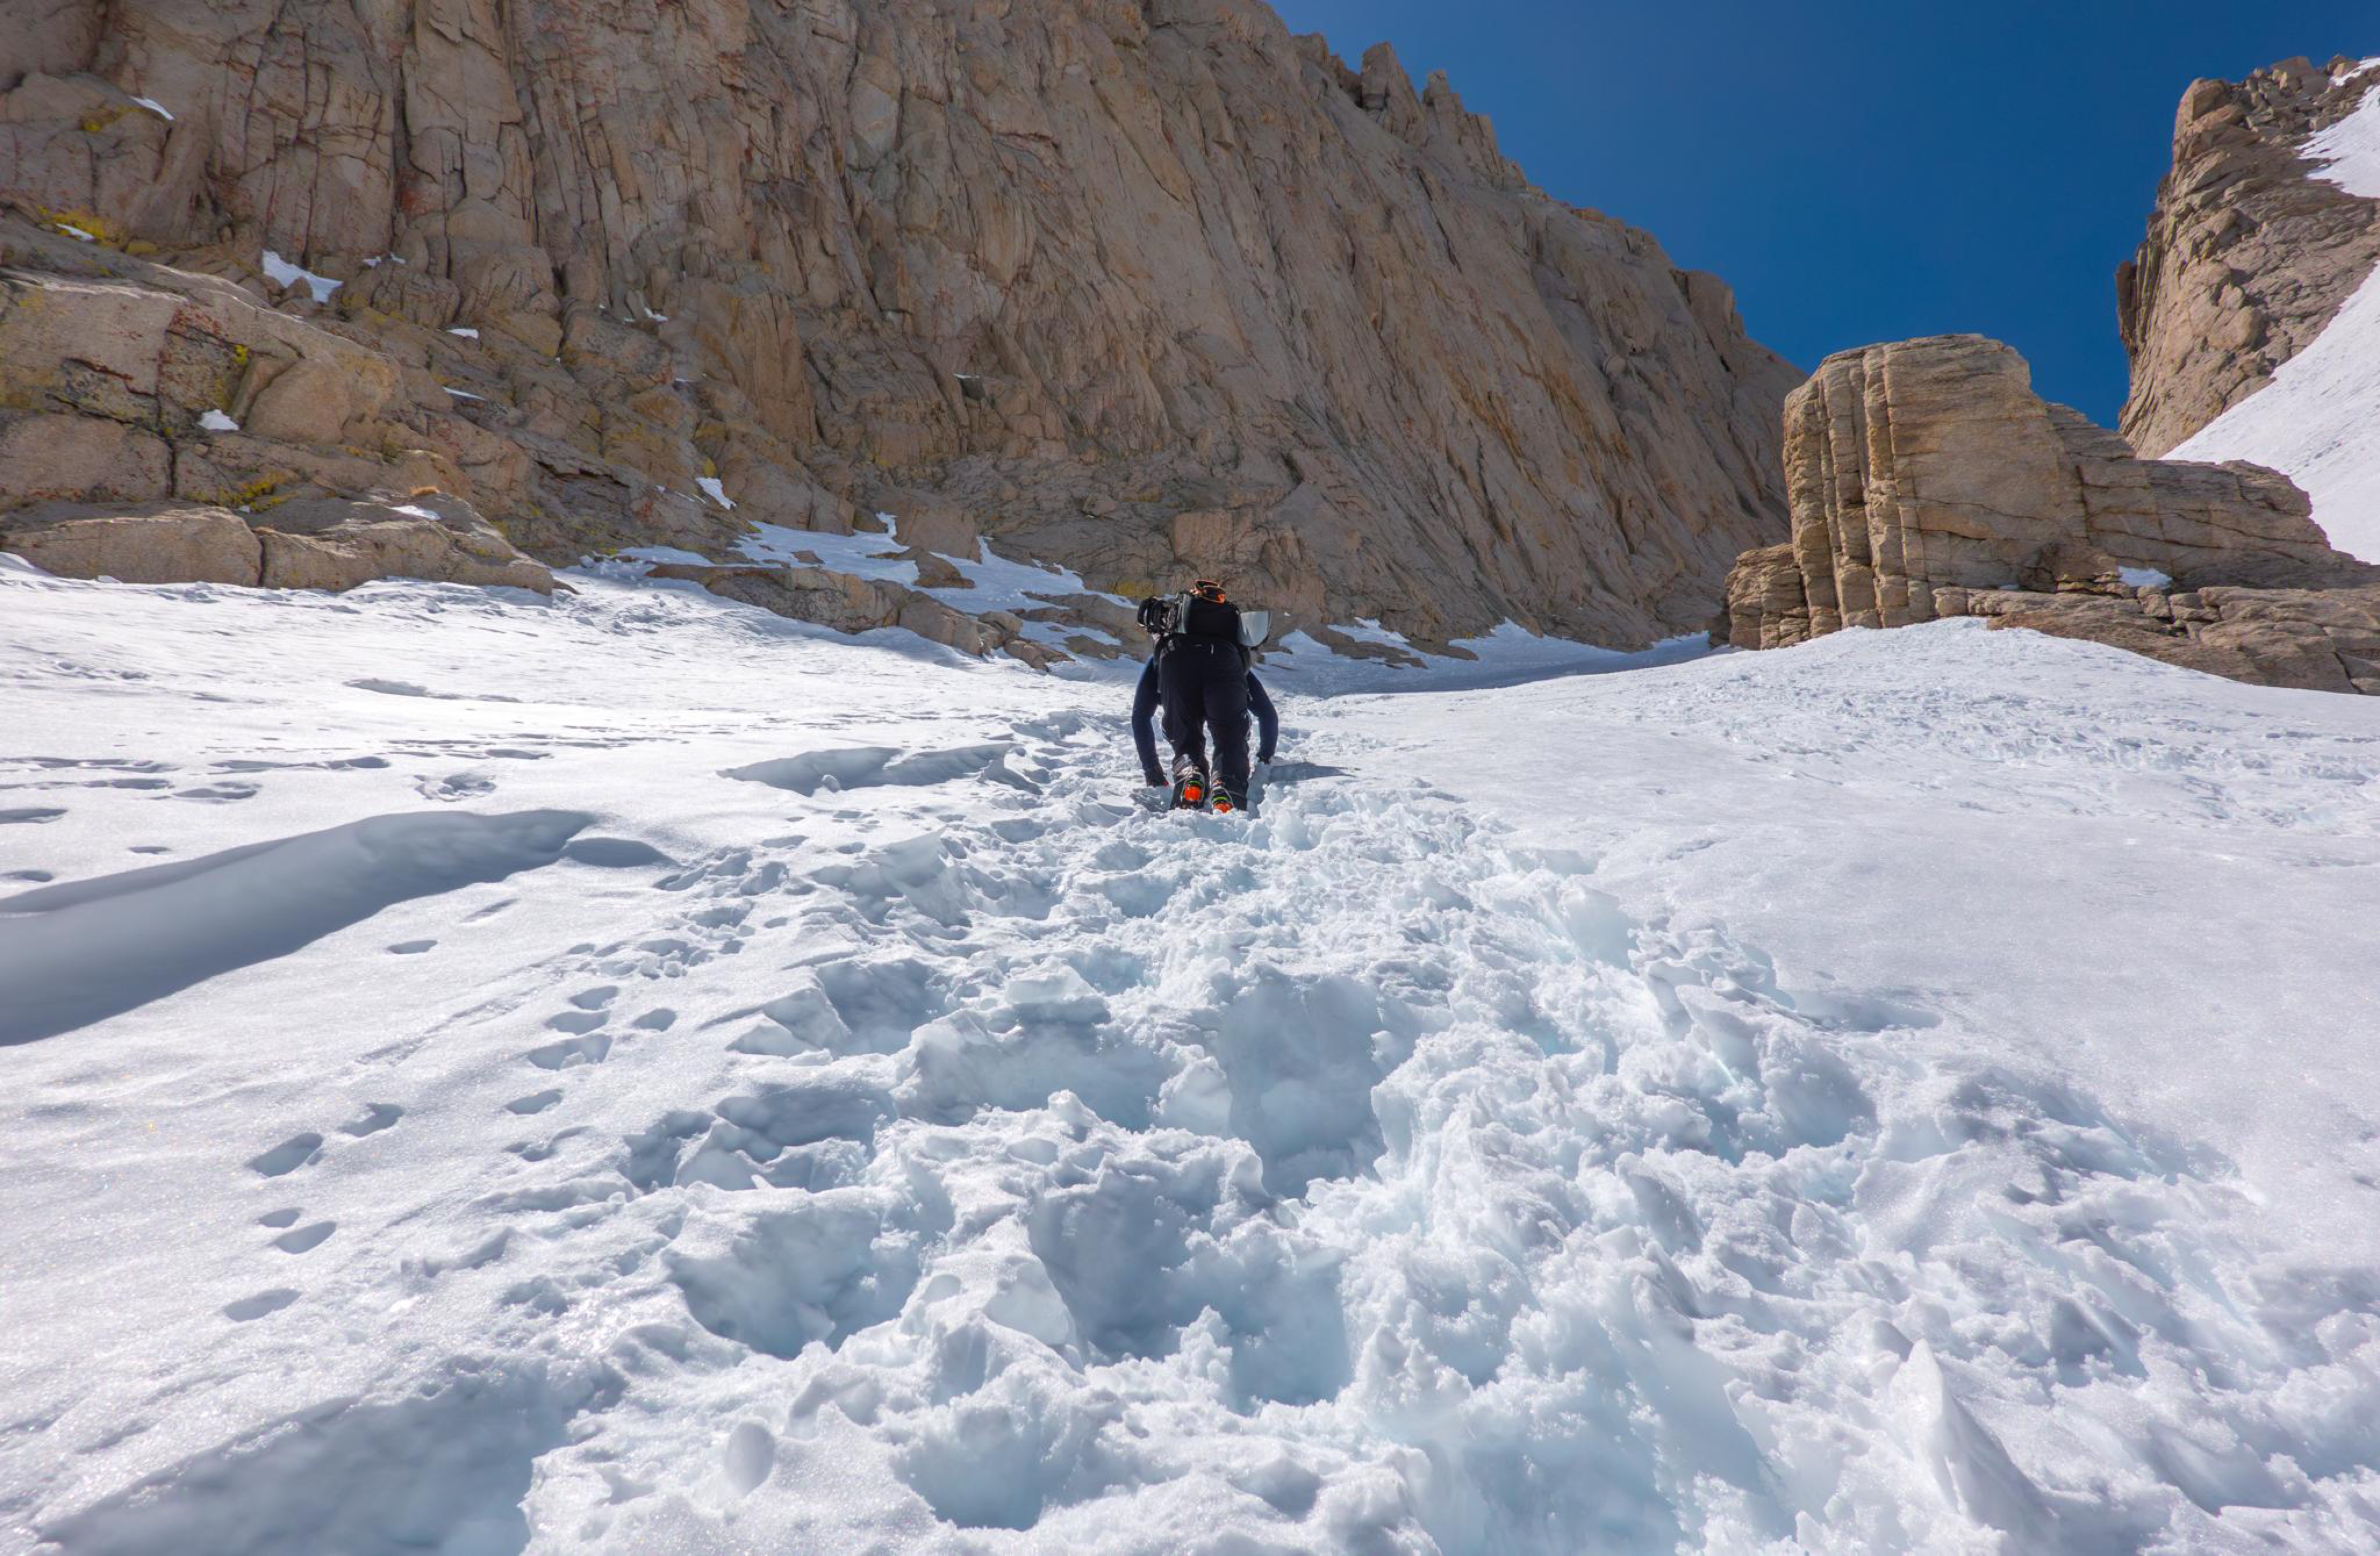
Pat ascending the Couloir between Iceberg Lake and the Notch on 04.26.2023. We got a late start from the below the Portal that day. You can already see the shadows creeping into the couloir above. Our goal was to ski from The Notch, but we called it early because we didn’t want to ski on 37° alpine ice, and dropped at about 13700, then skied all the way to the Meysan Gate on perfect corn.
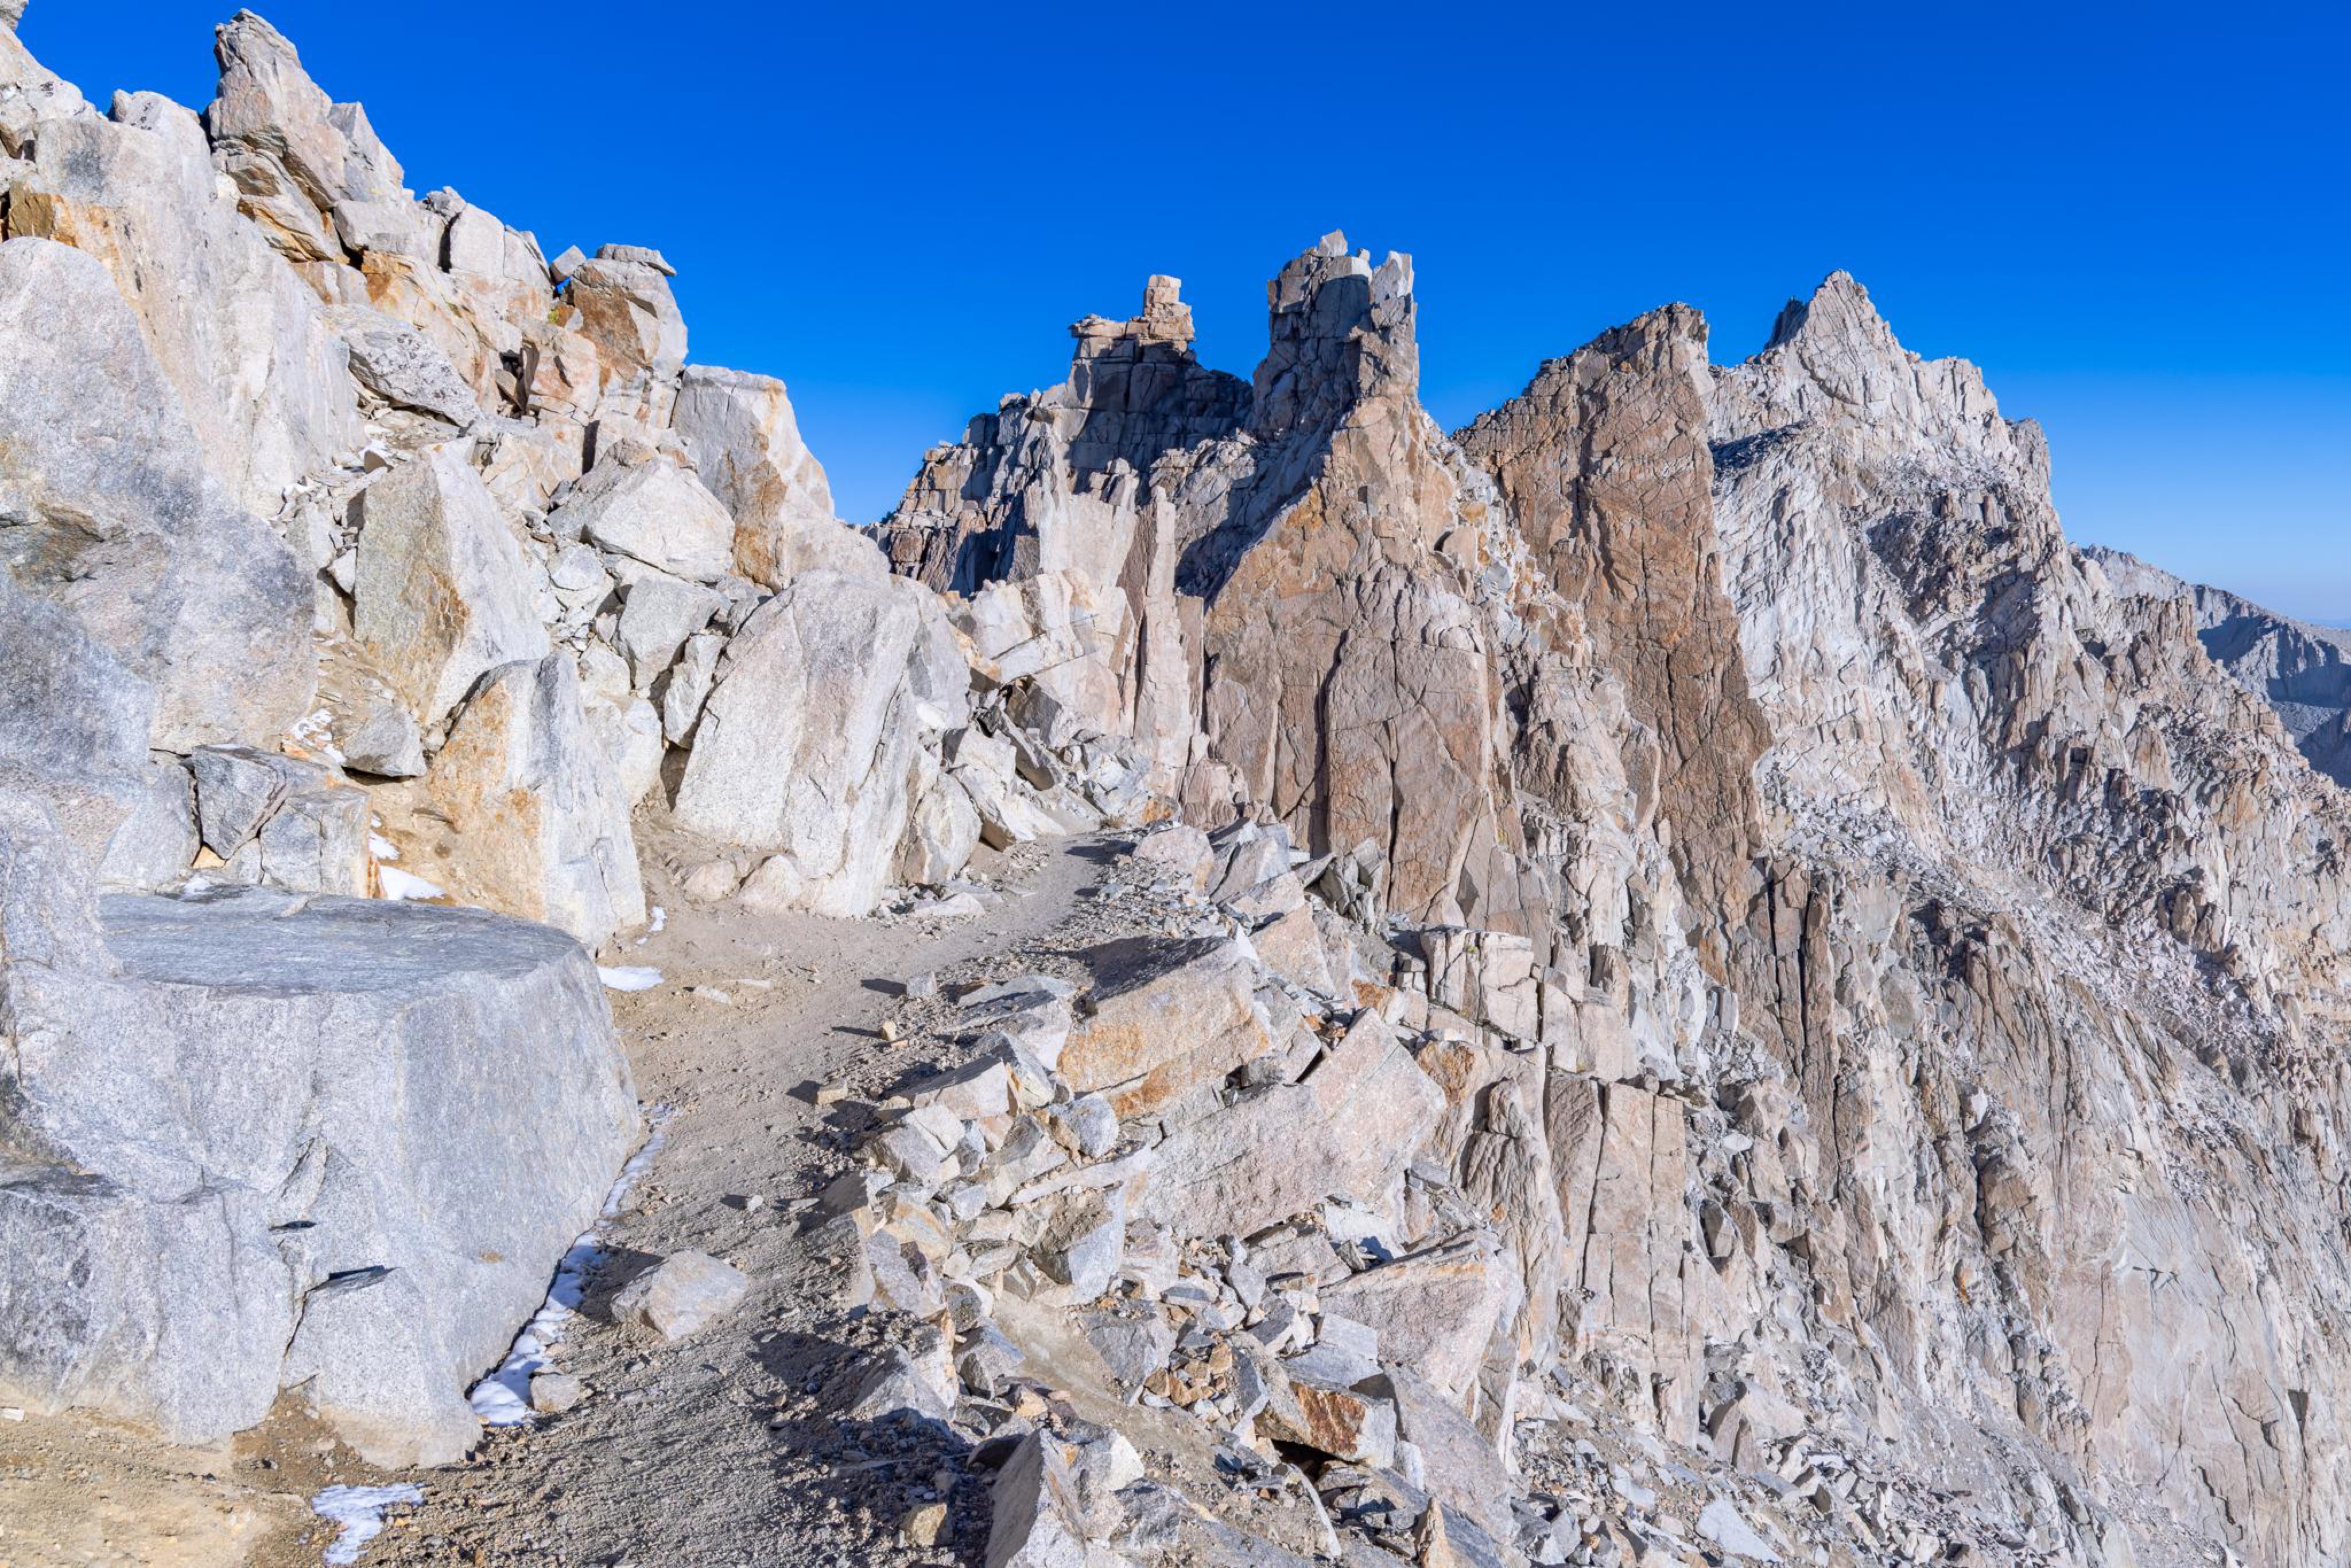
(If there was a little bit of ice glazing the dirt and no sections of snow slopes perched over deadly fall/lines that needed to be traversed).
This is a great example of a flat trail in not-flat alpine terrain. It’s on the Main Trail at the end of the last long switchback of the 99 Switchbacks, right before Trail Crest. When this has a glazing of ice on it in a sea of rock elsewhere on the trail, sure, some people find some comfort using microspikes in places like this.
If there’s not enough consolidated and firm snow to fill in all of the talus and create a steep snow slope that you must ascend and one that you can actually fall down, then you’re likely on a flat trail, surrounded by rocks, like this one, where crampons and an ice ax are fairly useless.
A good rule of thumb is that if you could negotiate a section of trail without microspikes, then it’s microspike terrain.
Microspikes are convenience items, not mountain safety items.
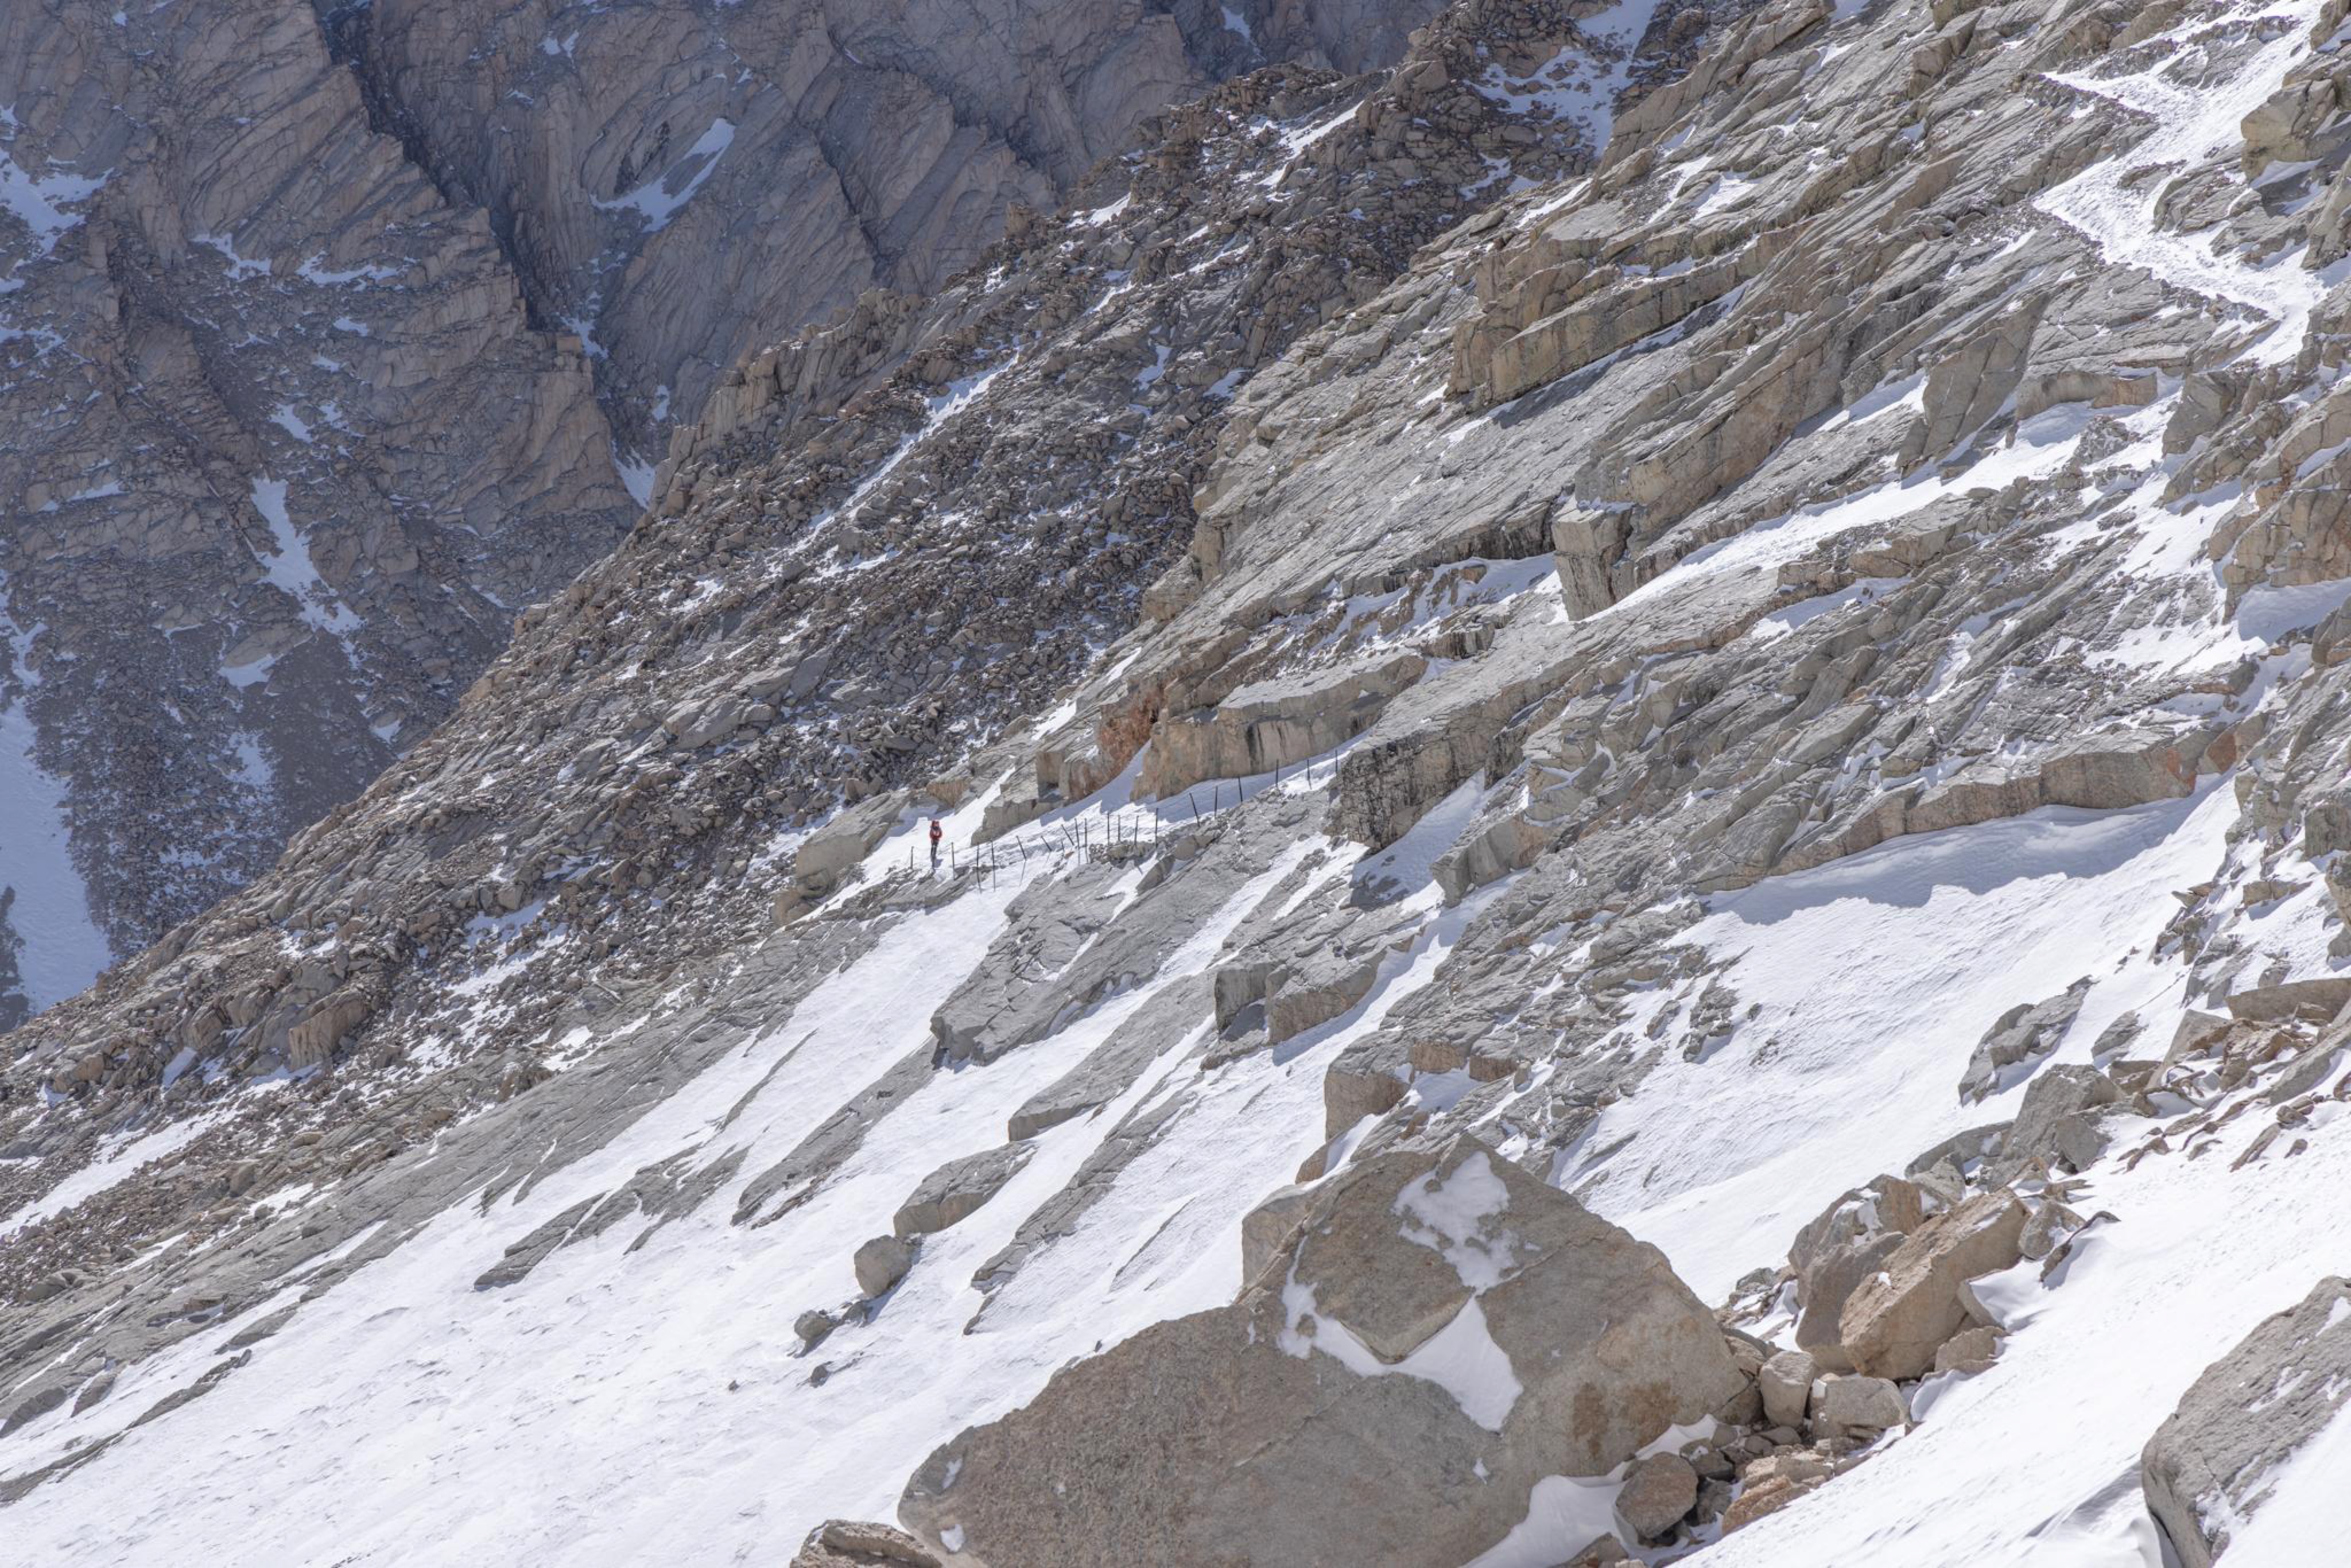
The Cable Section of the Switchbacks on 04.17.2022. I stood and watched this person consider it, then turn around and descend. Good choice. When I took this photo, I was actively involved in a rescue of another person who had not made that decision and had proceeded up, and had subsequently fallen, suffering many blunt force injuries. This person was helicoptered out the following morning.
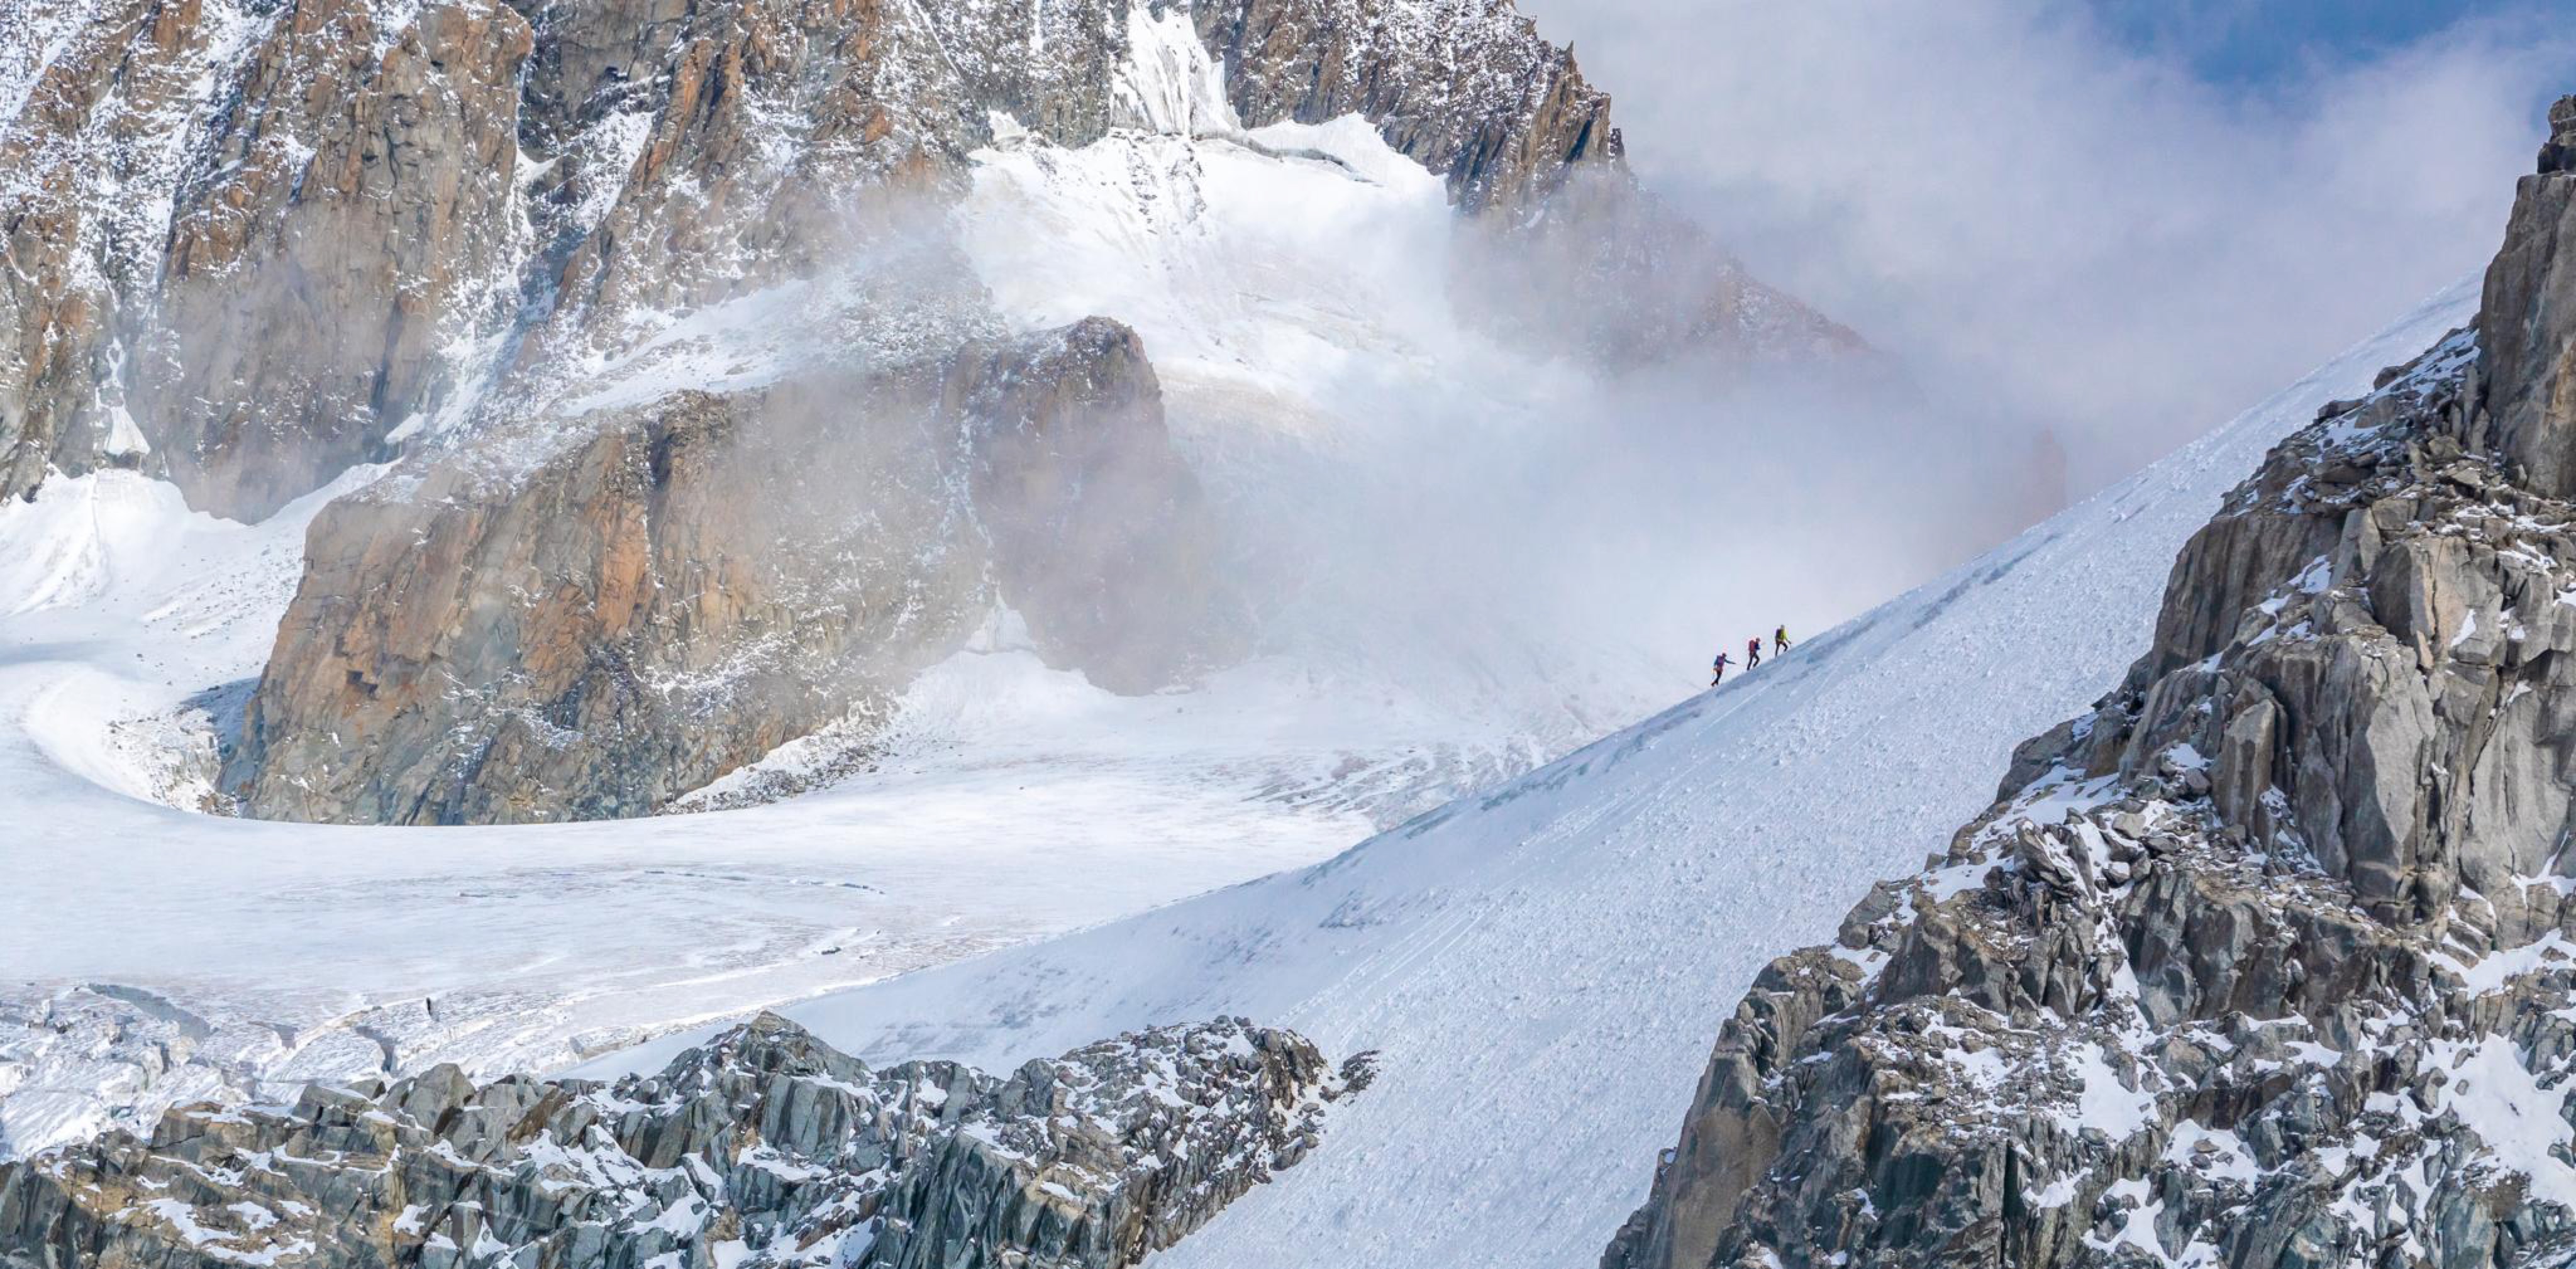
This is a route in the Mont Blanc Massif of the French Alps i shot while returning from climbing a completely unrelated route. I've "climbed" this route as well, though. (In quotes because this route is very simple and is more of walk you could die on...)Those people are definitely wearing crampons, but they are also and definitely should NOT be roped up without placing intermediate protection, as it's plain to see they are not. (they're roped up way too close to each other for that. This is referred to as a "suicide pact"; if one falls, they all do...)
You see all kinds of whacko stuff in the French Alps...
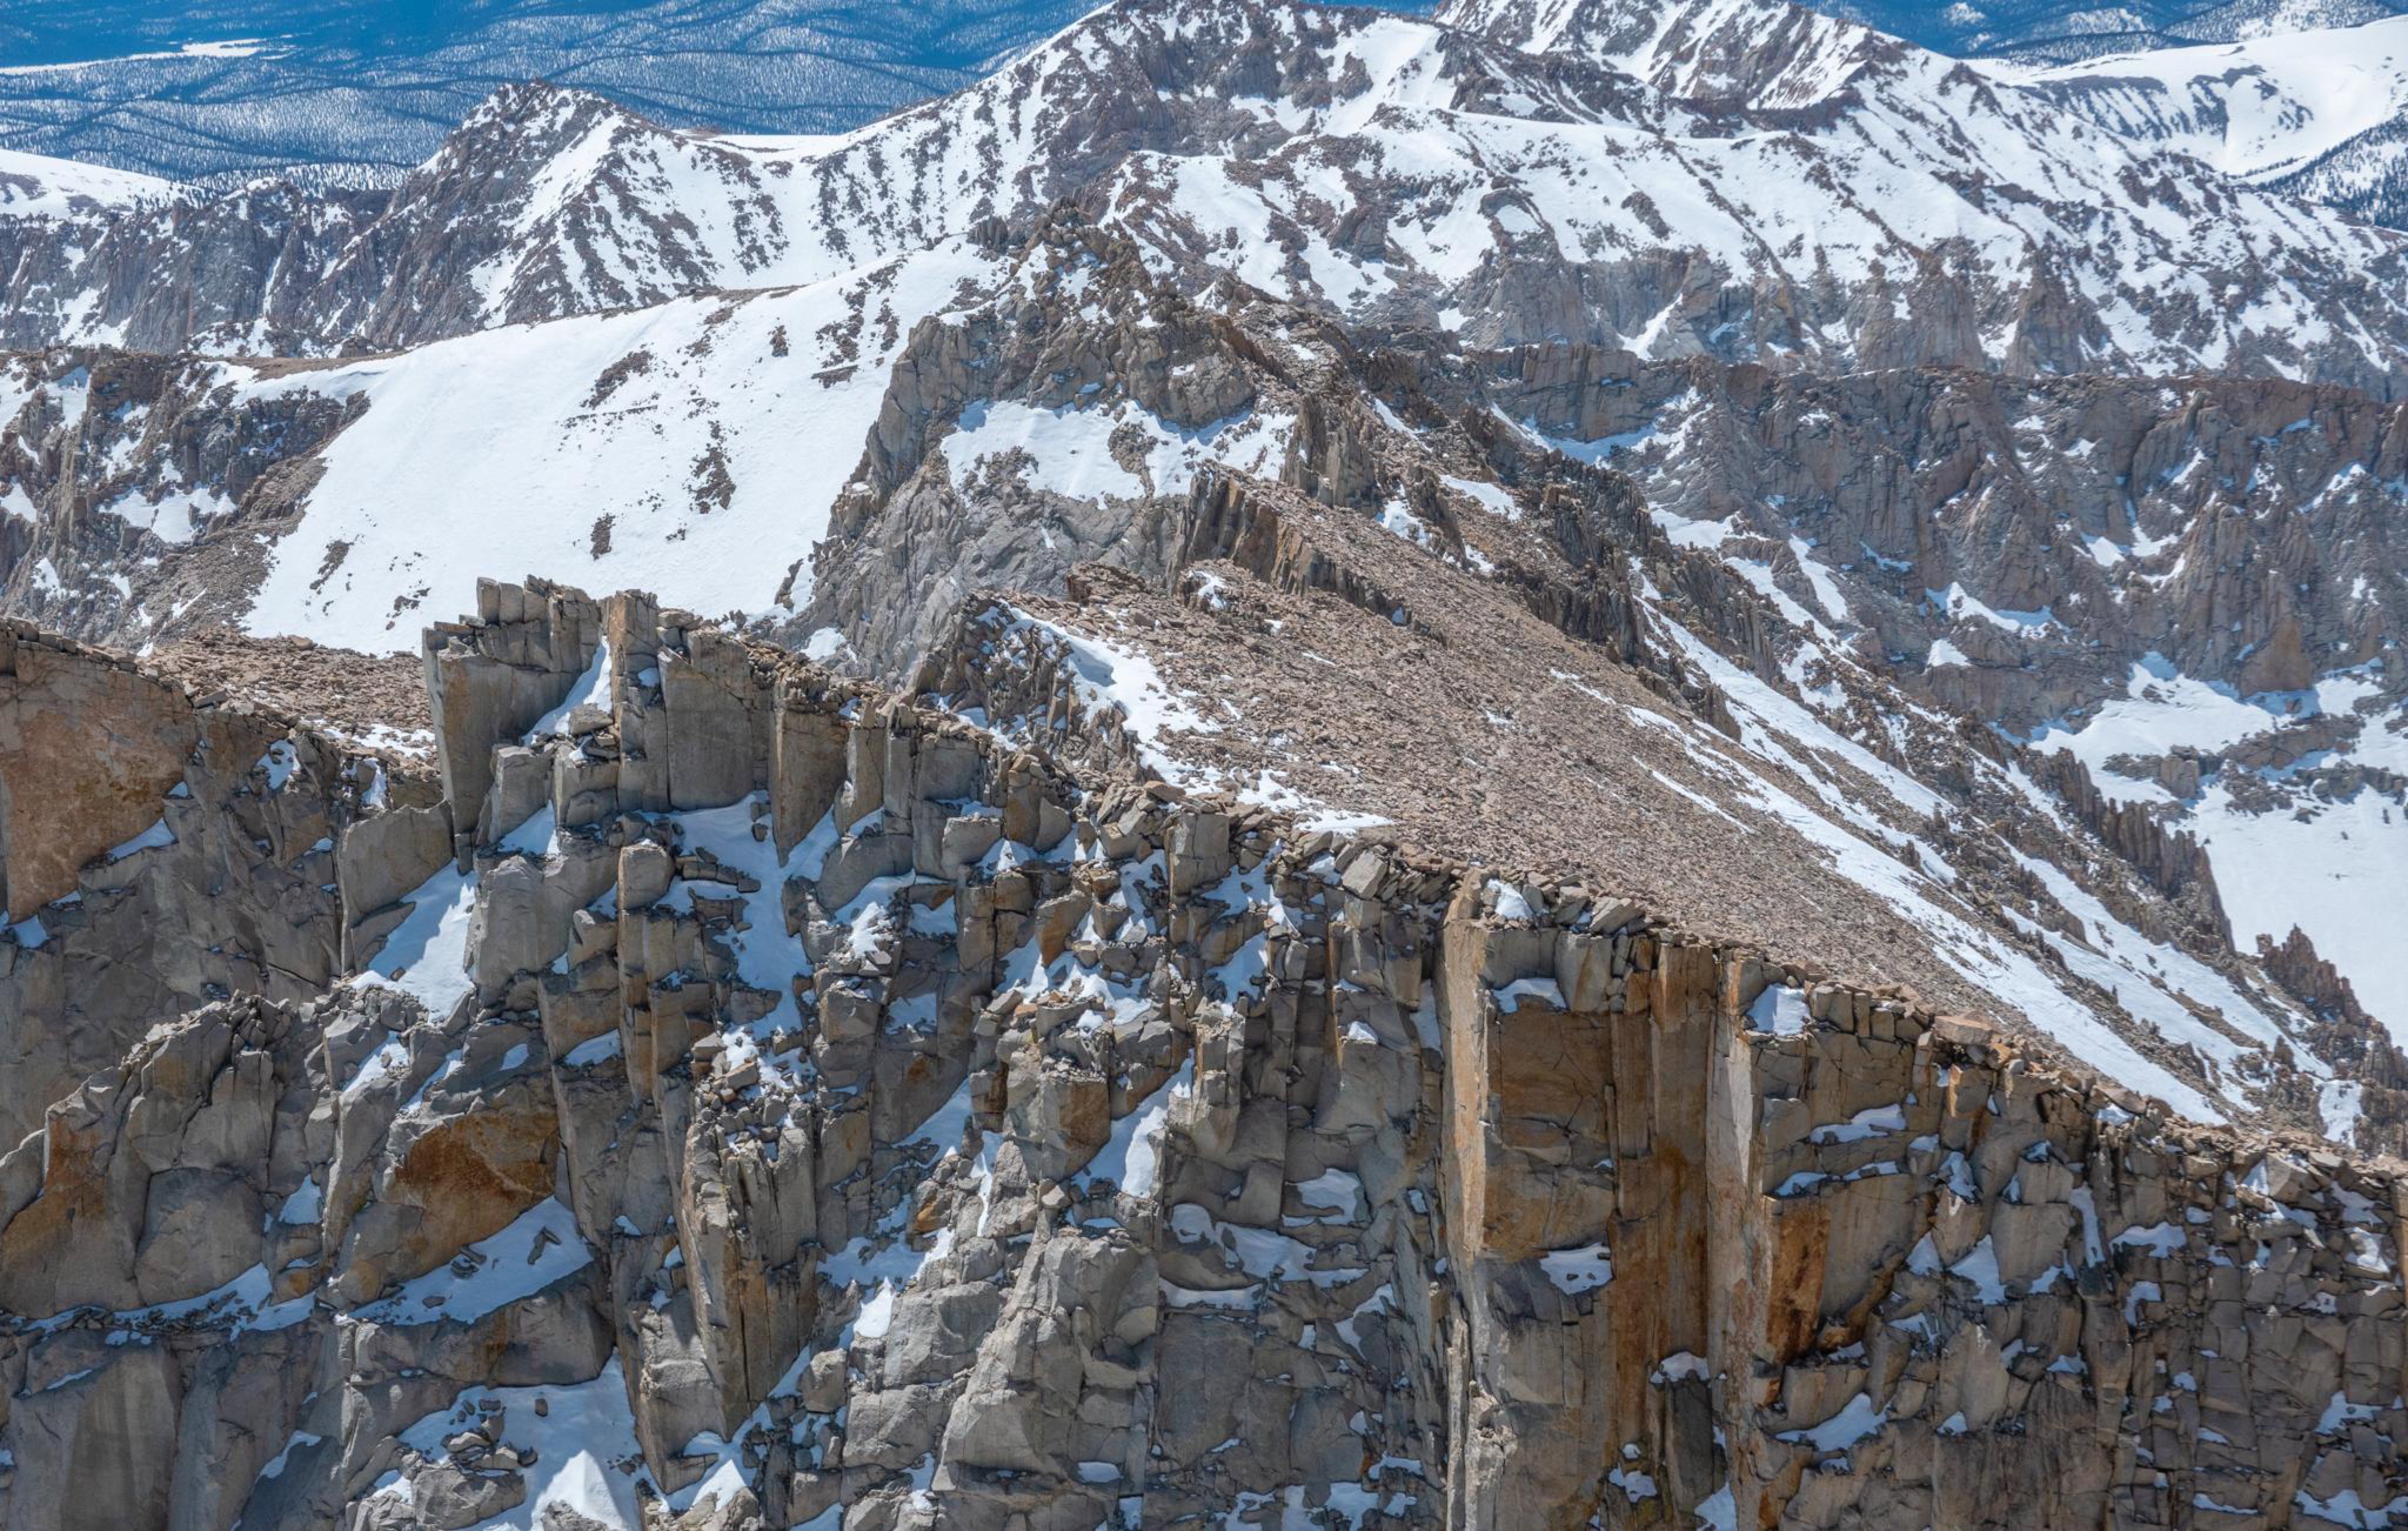
A great example of when you need crampons for part of the route and just shoes for other parts of the route, even when the part you don’t them for is higher than the part you do need them for. There’s much more to mountain conditions than simply elevation. In this case; aspect. The West Slope gets raked by winds from the storm cycles we receive (the vast majority of which spin down SouthEast from The Gulf Of Alaska) and receives lots of direct solar radiation. It often is bare while the rest of the mountain is buried. Around the corner from where the rock is bare is where the shot of Pat above was taken. Snow typically lingers in that mile-long section because the successive gullies there limit the amount of solar radiation that can directly affect them. So if you see photos from the summit that look like this and think “there’s not much snow at 13500 on Whitney”, you’re not getting the full picture.
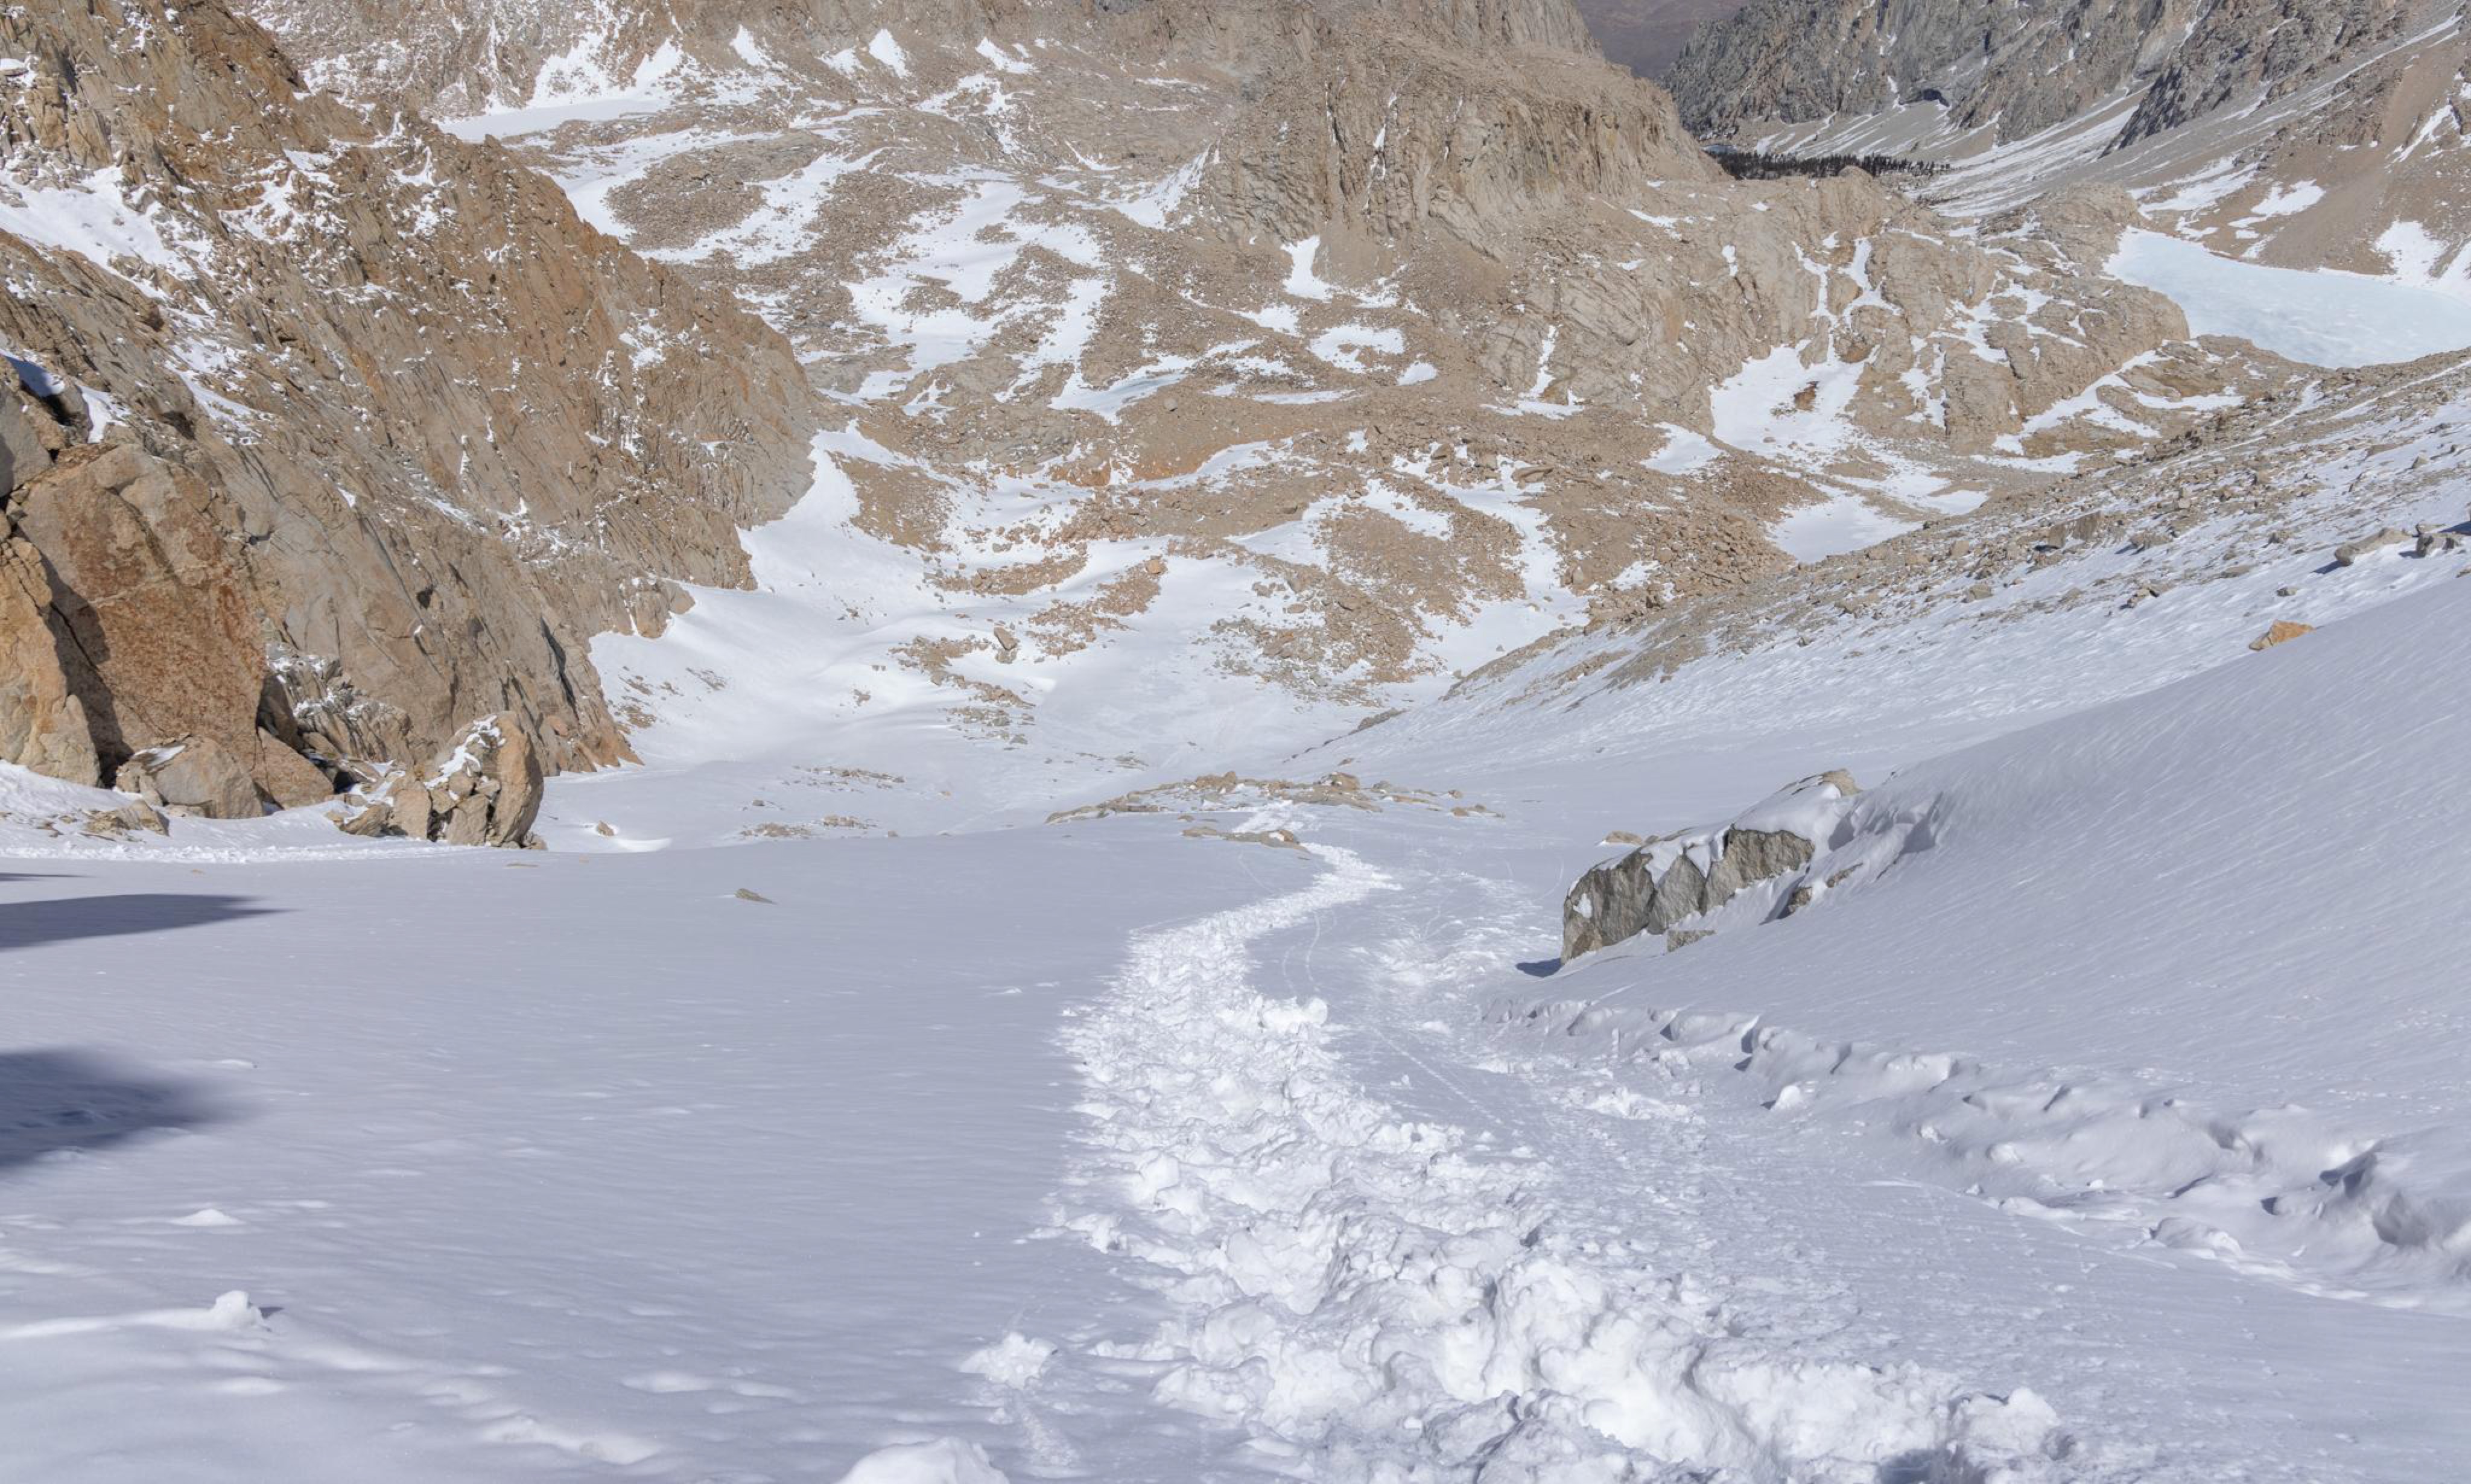
Looking down the slope to climber’s right of the Switchbacks on 04.17.2022. You can see the very top of the central rock band that bisects the face. Uncontrolled falls that started in poorly-placed positions get funneled into that rock band. It’s been the cause of injuries.
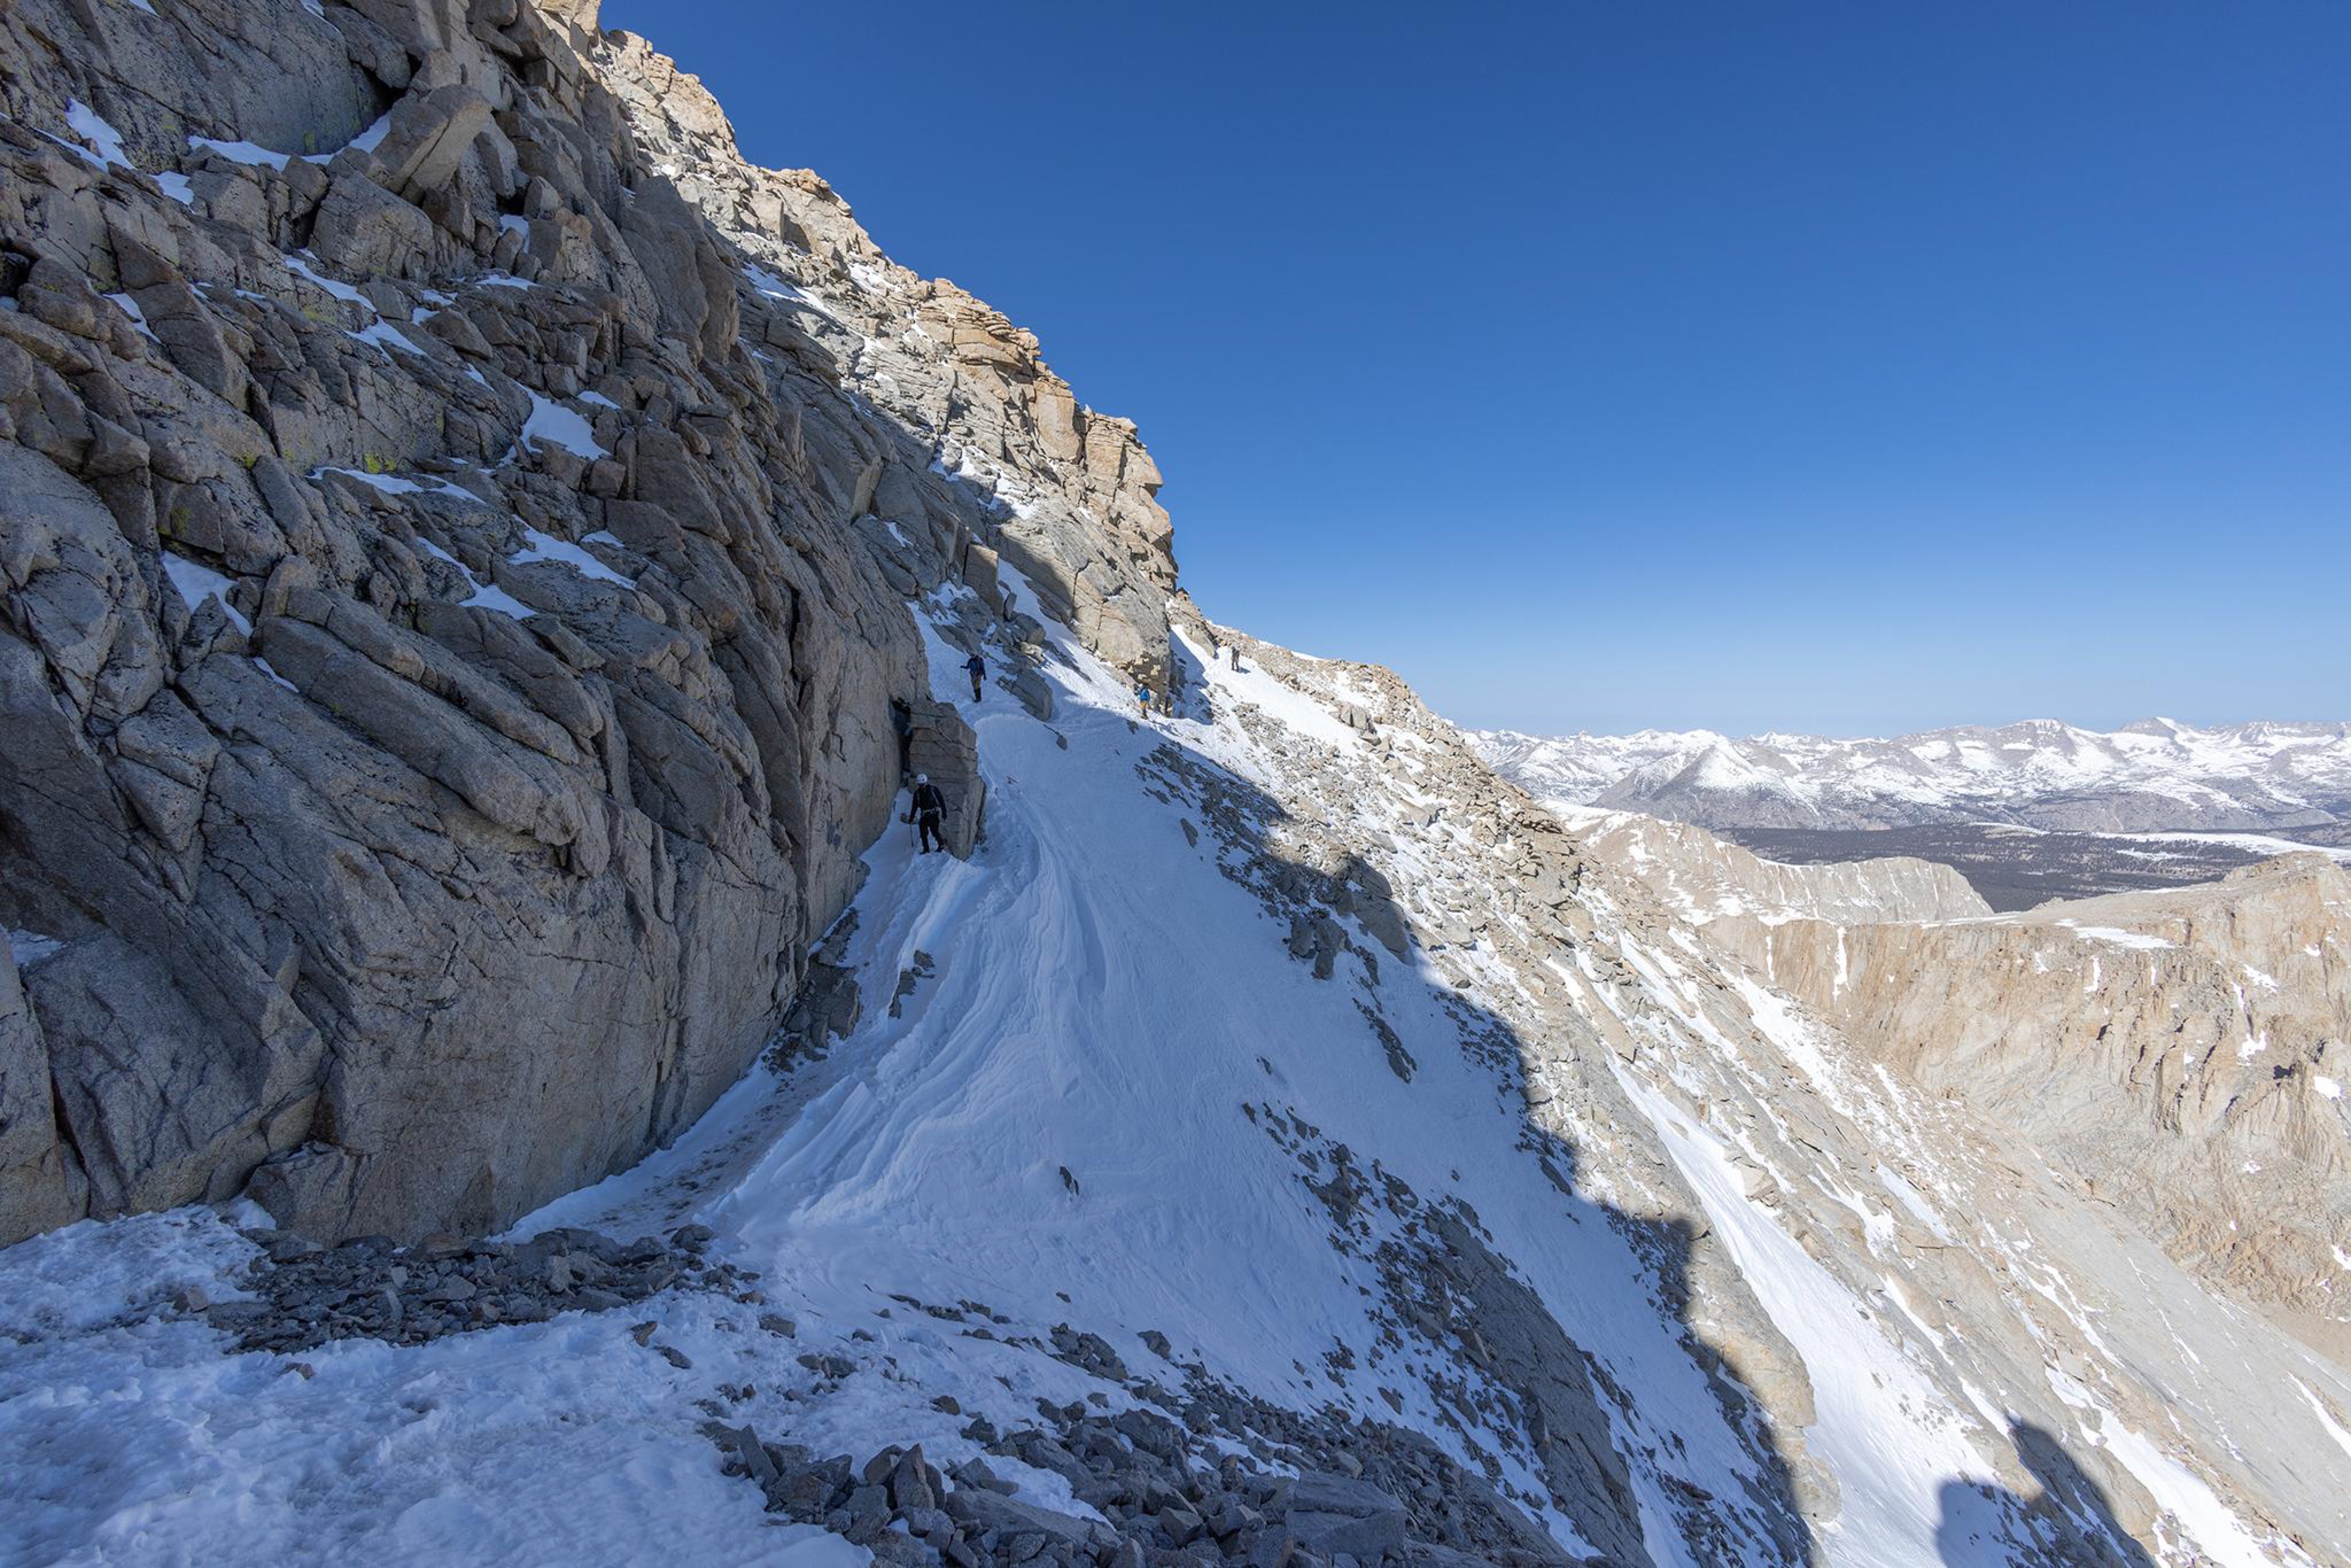
This is the (in)famous “Easy Walkoff”, on 04.30.2022. It’s been the site of more fatalities than any other single place on the mountain. This should basically never be done with snow on it. It’s a sheltered, north-facing gully at 14200 feet. It’s subject to regular melt-freeze cycles, which creates ice that usually gets snowed on again. This hidden layer of 40º ice, coupled with people using insufficient gear, coupled with the fact that traverses on steep snow/ice pose an entirely different and less secure mechanic than climbing and down-climbing do, have been the mechanisms of failure here many times. People sometimes go this way because they’re too gripped (scared) to descend the Final 400, which is likely the route they ascended, since it’s actually part of the Mountaineers Route. (The traverse is not, so if you took the Traverse both up and down, you didn’t technically climb the Mountaineers Route). They look down from the summit after completing the Final 400 and think this route is safer. But it’s not, for many reasons.
At least the people in this photo are not roped-up with no intermediate anchors, which I have seen done here (and up The Final 400), which is absolutely horrifying. If you must take this traverse in these conditions, the second best way to do so is to rope up and place intermediate anchors, but this gets a little complex in teams of four for reasons beyond the scope of this post. The FIRST best way to do this is to not do this…
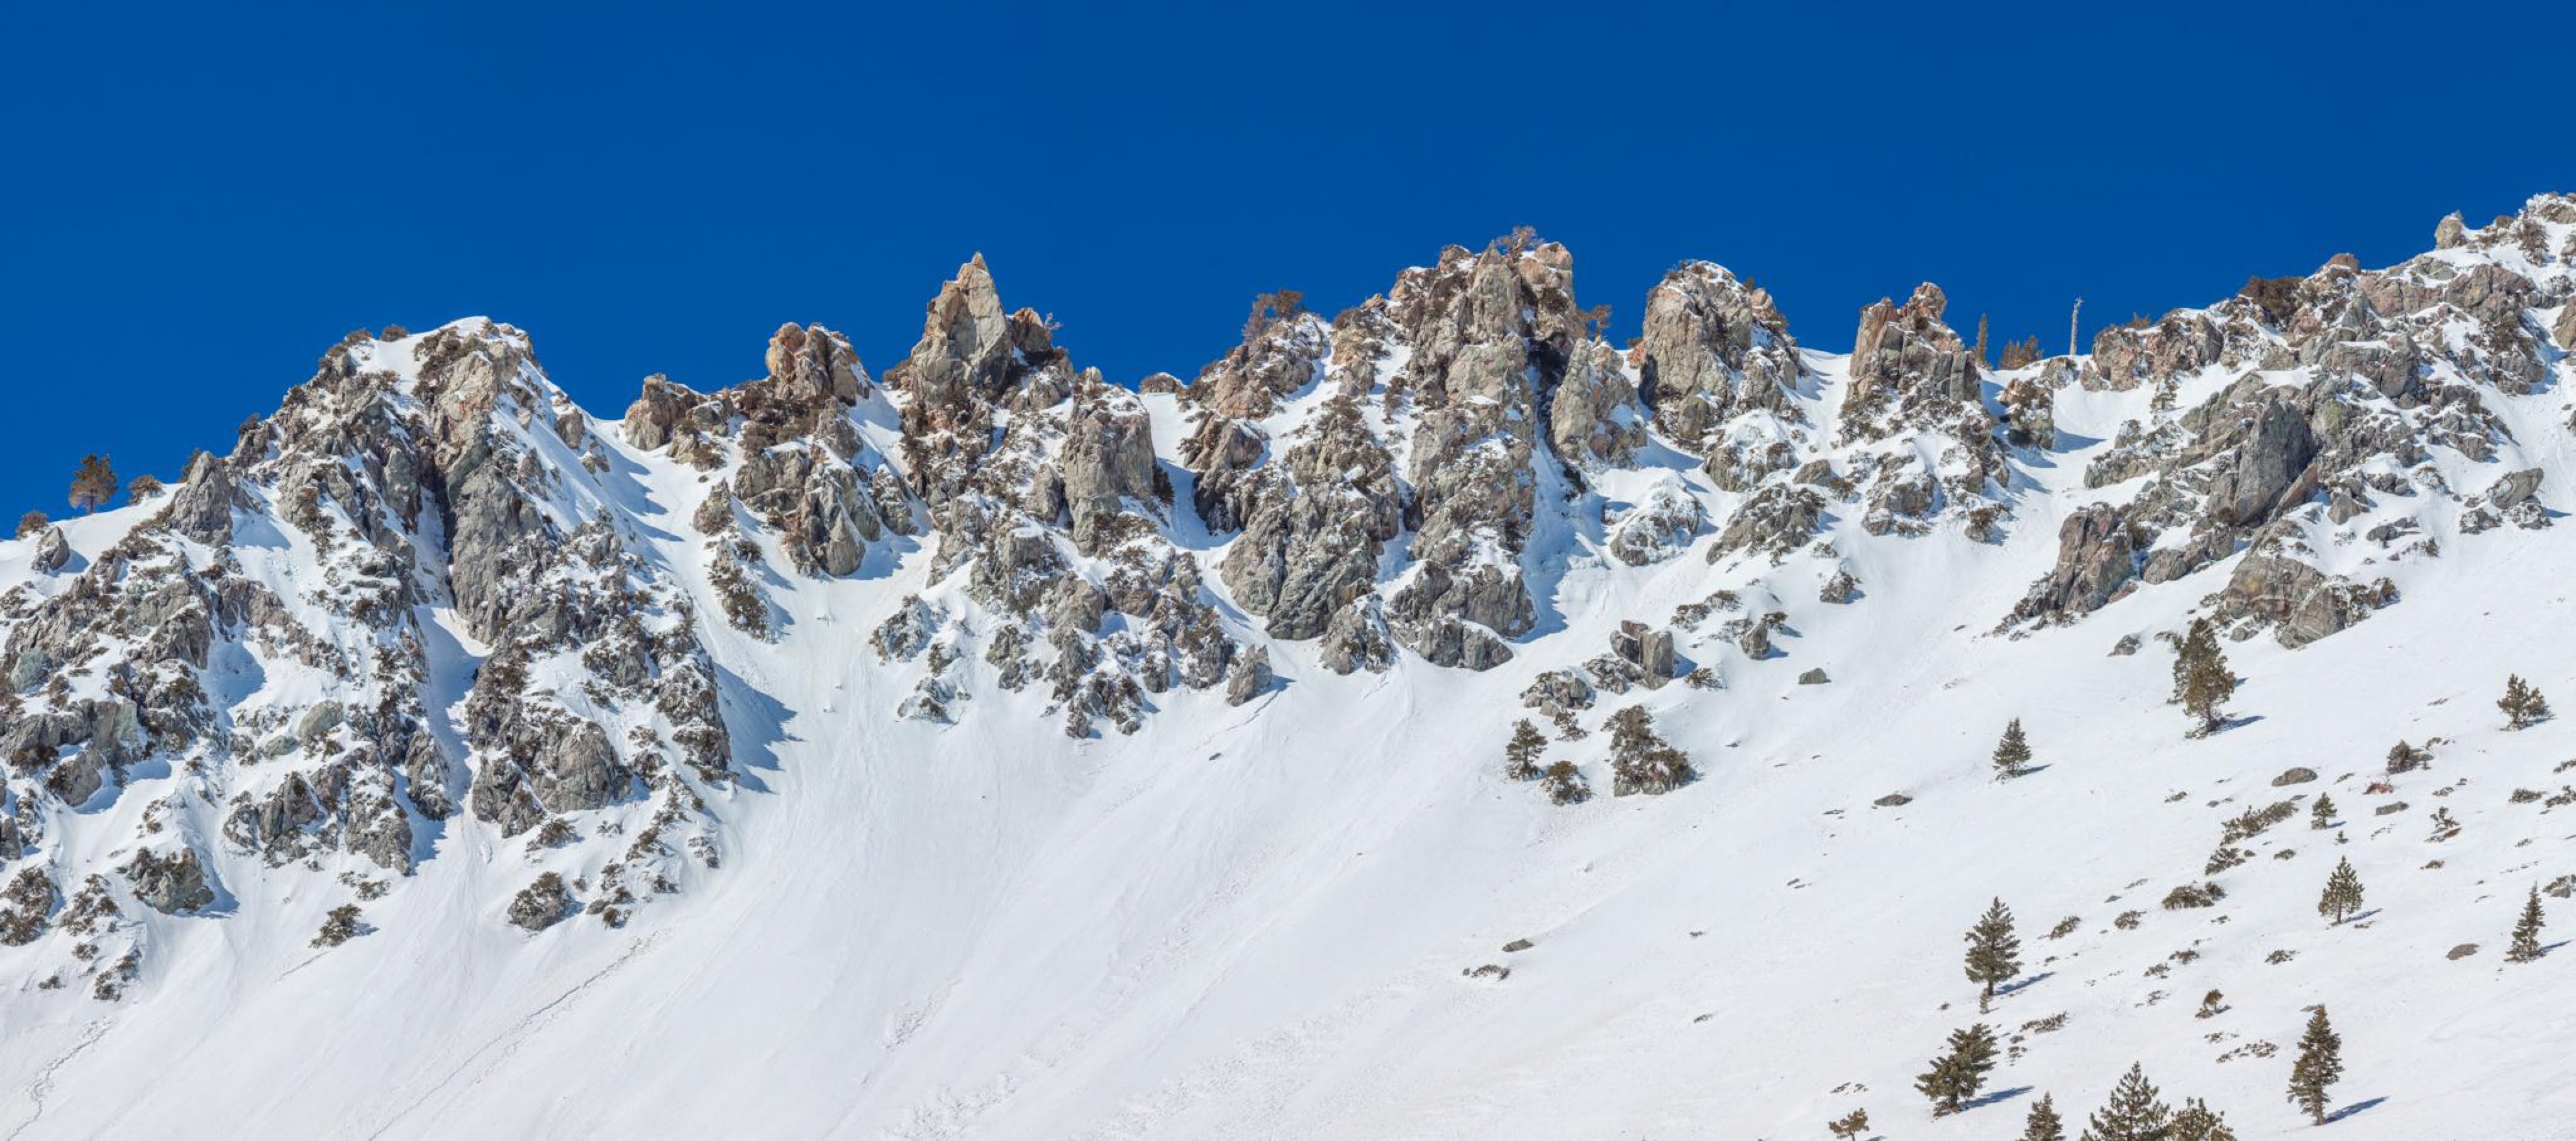
The Chutes at Mount Baldy on 01.27.2023. People fall down these things (and adjacent) on the regular. When these chutes are “in”, they offer some great climbing and skiing, but I’ve seen some crazy things here over the years. Many things microspike-related.
SoCal gonna SoCal…
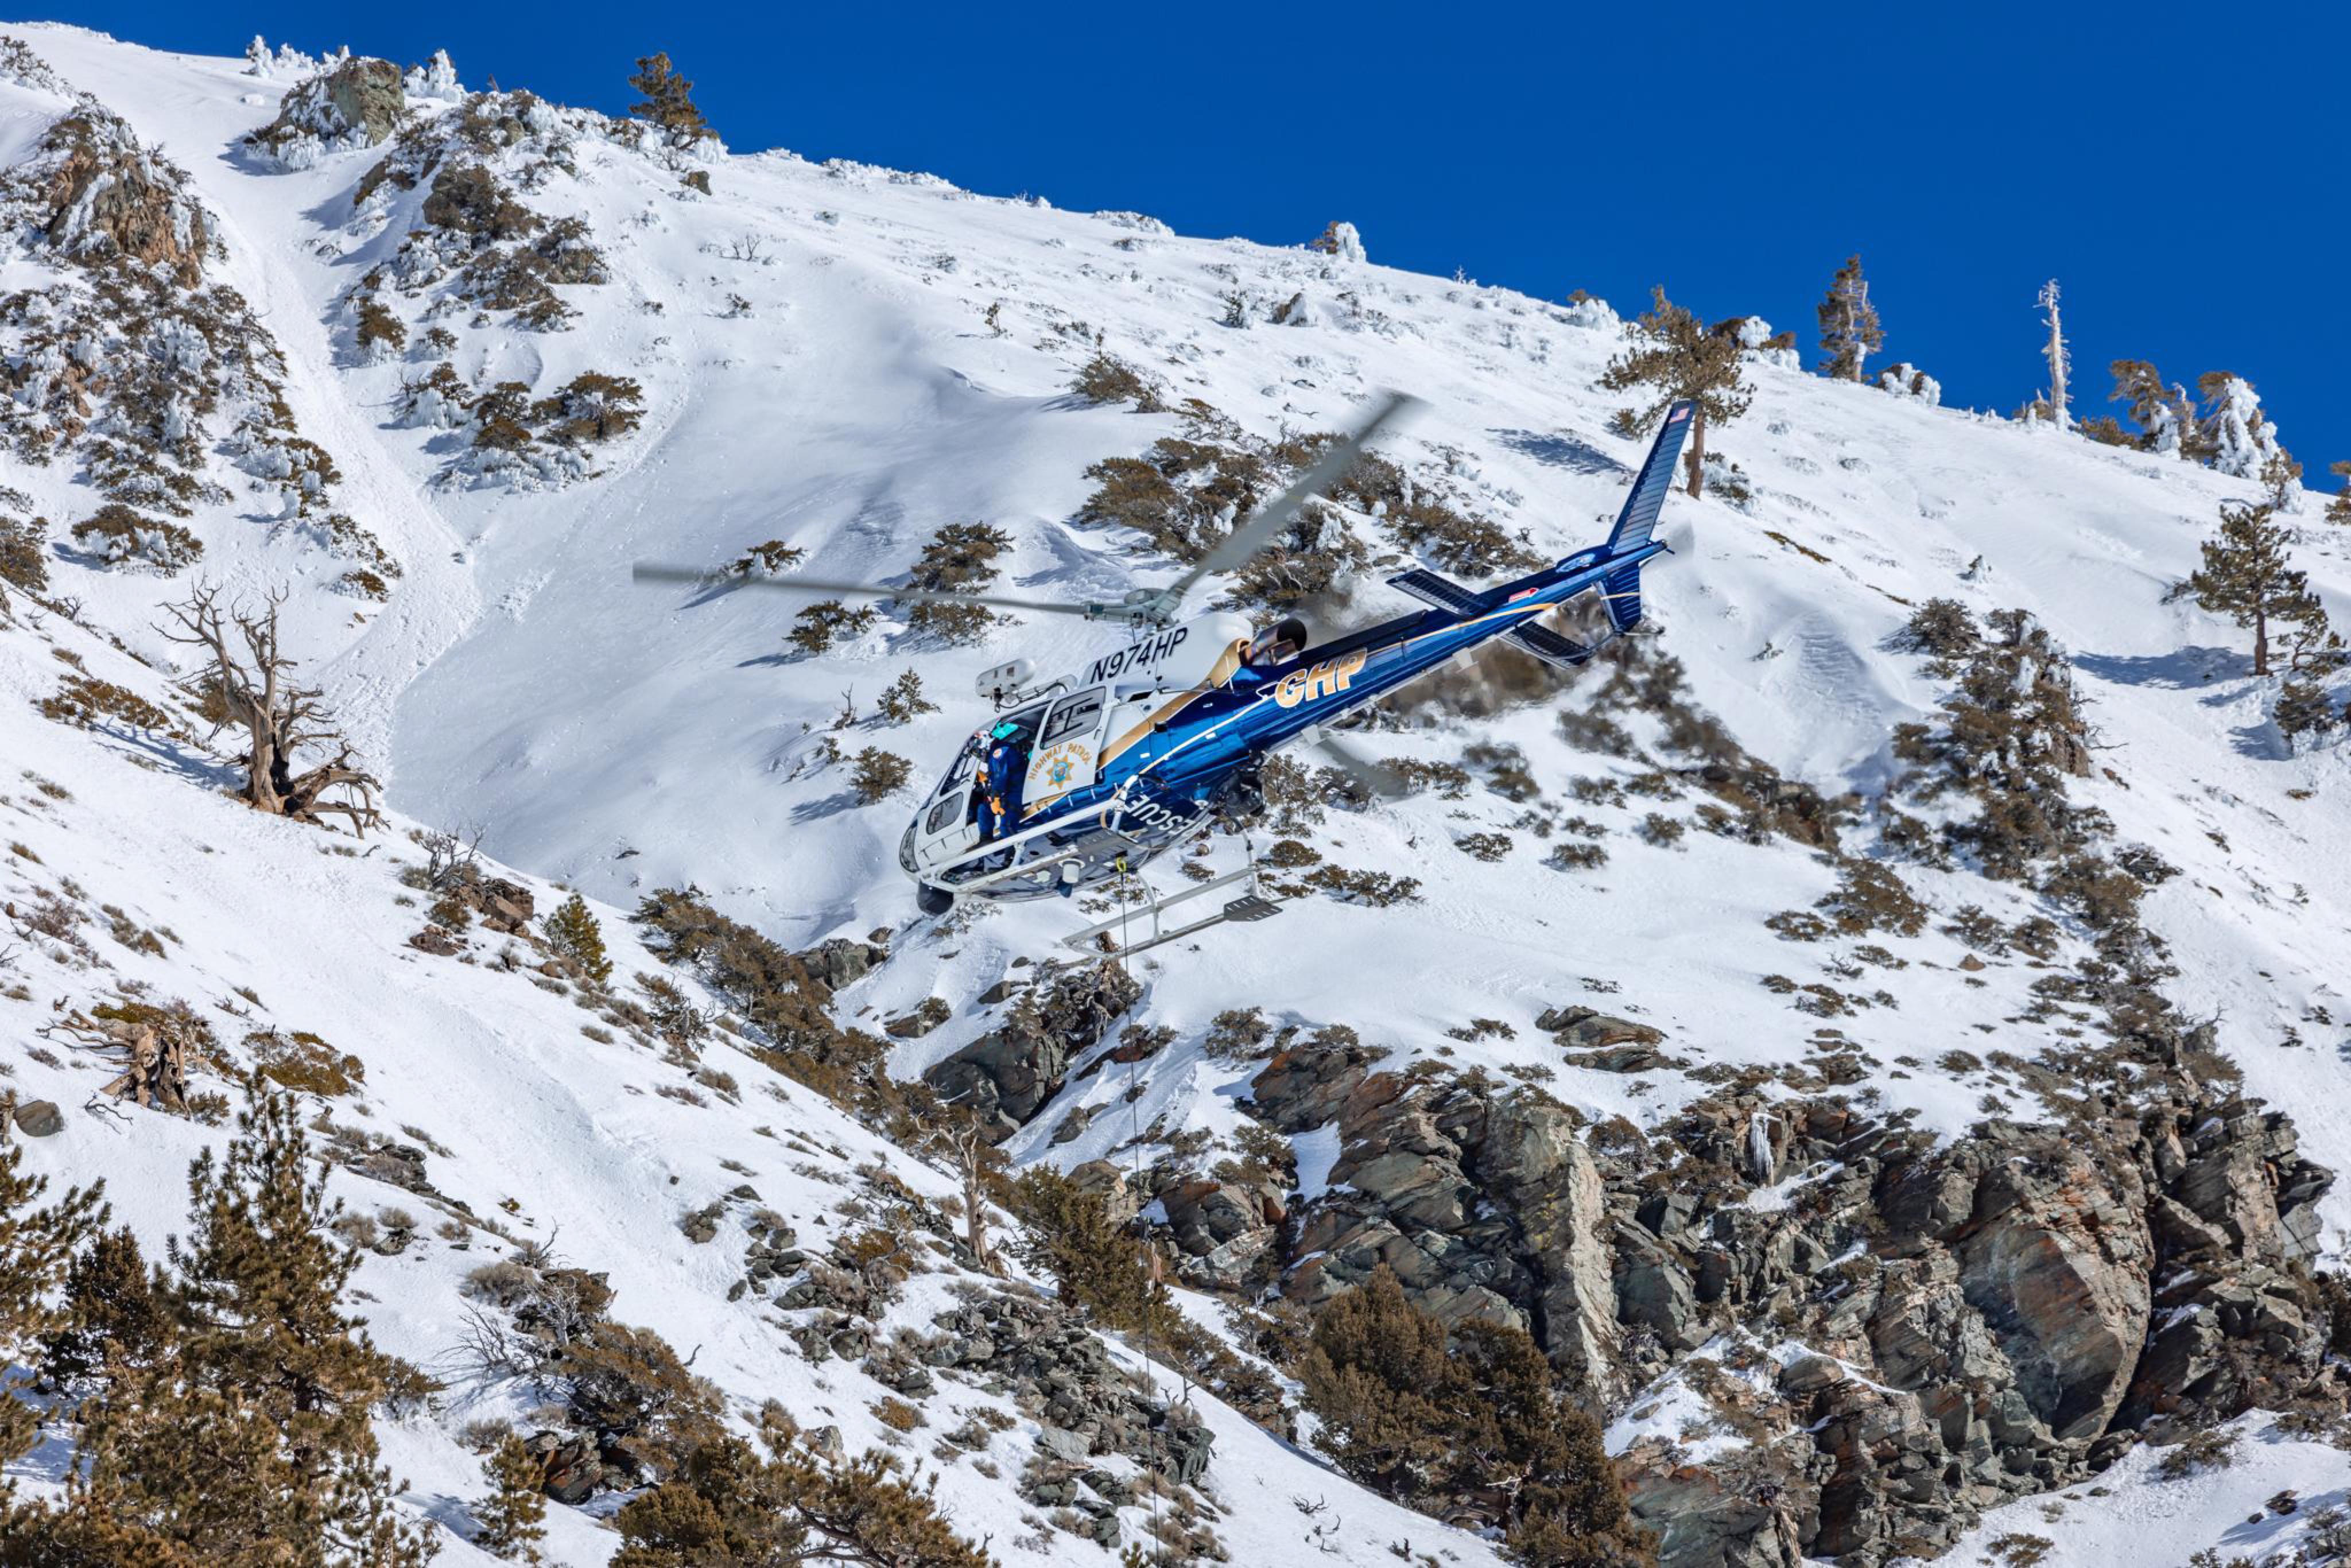
Speaking of Baldy and people falling, here’s a SAR chopper looking for yet another person who’d fallen and had vanished.
For extra credit, take special note of the wet point release avalanches dumping into terrain traps on West aspects and the rime ice on the trees and rocks that always break loose with morning solar radiation exposure and/or wind and tumble down the Bowl with the typical barrage of rockfall calving off of the friable metamorphic gneiss/schist gendarmes that line it, where hikers without helmets, wearing microspikes, and using only trek poles get rekt. Don’t do any of that here, and time your ascents to avoid the morning fusillade.
So much drama, all 100% avoidable…
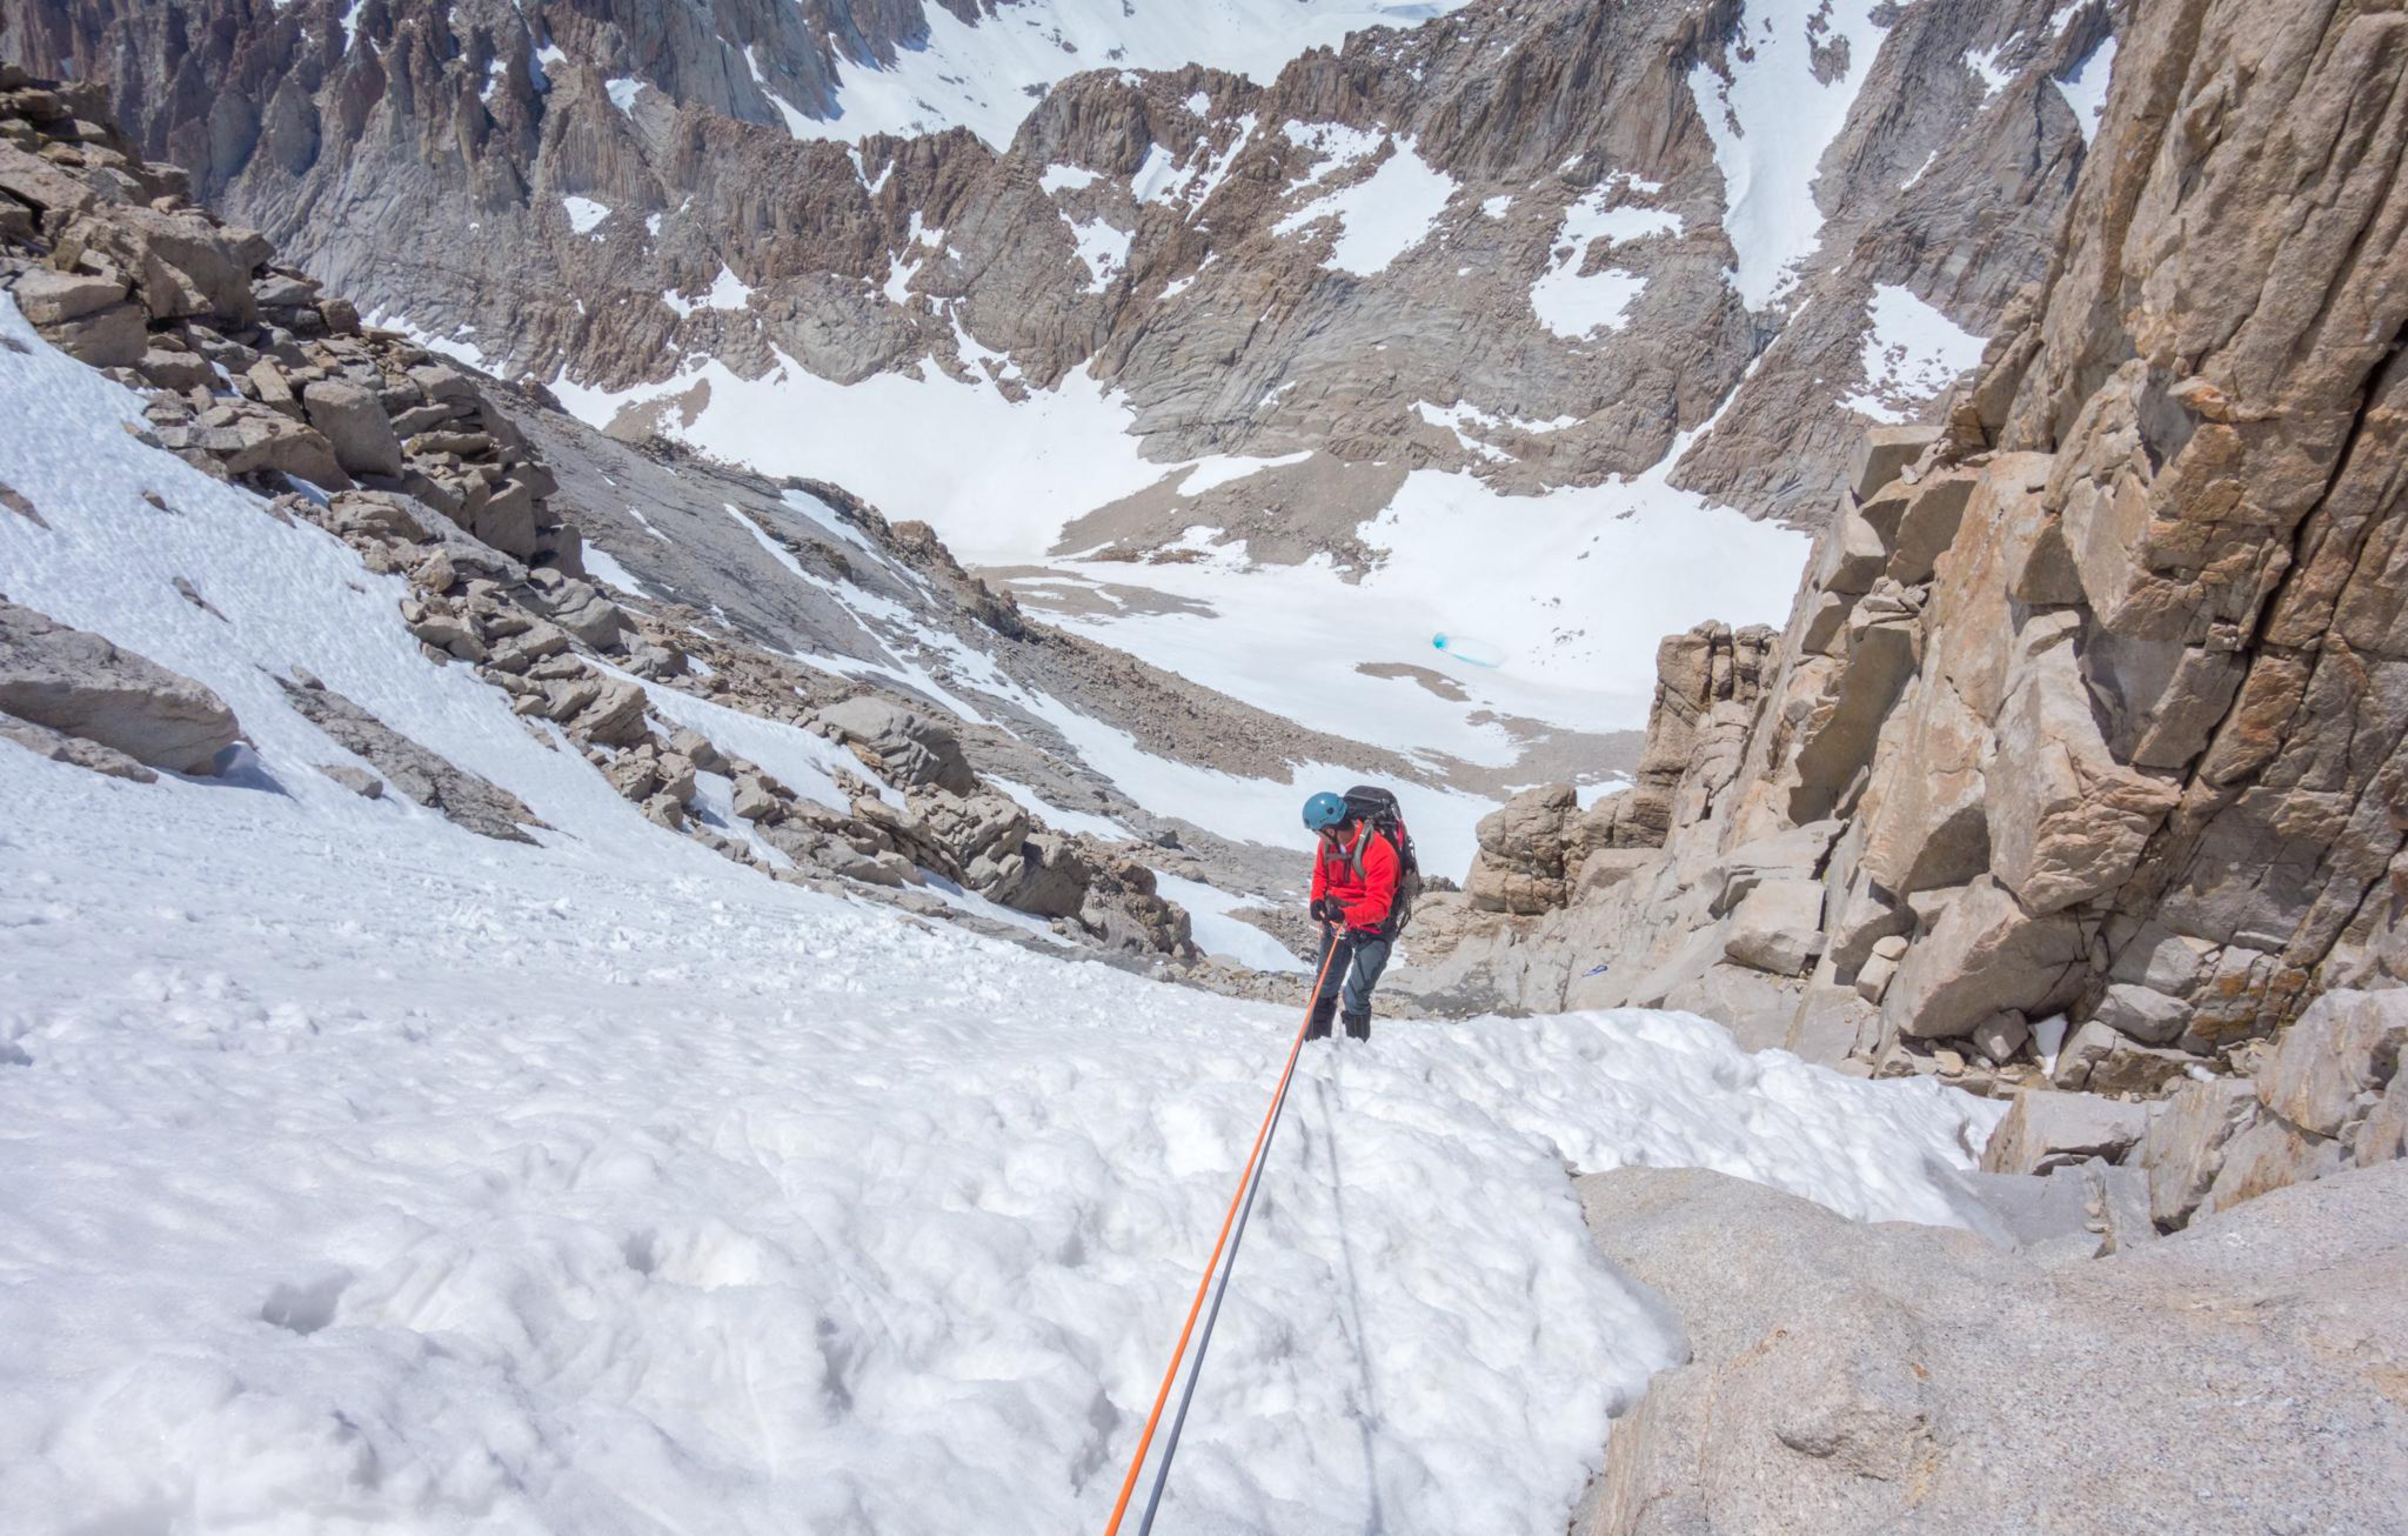
My partner Dan, rapping down the Final 400 on the Mountaineers route on 05.15.2012. This was Dan’s first time on Mount Whitney and we treated the ascent of the Final 400 as a multipitch climb (he said his wife would kill him if he died…) Jokes aside, falls from here and close to here have indeed killed many people over the years. It’s a long way down the North Face of Mount Whitney through many bands of rock and ice. I’ve seen people wear microspikes here.
At least he’s wearing a helmet…
(And while we’re at it; bonus round!)
Tethers on classic mountaineering axes are generally a bad idea. A good way to gauge the need for them and if that need overshadows the danger that tethers pose is to ask yourself if you would fall OFF or DOWN the route.
If your answer is “down” then it means you’re on a snow slope, and if you fall down a snow slope with an ax tethered to you, and you then lose control of that ax, you have inserted an additional hazard into your fall; impalement (it happens). You don’t need the leash. Just don’t drop the ax. Discipline yourself not to and free yourself from that impalement hazard. I’ve never dropped an ax, on any route, in over 20 years.
If you lose your ax in fall, you’re not going to heroically regain control of it. All the tether does in this case into ensure that sharp blades and a spear is boinging around your head and face and eyes and neck and body as you tumble uncontrollably down a snow slope. Hard no.
If the answer to that question is “off”, then you should use tethers, because if you can fall OFF a route, it means you can free-fall off a route, which means “cliff”, which means you’re ice-climbing or technical mountaineering, and if you drop one of your icetools (axes are generally referred to as “tools” when you’re carrying two of them on technical routes) from a technical route, you have major, major problems. Routes that require two axes require two axes, mechanically. You can’t climb such a route with one ax. Your rappel game better be dialed…
And while we’re at, if you do leash your classical mountaineering ax with a Black Diamond Slinger; the metal part goes onto the ax, not your harness. I see people clipping the carabiner to their harness and tying the loop that’s supposed to be girth-hitched through their harness to the ax instead all the time. All this does is ensure there’s no easy way to move the clip from the spike to the head, which is a fairly common need, which is why the Slinger leash comes with a carbiner clip. I don’t know why people do this so frequently. It’s weird. I’ve seen people pose the “metal can’t go on metal” trope, but this is a misconception based on technical climbing where roped safety systems need to hold in-excess of body weight where leader falls are concerned. Ice ax tethers are not meant to hang more than body weight on (the Black Diamond Slinger is rated 2kN), they’re essentially meant to hang ice ax weight to your body (you're not supposed to dangle by your ax tether…), so this argument is completely misguided, and it’s even misguided in technical climbing in general; metal goes on metal in many instances.
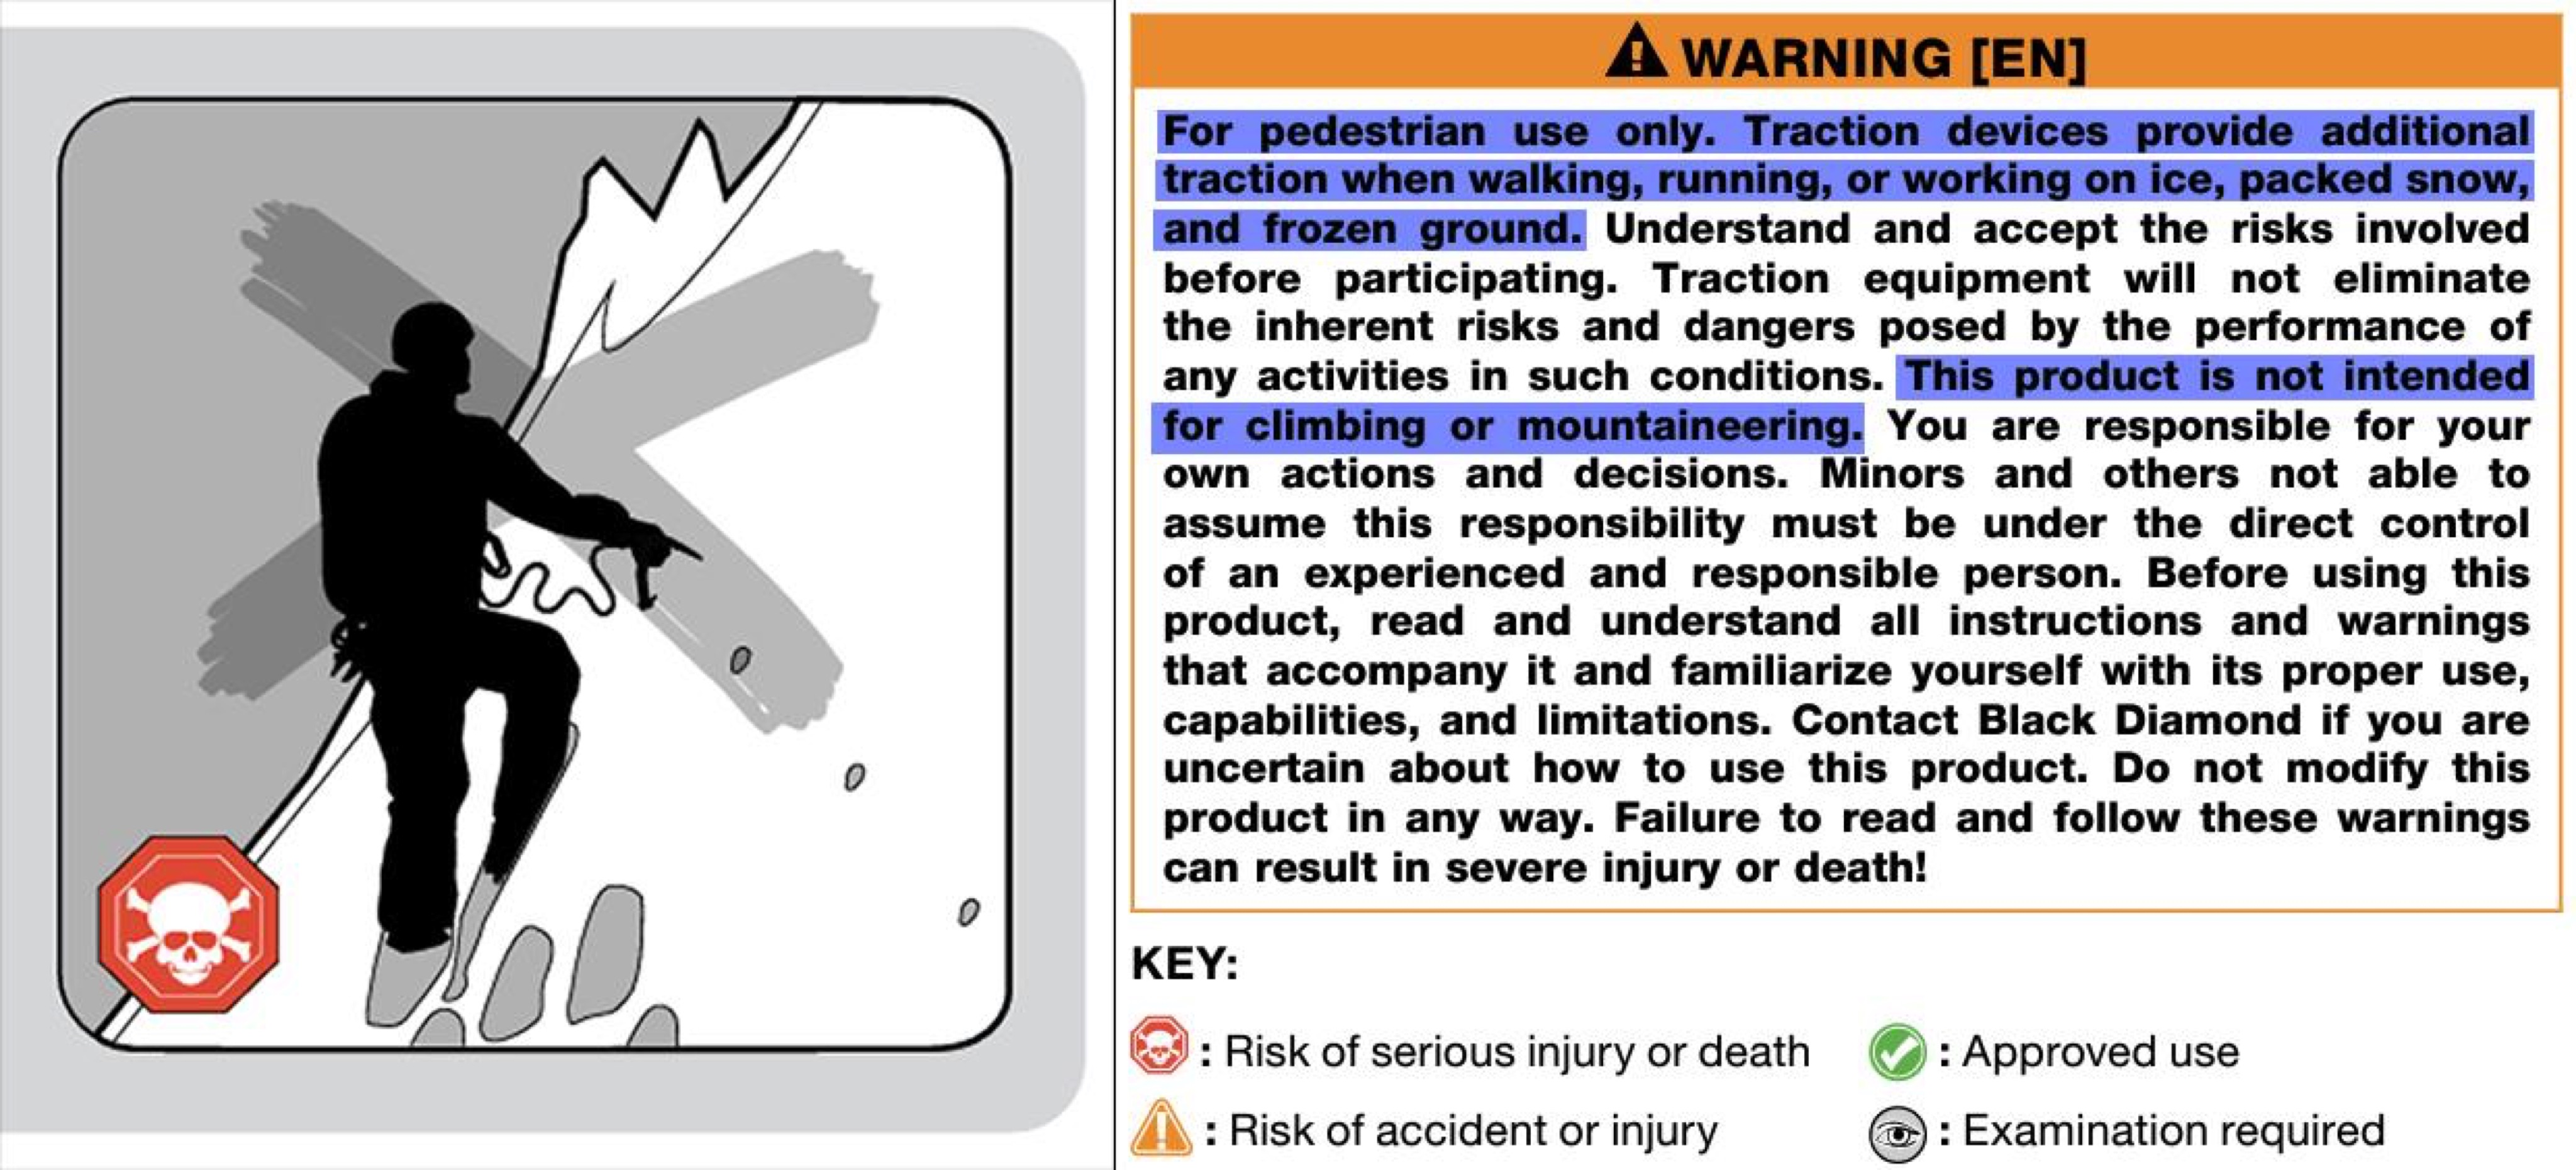
But don't take my word for it; it's in the instructions...
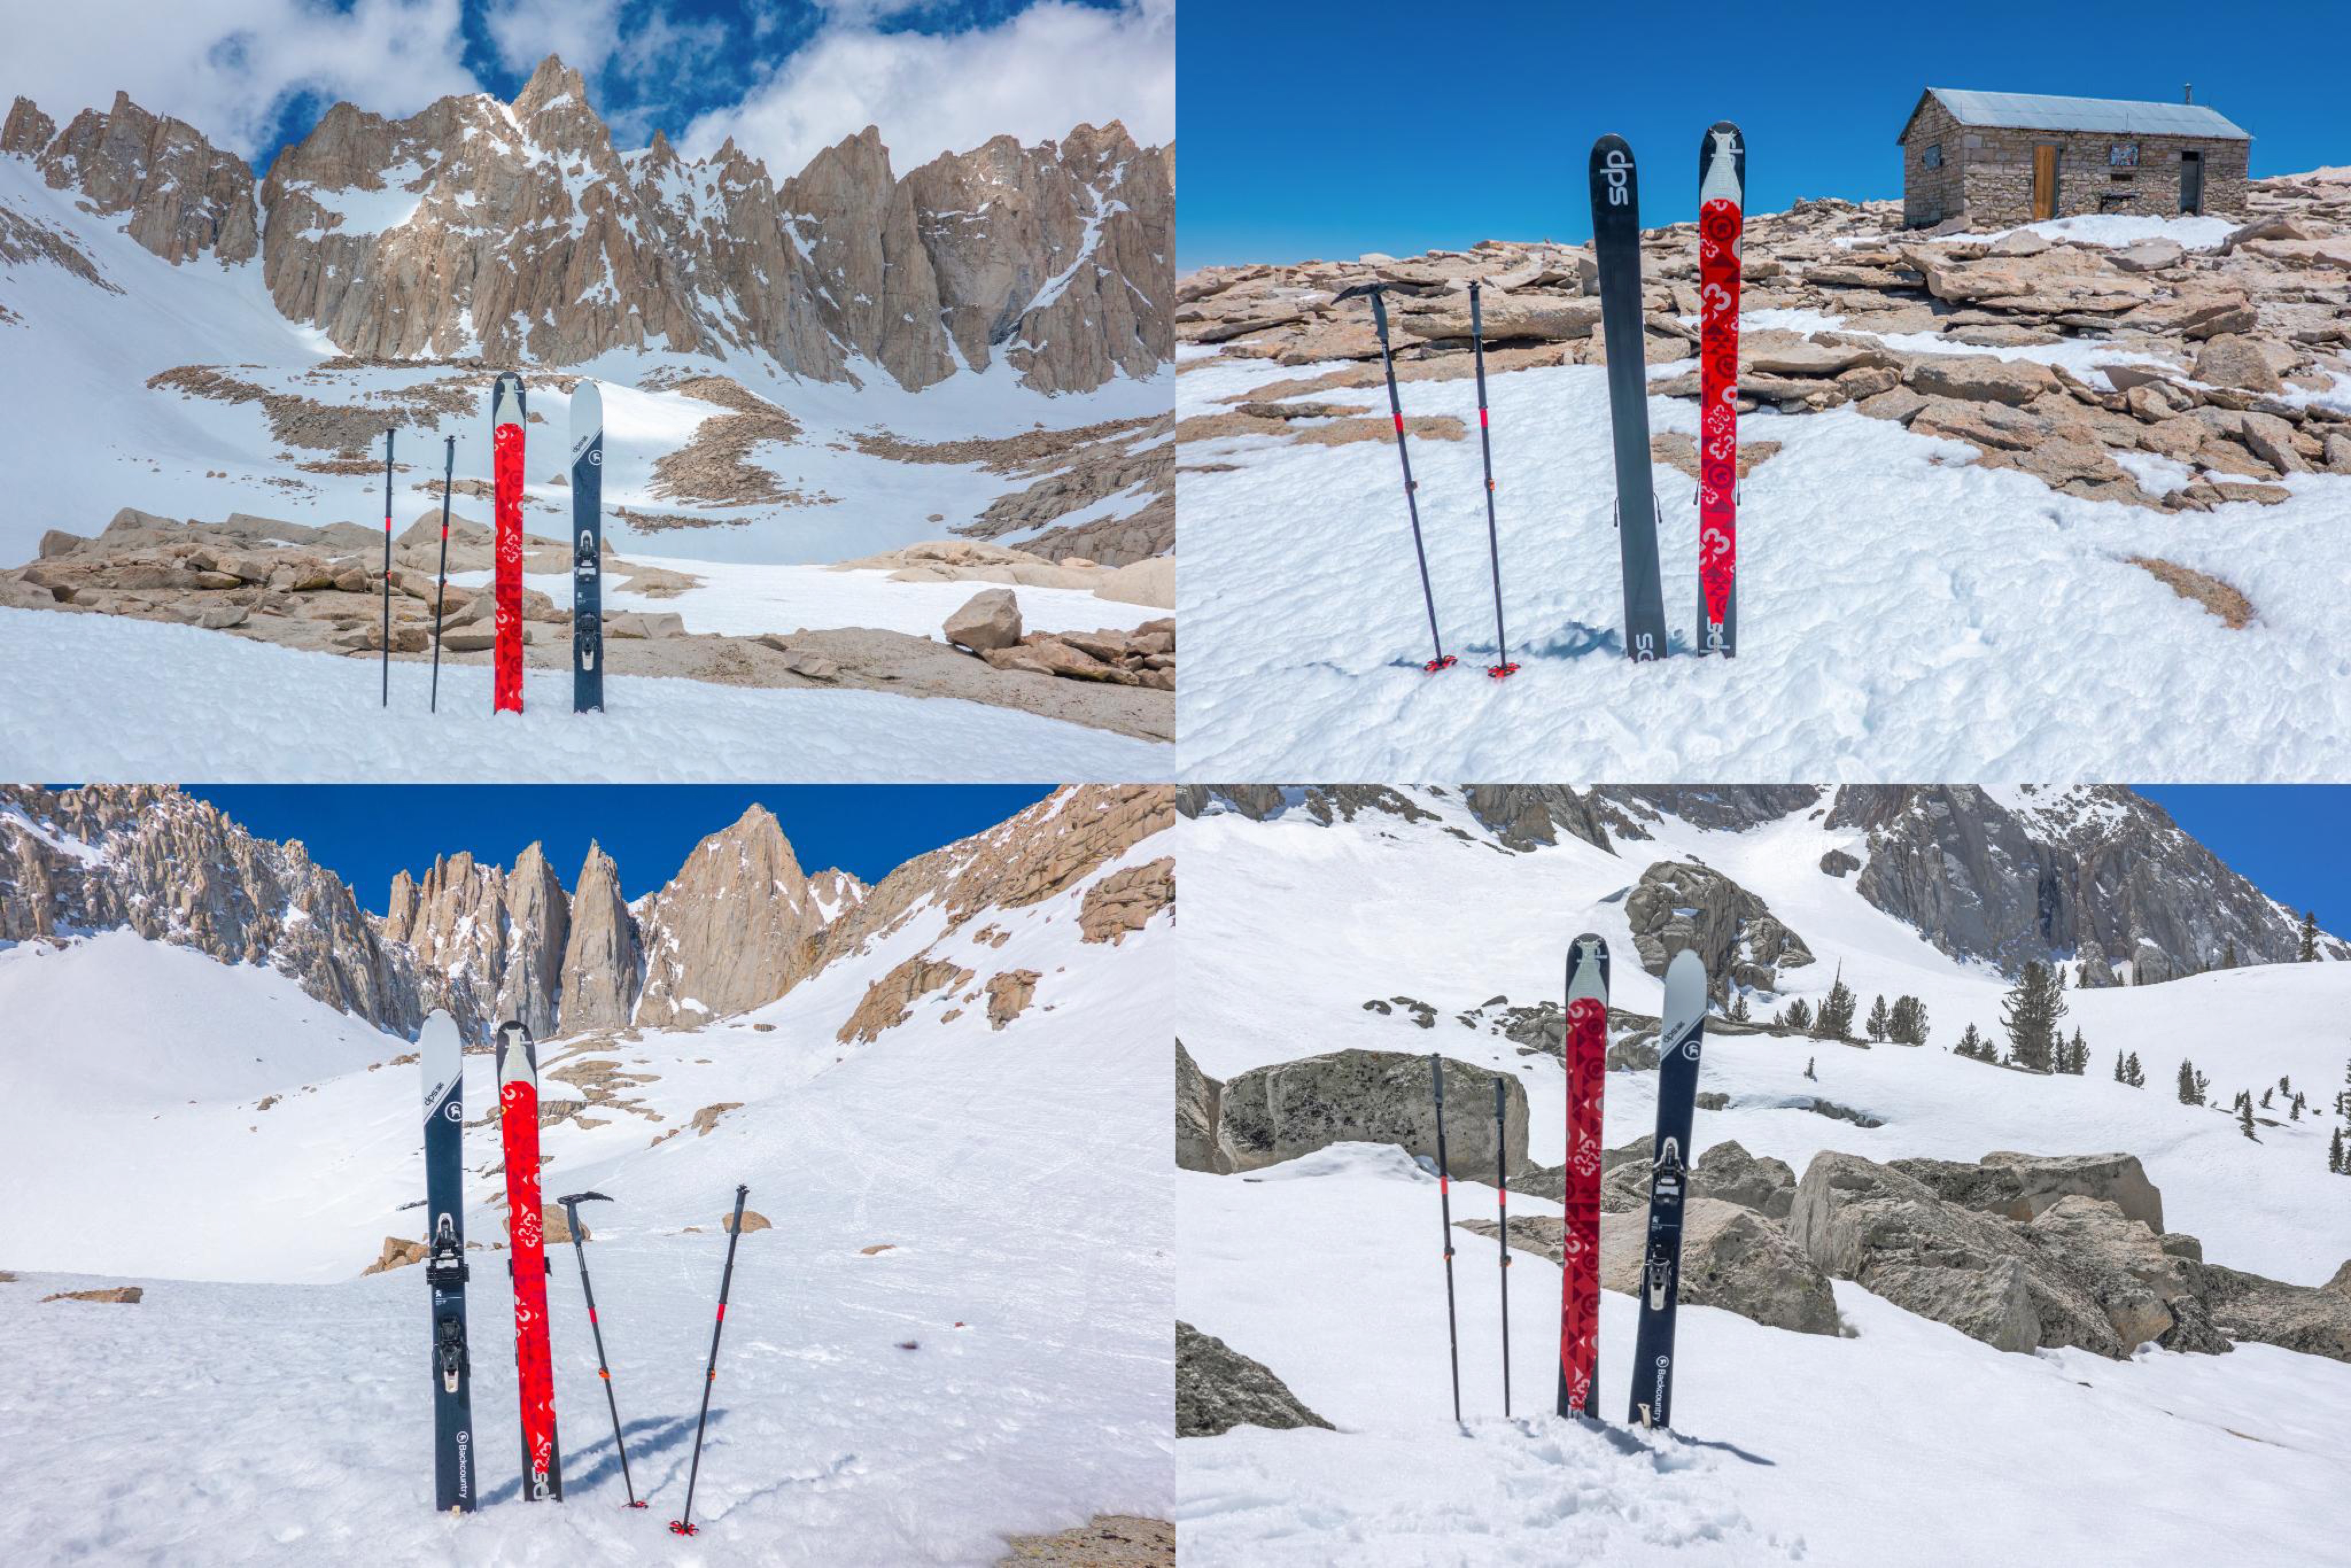
(which was just a gift from the Mountain Gods)...
I mentioned gear transitions in the post. To give you an idea of gear transitions during a typical mission day when I’m skiing:
I sometimes start in Hokas and wear them to about 9200 feet or so. Sometimes down low, depending on snow cover and how early I’m leaving, I wear my LaSportiva Spires instead, sometimes with BD Distance Spikes (because microspikes are pretty convenient when you start early enough that the snow down low, where it’s low-consequence, is still somewhat firm, and when you’re carrying awkward skis on your back. I don’t wear them for safety, I wear them because not constantly adjusting for slips and slides, which is easily possible and what I usually do, just burns fewer calories, stresses your muscles less and is frankly just less annoying). Unless I’m in rockfall zones or it’s dark, my helmet stays lashed on my pack on approaches. (If it’s dark, I mount my headlamp to my helmet and just wear it).
When the snow-pack becomes continuous, I switch into my boots and skis, which can be equipped with skins, allowing me to progress uphill on what are essentially glorified snowshoes. I travel like this as long as possible, sometimes with ski crampons fitted to my skis when it’s really cold or early and the snow surface is basically ice. I usually put my helmet on about here; the terrain I’m getting into at this point is becoming more hazardous; falls become possible, as does rockfall.
It eventually becomes necessary to take off my skis and put crampons on my ski boots to climb terrain in excess of about 25° or so. Sometimes, depending on which route I’m taking, i end up switching back into skis when the terrain mellows out, as long as the distance between where I am and where I will have switch back to boot crampons justifies the transition to skis (walking is for people without skis…)
Regardless, there usually comes a time (at least in early spiring ski-mountaineering) when the snow-cover decreases and transitioning back to my Hokas or Spires becomes the most efficient method of travel (such as the section between TrailCrest and the summit).
If I hit any minor sections of snowy rock with zero or low fall consequences, I consider throwing my BD Distance Spikes back on. If I run into high-consequence sections of snow and ice, even if it’s only 100 meters, I put my ski boots back on and mount them with crampons.
I weigh the inconvenience of every gear transition with that of the 6+ months of rehab I’ll need to do if I ignore the conditions, attempt them with insufficient gear, fall, get injured and somehow make it home alive. Rehab sucks. I’d rather be in the mountains…
Eventually, the “up” is done and it’s time for the “down”, so i rip skins and drop. (Meaning, I remove the skins from my skis, convert them to downhill mode, lock my ski boots into downhill mode and ski down.) There’s a million things to consider here regarding avalanche conditions, snow surface metamorphosis, fall lines, rock hazards etc. Usually, skiing in alpine terrain is more of a battle than anything else. The snow conditions constantly change from ice to neve to powder to corn to mashed potatoes to slush to dirt. Don’t even get me started on breakable crust. I hate breakable crust. If anybody out there knows how to actually ski on breakable crust, please DM me and educate me…
Transitioning back to skin mode is sometimes necessary, but if the conditions are good and your route planning and terrain management is on point, you can some sometimes ski unbroken 7k vert lines back to your car.
That is…a lot of transitions and logistics. While shoulder season classic mountaineering on Whitney is no where near as complicated as ski mountaineering, it still requires dedication to gear change-overs. Not doing them inserts unnecessary hazards into your day.

Microspikes don’t penetrate snow and ice deeply enough to withstand the force/friction ratio on steep (15°+) snow slopes, firm (known as névé) or otherwise. They eventually fail to generate the friction required to hold the force (aka weight, otherwise known as “you”) applied.
To be annoyingly accurate, microspikes on angled snow and ice have a low static friction threshold, due to lack of spike penetration, requiring very little force to overcome. “Overcoming static friction” in this case is when your foot (and body) cease to be “glued” to the slope; your foot goes from not moving, to moving downhill, when you don’t want it to.
When any static friction threshold is surpassed, kinetic friction takes over, which requires even less force to overcome (static friction coefficient is higher than kinetic friction coefficient, but now we’re getting super nerdy). Once the kinetic friction threshold is exceeded, applied force is greater than maximum force, and mass (again, “you”) is accelerated. Down the mountain…
That’s what’s actually happening when you slip wearing microspikes. You essentially blow a spike placement because those spikes aren’t long enough to actually matter unless the terrain you’re standing on is flat.
That’s the REAL answer to the “Why shouldn’t I wear microspikes on steep snow?” question. Microspikes eventually fail to hold your weight on steep snow slopes, and you begin your fall down a mountain. (Especially problematic because people who tend to be on steep snow slopes with microspikes on also tend to be the ones using trek poles instead of an ice ax and not wearing a helmet; AKA “consequence multipliers”. Another example of people not recognizing the Line Of Demarcation…)
Crampon design is not arbitrary; it’s been refined for more than a century. Their current form is the result of millions of field tests and thousands of subsequent design tweaks. The number of and length of crampon points is exactly what they need to be for what they have been meticulously designed for and experimented against; holding the weight of humans and their gear on snow or ice slopes ranging from 10º to 90º (or more) in any conditions at any elevation on any mountain anywhere at any time. They were designed by mountaineers in 1908 (Eckenstein) to solve a specific problem pertaining to mountain safety and have been improved upon by alpinists since. Microspikes were…uh…not.
I’ve seen people suffer the consequences of the poorly-informed decision to wear microspikes where crampons were necessary many times in the mountains. No one thinks about the math involved when they’re tumbling down a mountain; they’re too busy screaming.
But, like usual, math is the reason…
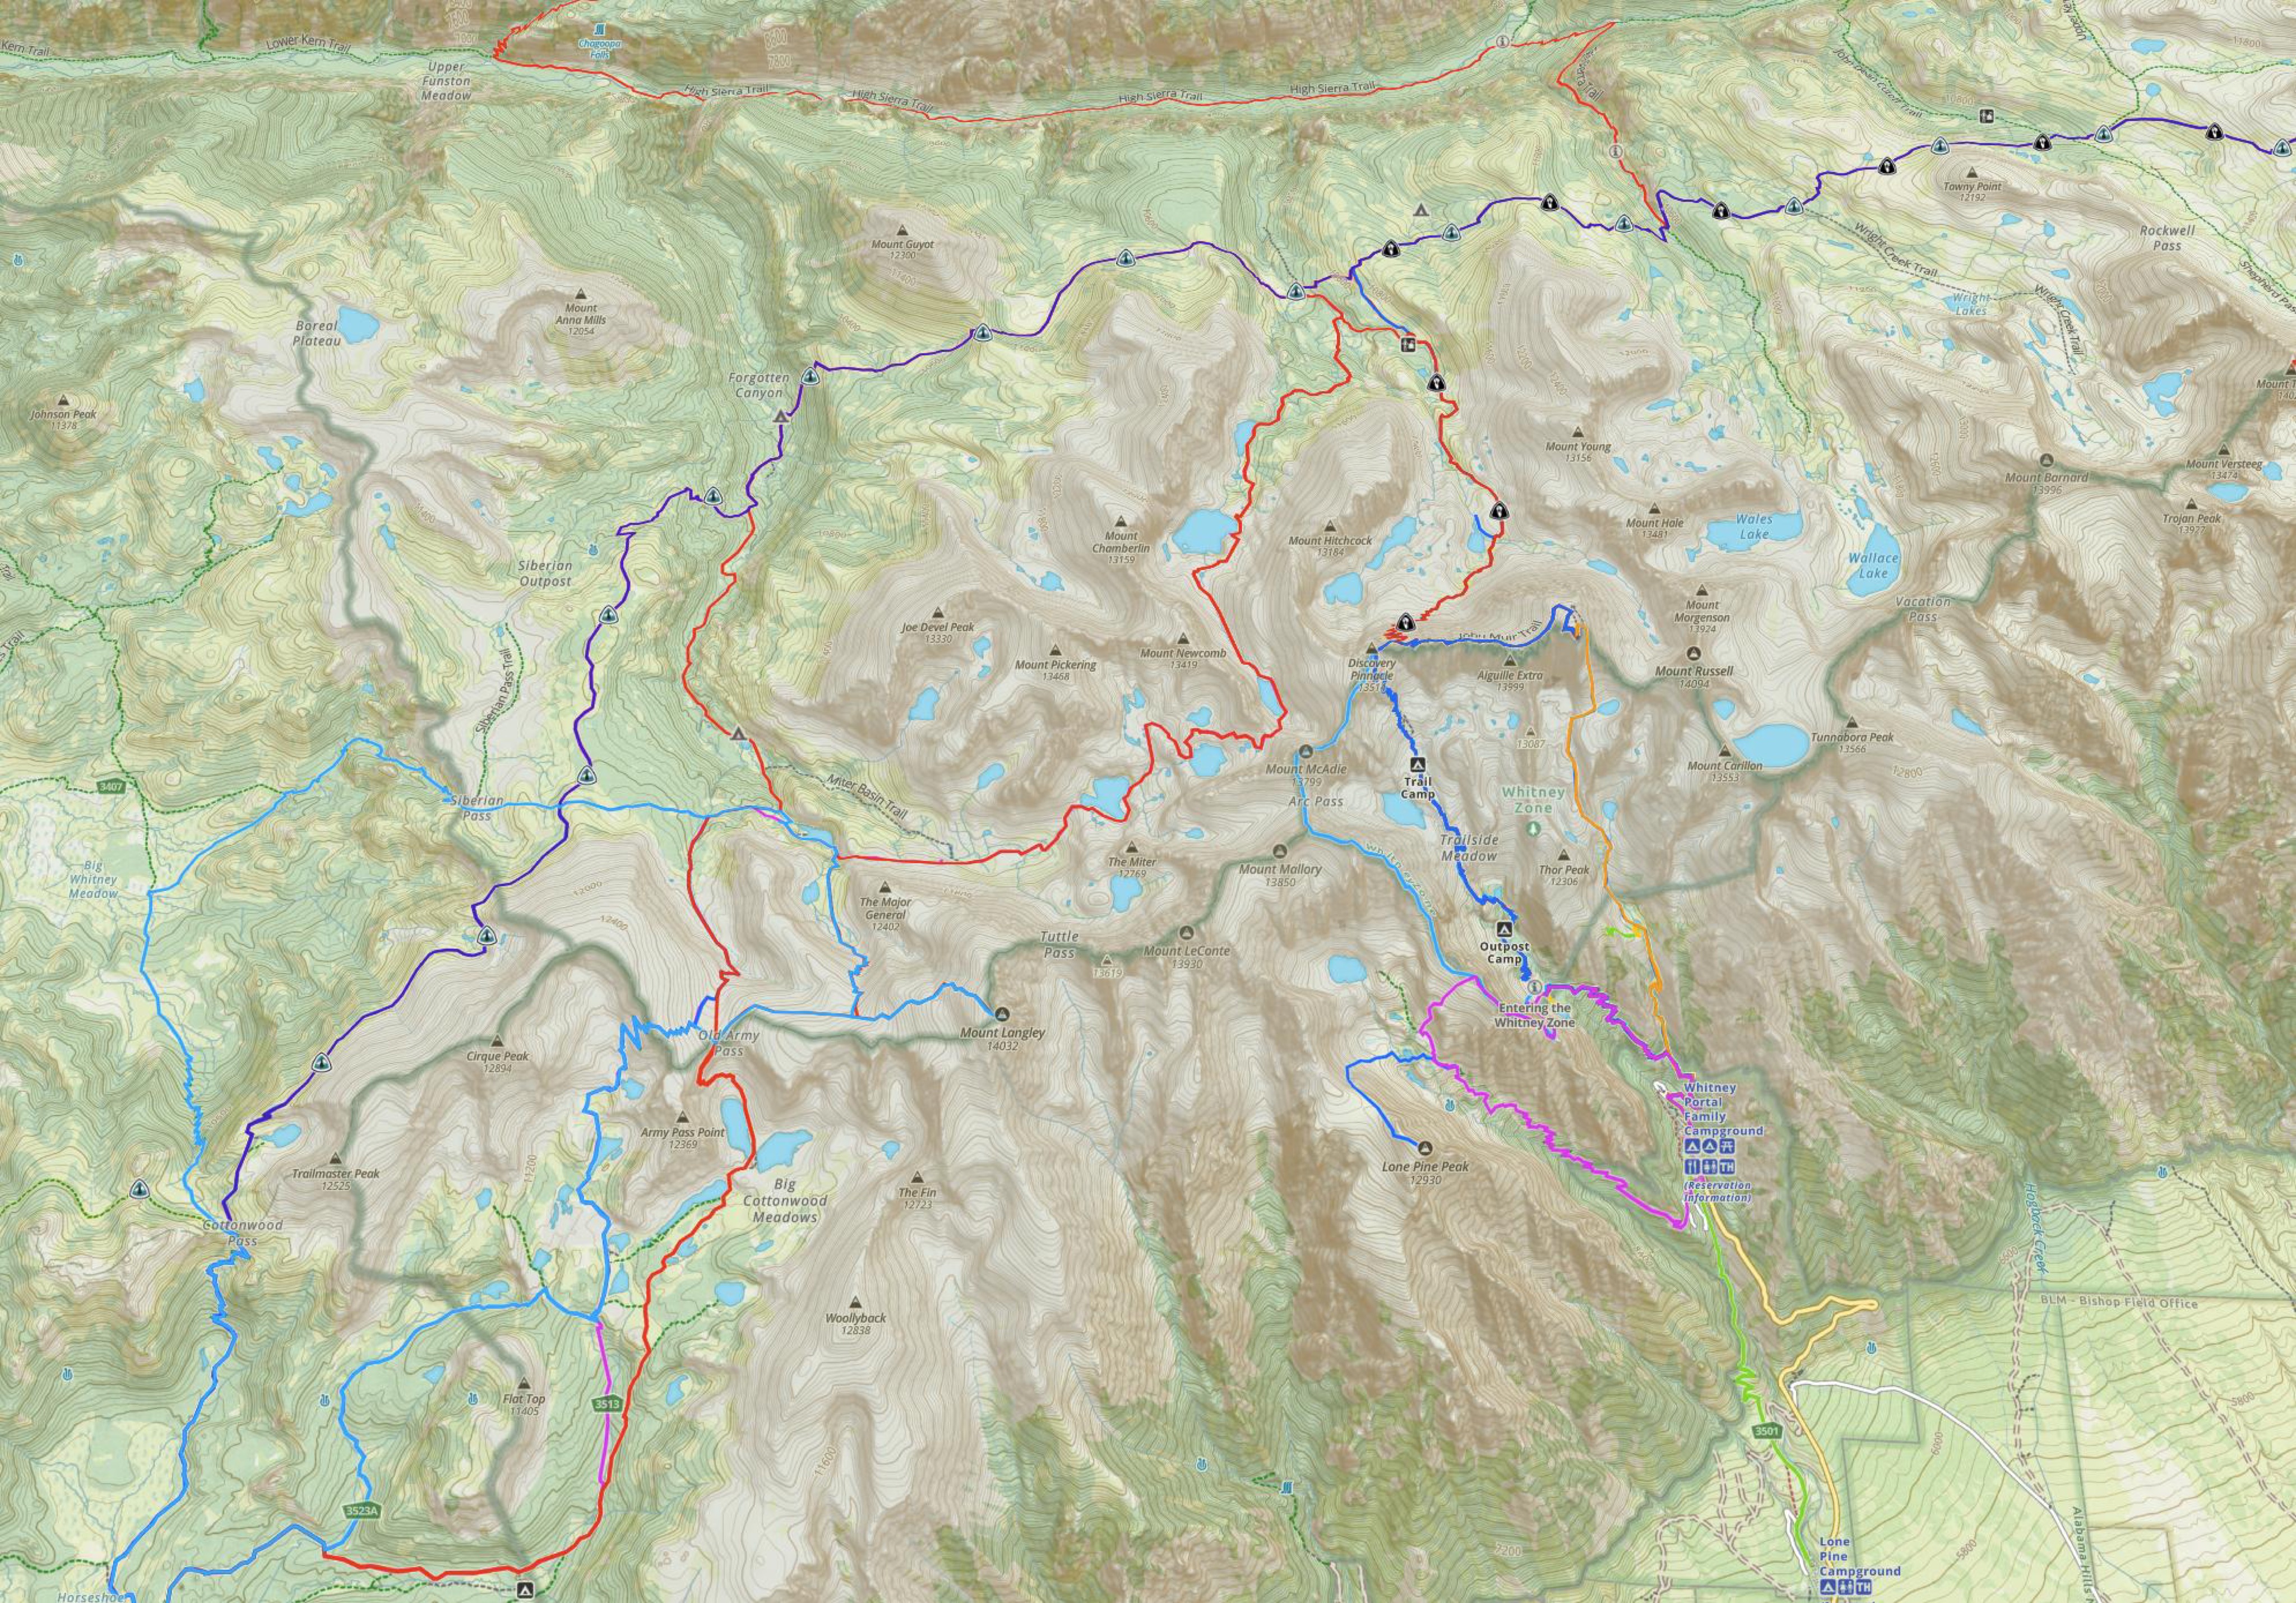
Only 0.00032% of the Sierra Nevada range is a trail…that’s less than four one-millionths of the total square meters the range occupies. That means that 99.99968% is not a trail, of which about 12% is low-angle enough make microspike use viable (~10° or below). Which means 88% of the Sierra isn’t microspike terrain, and 0% of terrain over 15° is.
When in doubt; quantify.
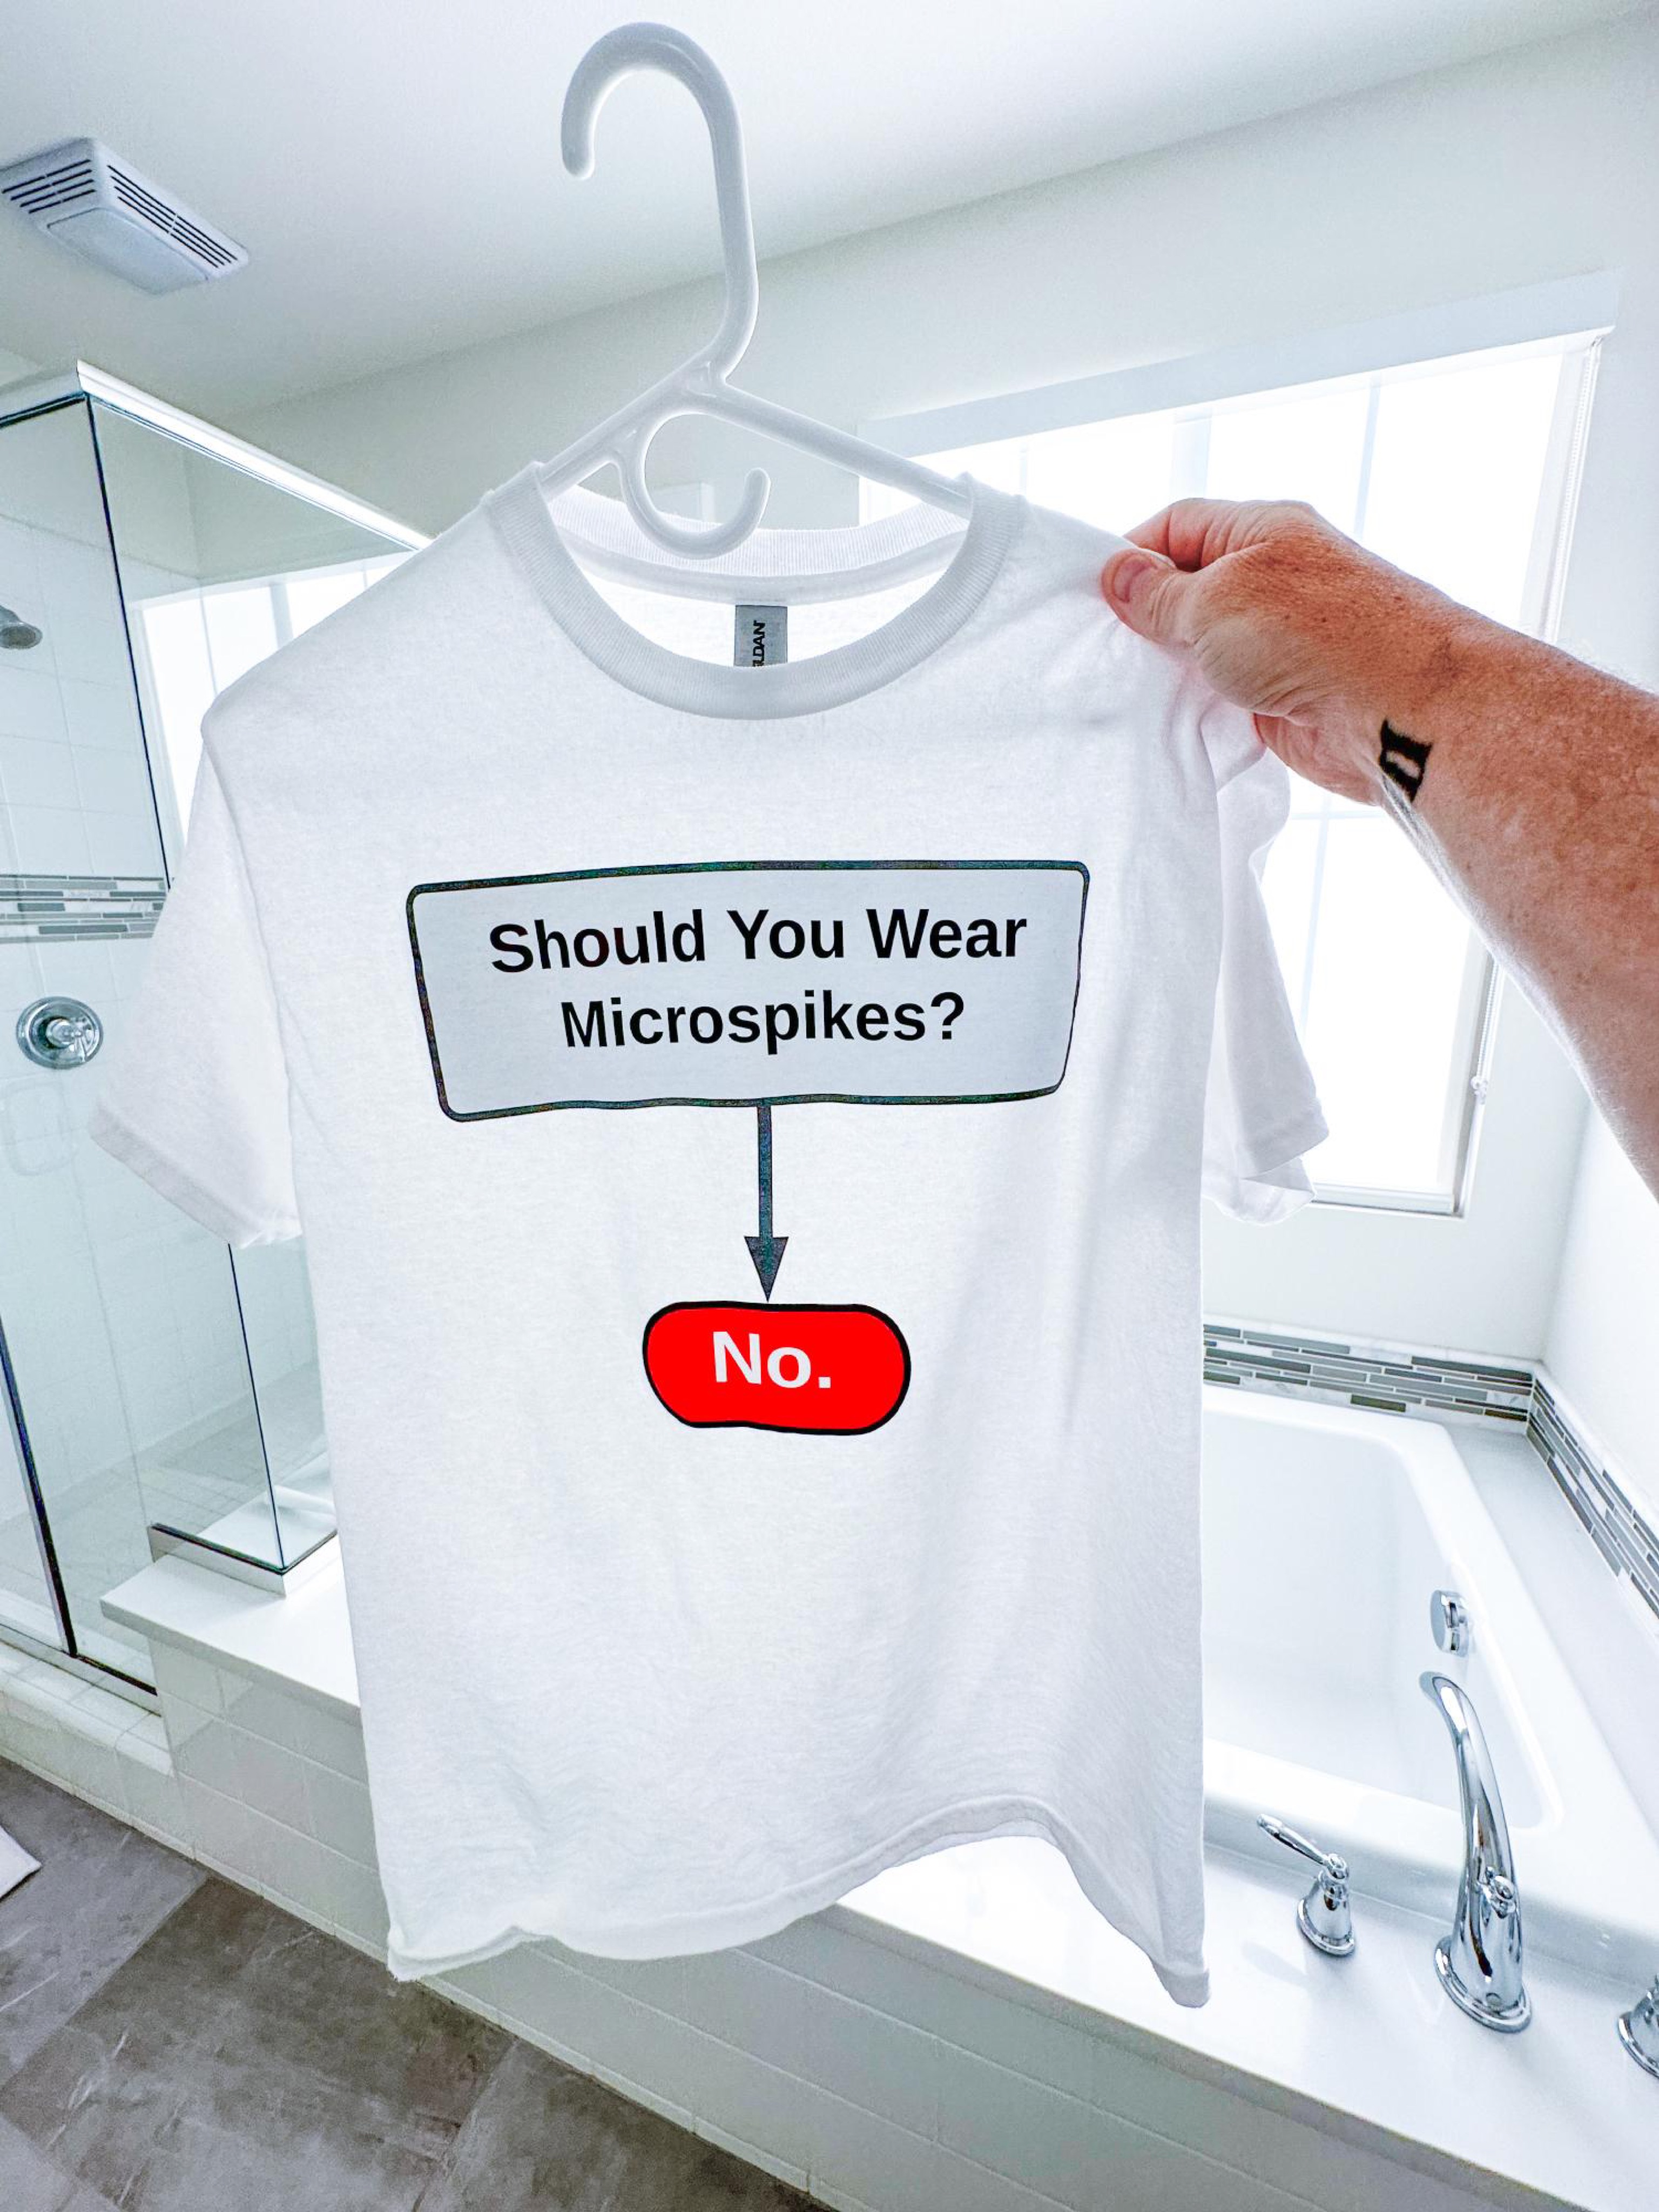
(jokes, y'all...it's a joke...)